Article Summary: Learn how to effortlessly manage individual line items within a guest's billing account in Reservit PMS before an invoice is finalized. This step-by-step tutorial will teach you how to add new services, record open payments, and edit or delete specific transactional charges on a draft statement. By mastering these billing adjustments, you will ensure total financial accuracy, easily accommodate custom guest requests, and streamline your property's checkout process.
The 5 Key Steps to Manage Invoice Line Items:
-
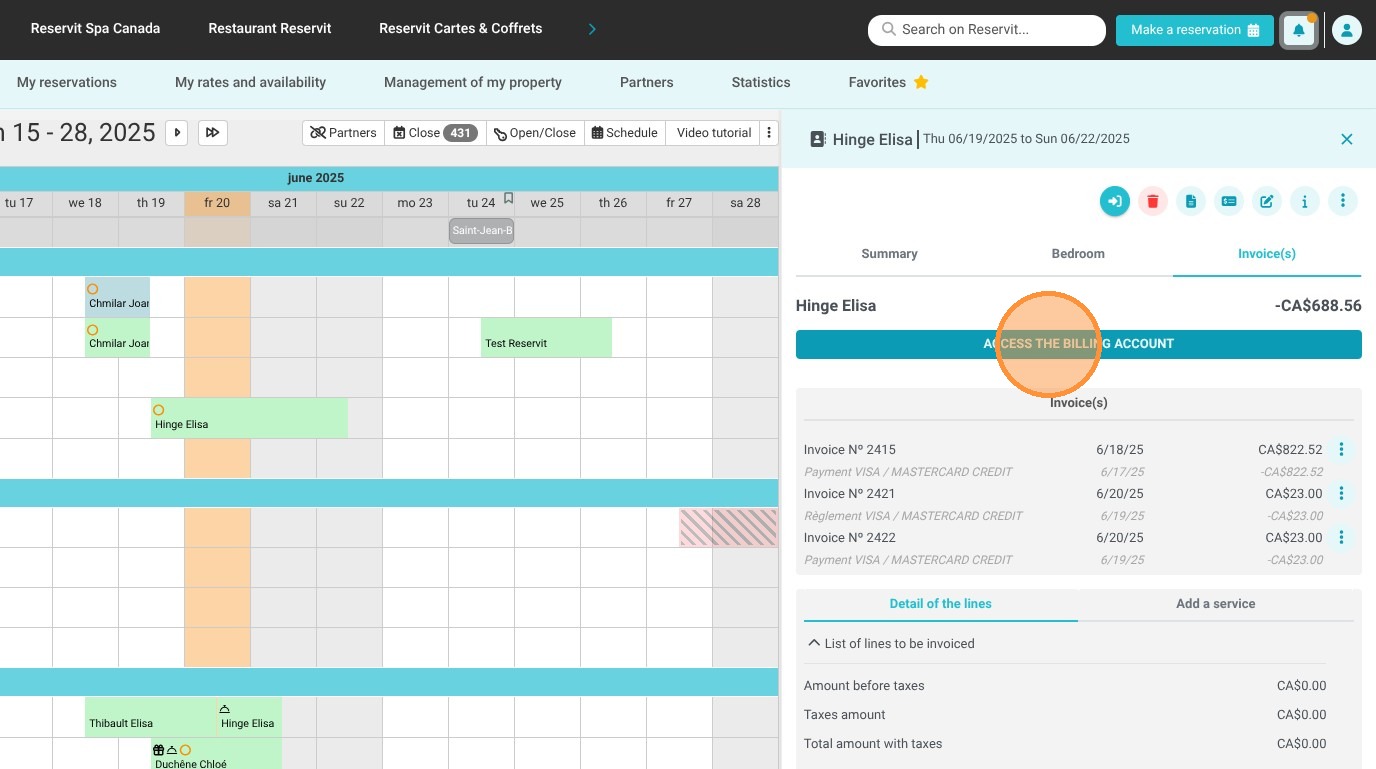
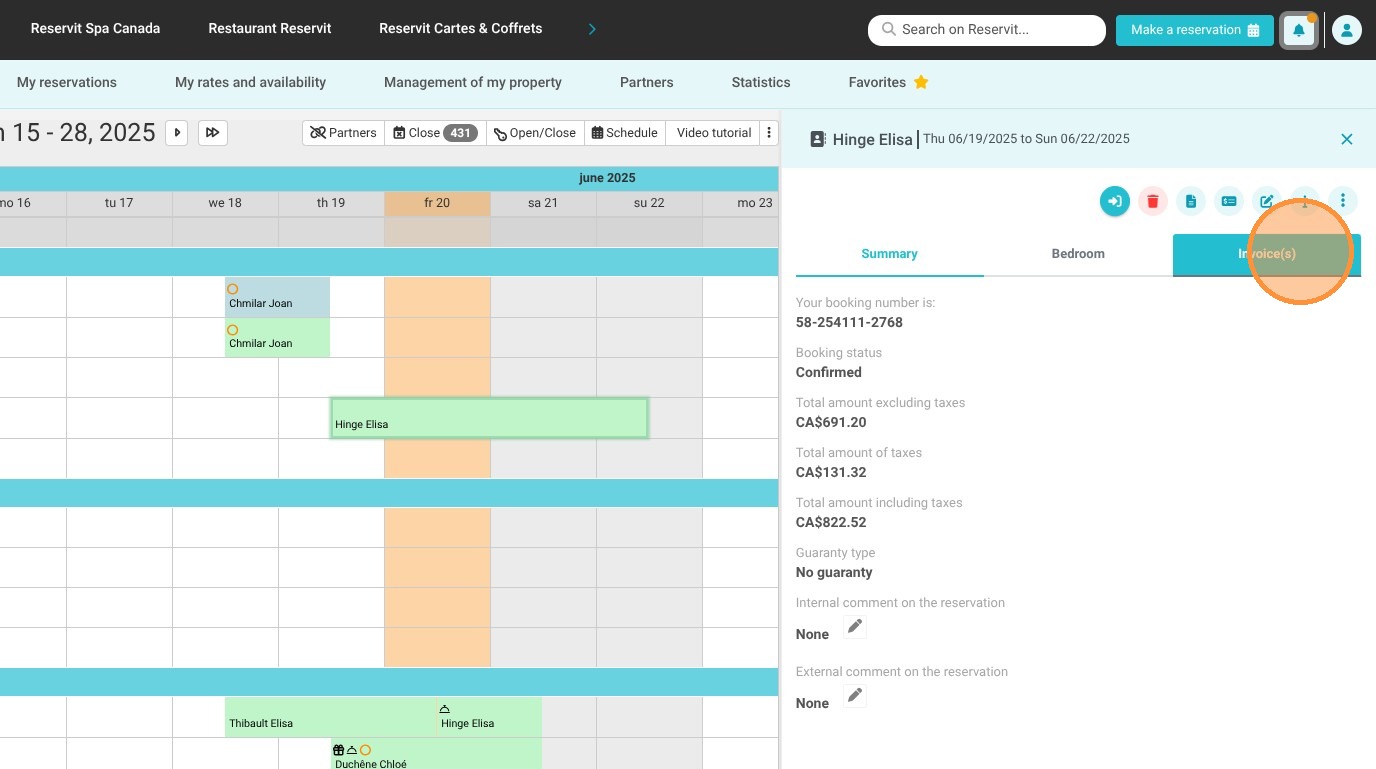
Access the reservation billing: Go to "Reservations planning," select your desired booking, and click on the "Invoice(s)" tab to open the main account workspace.
-
Add new services or payments: Click "Add Service" to append a pre-saved or manual charge to the account, or select "Add a Payment" to log incoming credit or terminal transactions.
-
Modify or delete specific lines: Click the three-dots icon at the end of any line item to open the menu options, allowing you to either remove the item entirely or edit its pricing, taxes, discounts, and accounting codes.
-
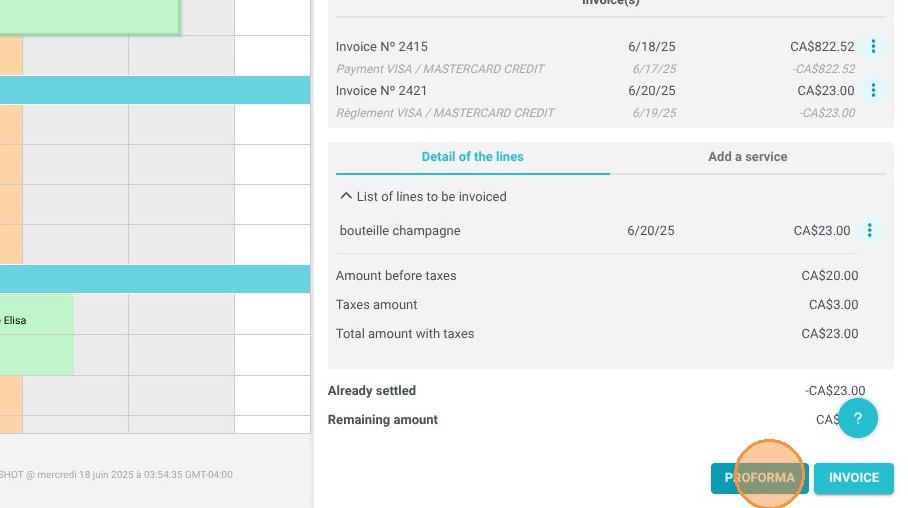
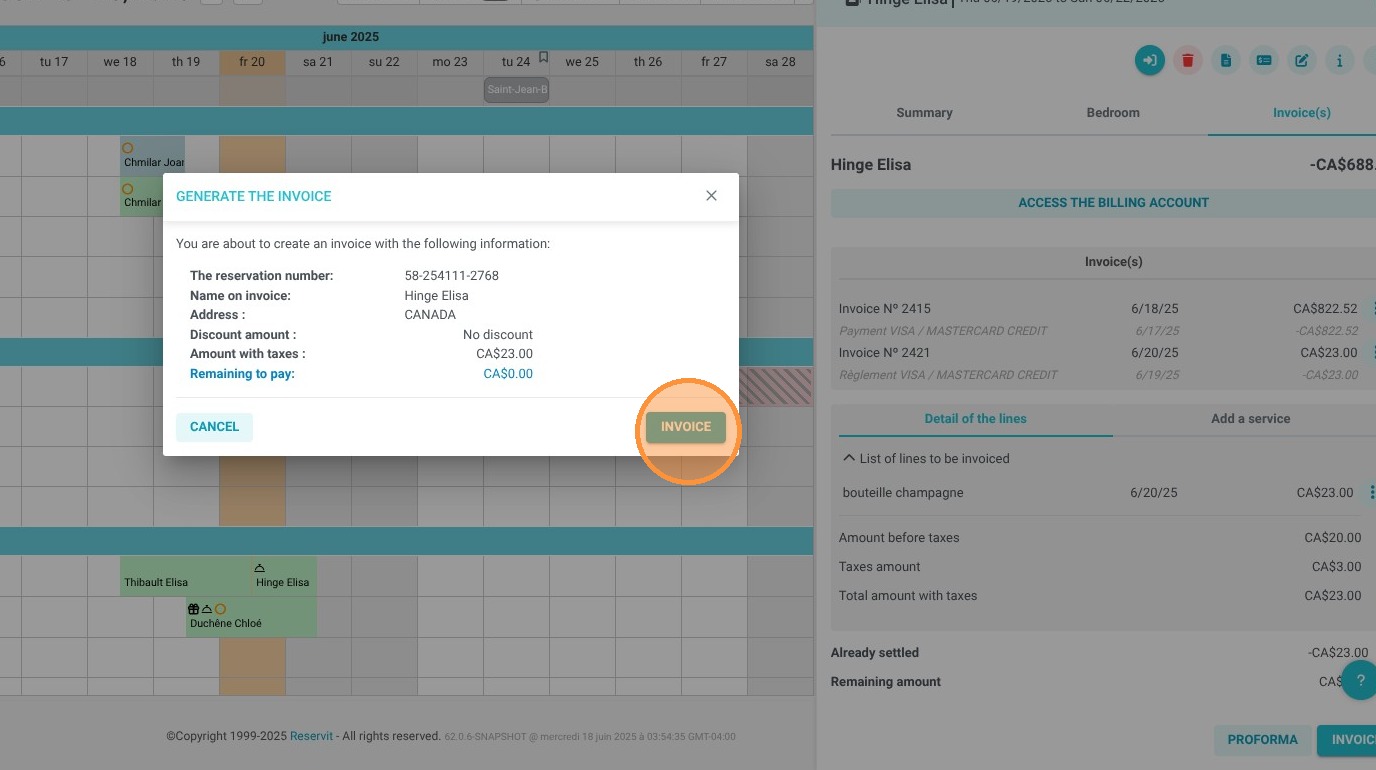
Generate the final or proforma invoice: Review your line adjustments, then click "Invoice" to trigger the official document creation window or choose to preview the preliminary "Proforma" draft view.
-
Distribute the document: Use the action icons in the top right corner to instantly print, download, or email the finalized invoice to your guest, or click "Access the Billing Account" for expanded financial operations.
Why Follow This Guide? This guide gives your front-desk team the exact knowledge required to rectify billing entry errors instantly and adjust account balances on the fly before a transaction locks. It saves significant operational time during peak departure hours, guaranteeing that your final property revenue reports remain accurate, transparent, and completely audit-ready.
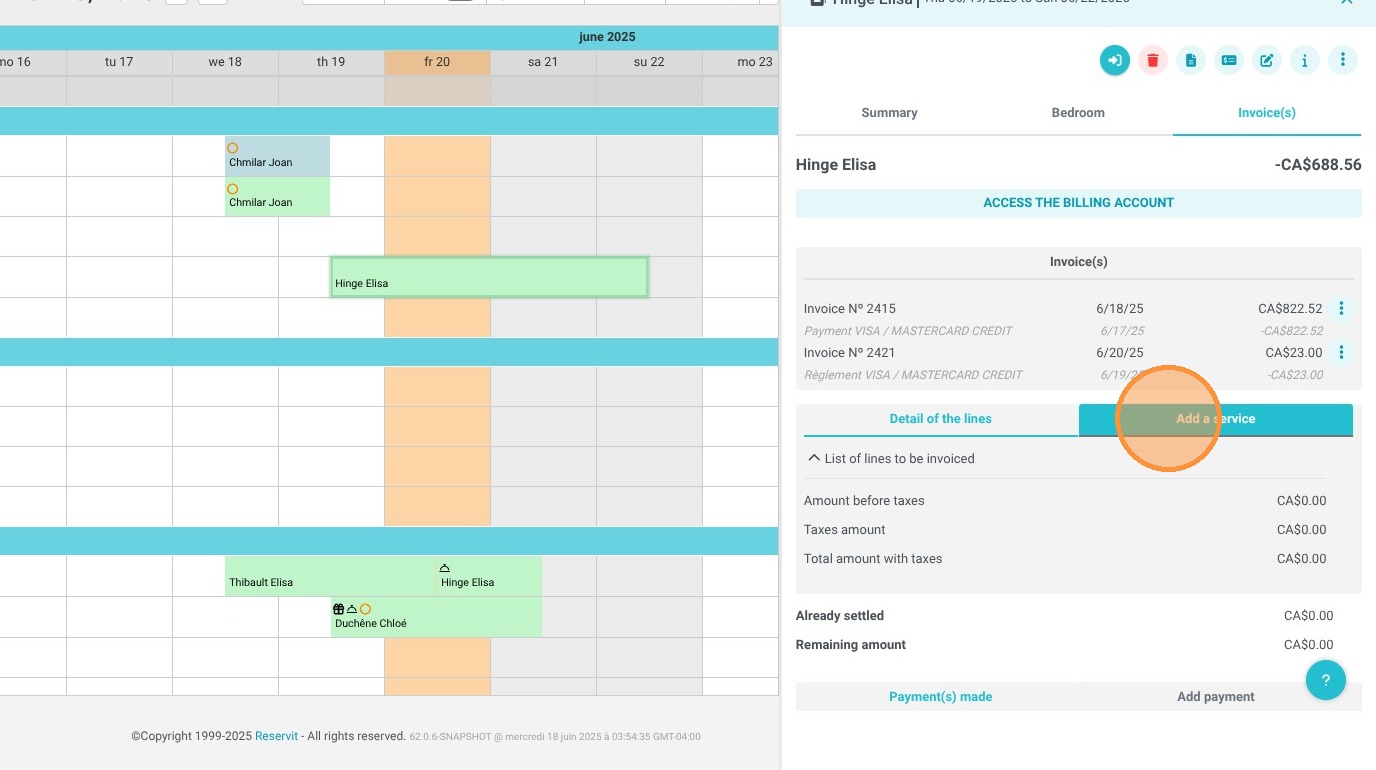
1. To access the billing account from a reservation, go to "My reservations" > "Reservations planning", then click on your desired reservation. Next, click on the "Invoice(s)" tab.
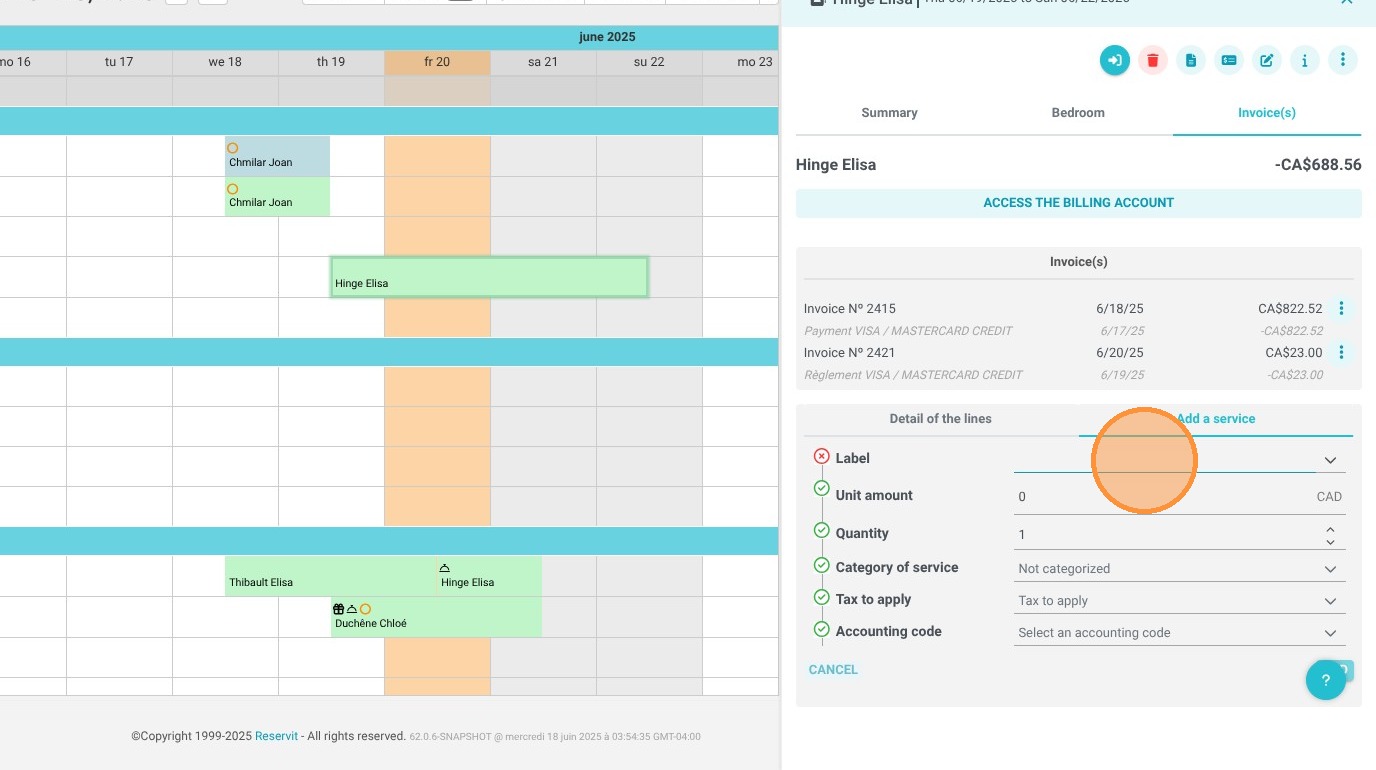
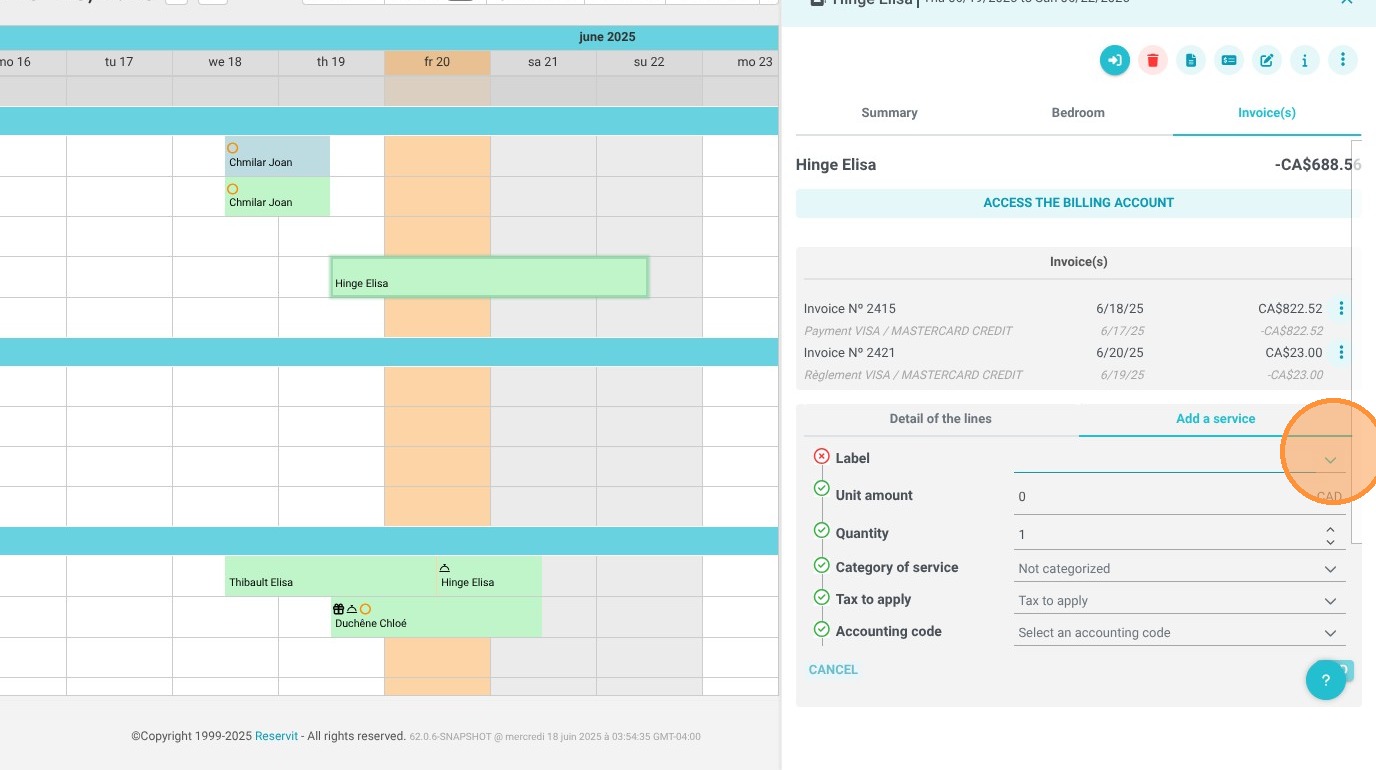
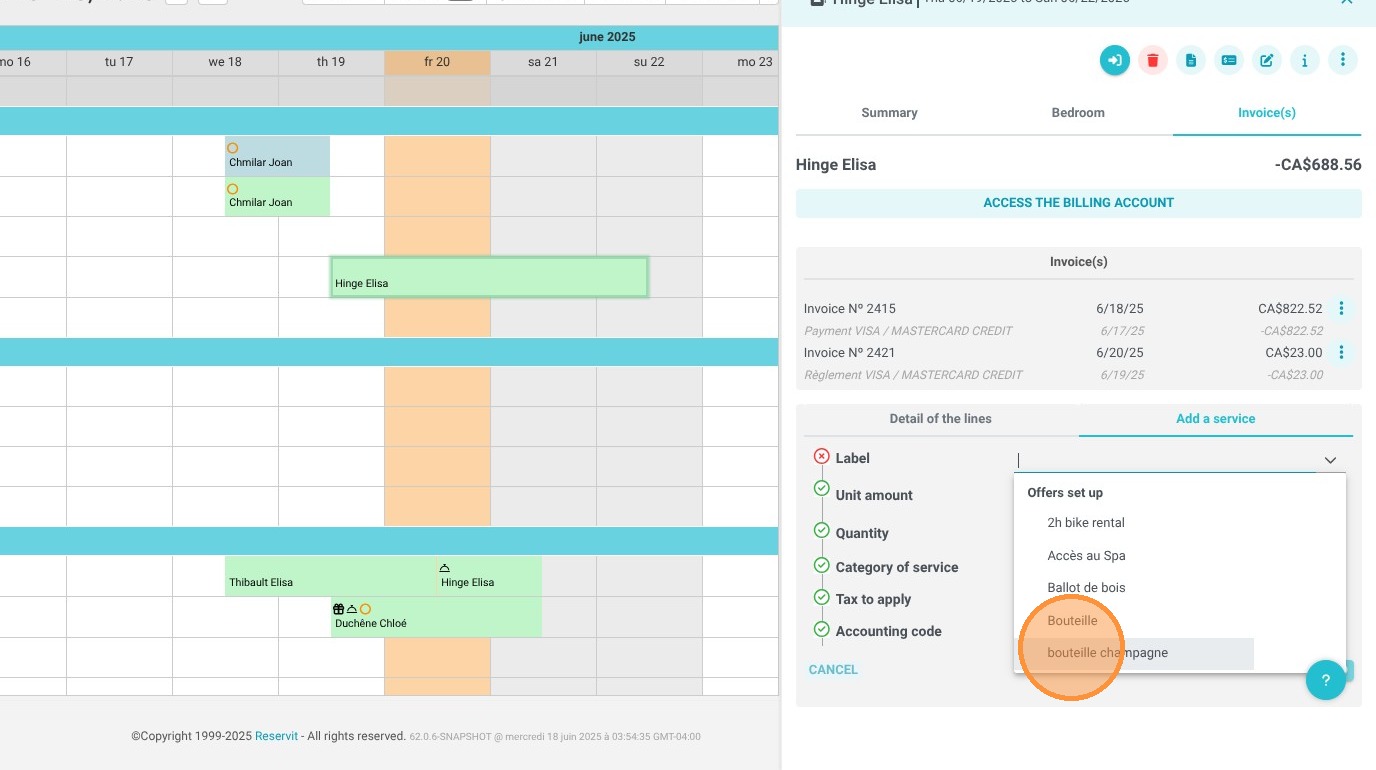
2. To add a service to a reservation that hasn't been invoiced yet, click on "Add Service."
You can either select a service that's already saved or manually enter the name of the service you want to add in the "Label" field.
If you choose an existing option, all the fields will update automatically. If you're adding it manually, you'll need to fill in those fields yourself. You can modify these fields if you wish, then click "Add" to confirm the action.

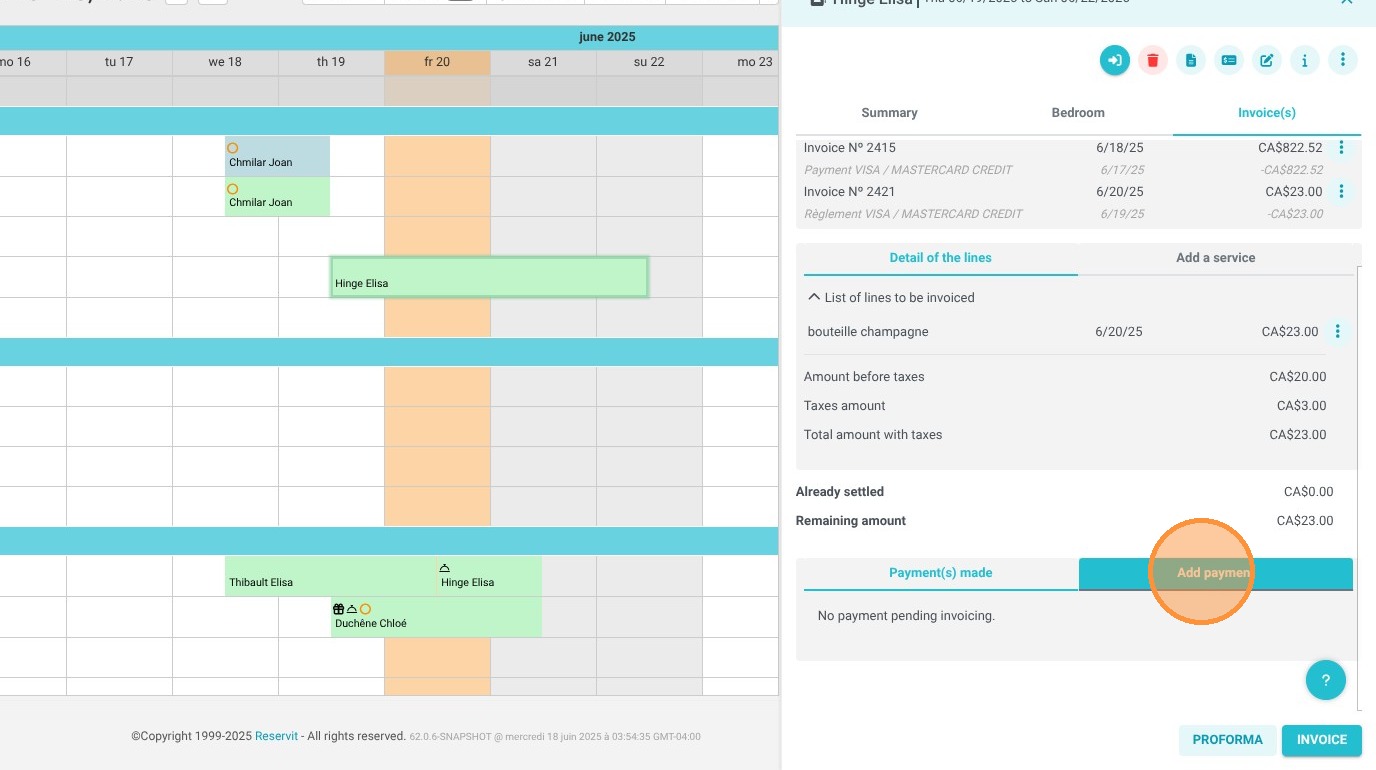
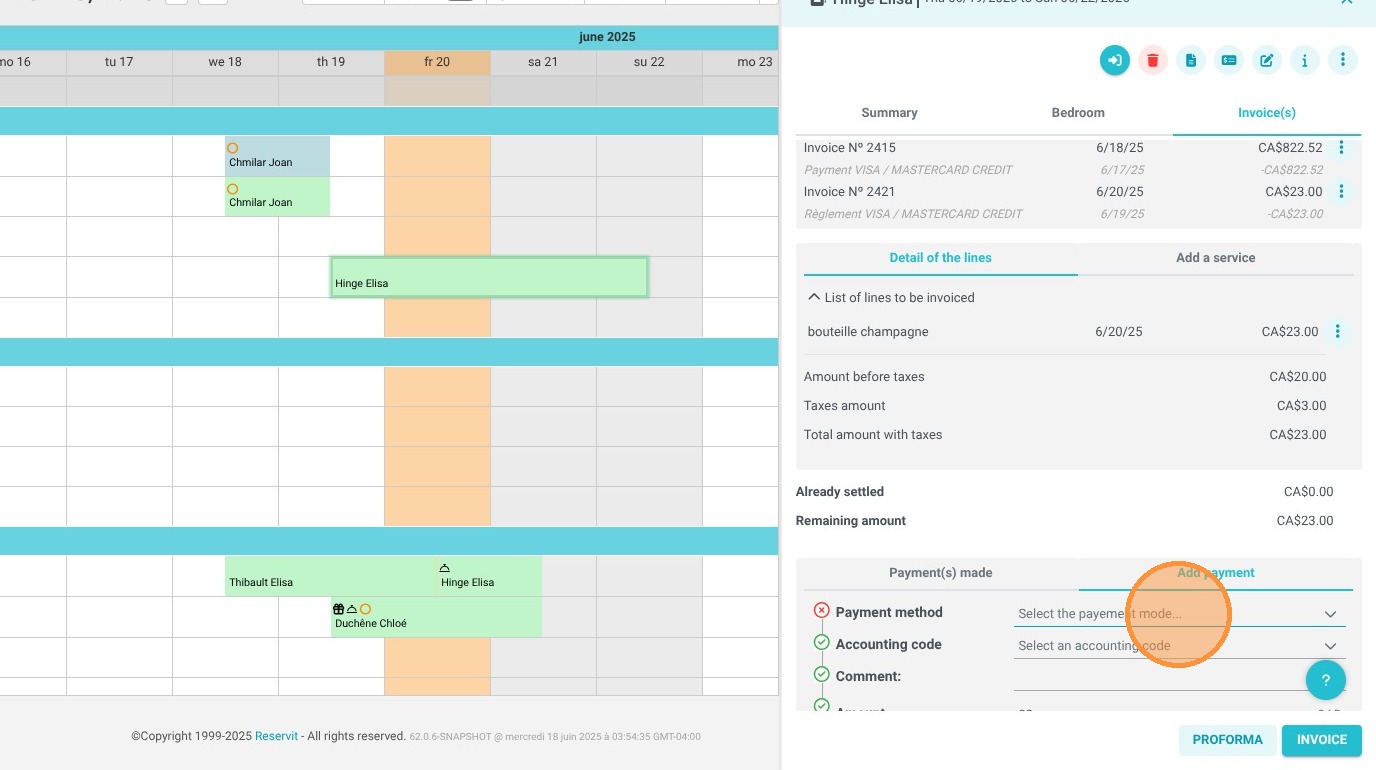
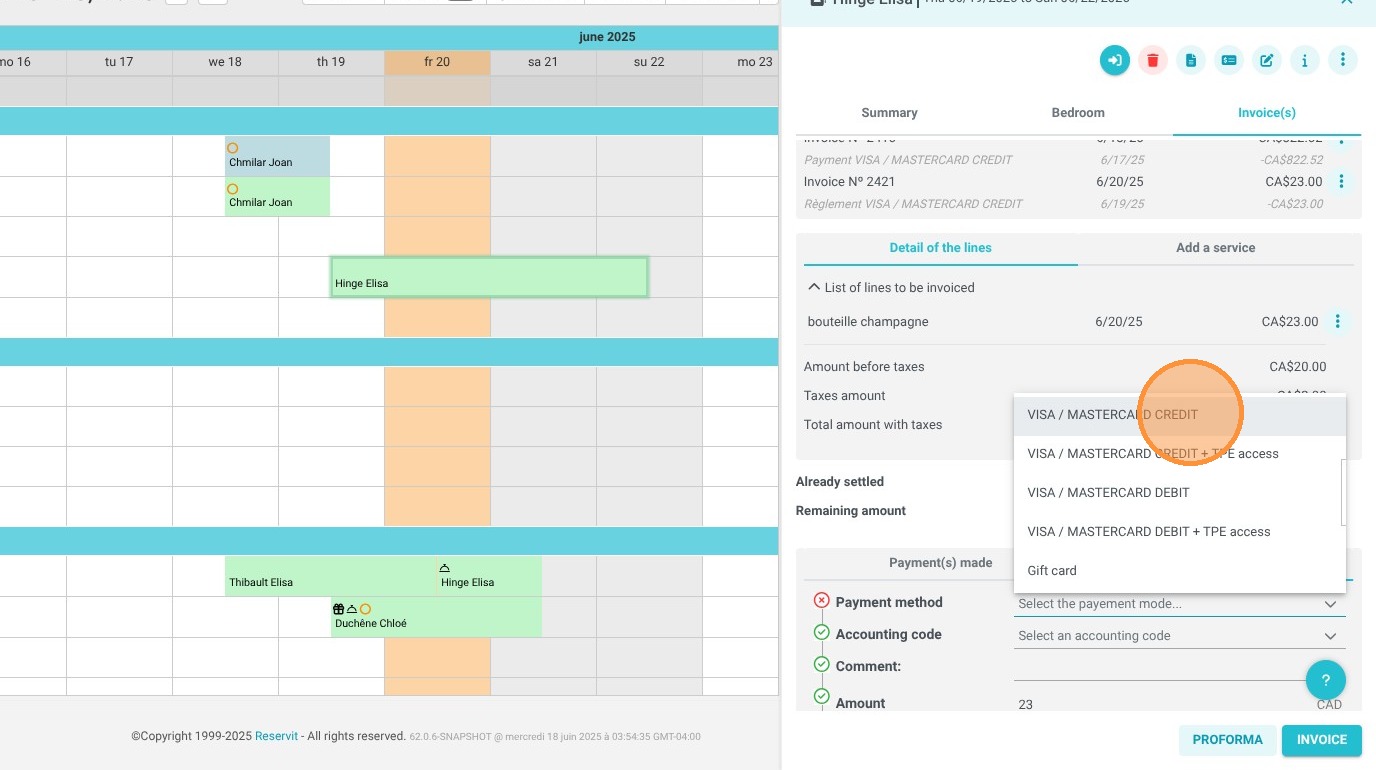
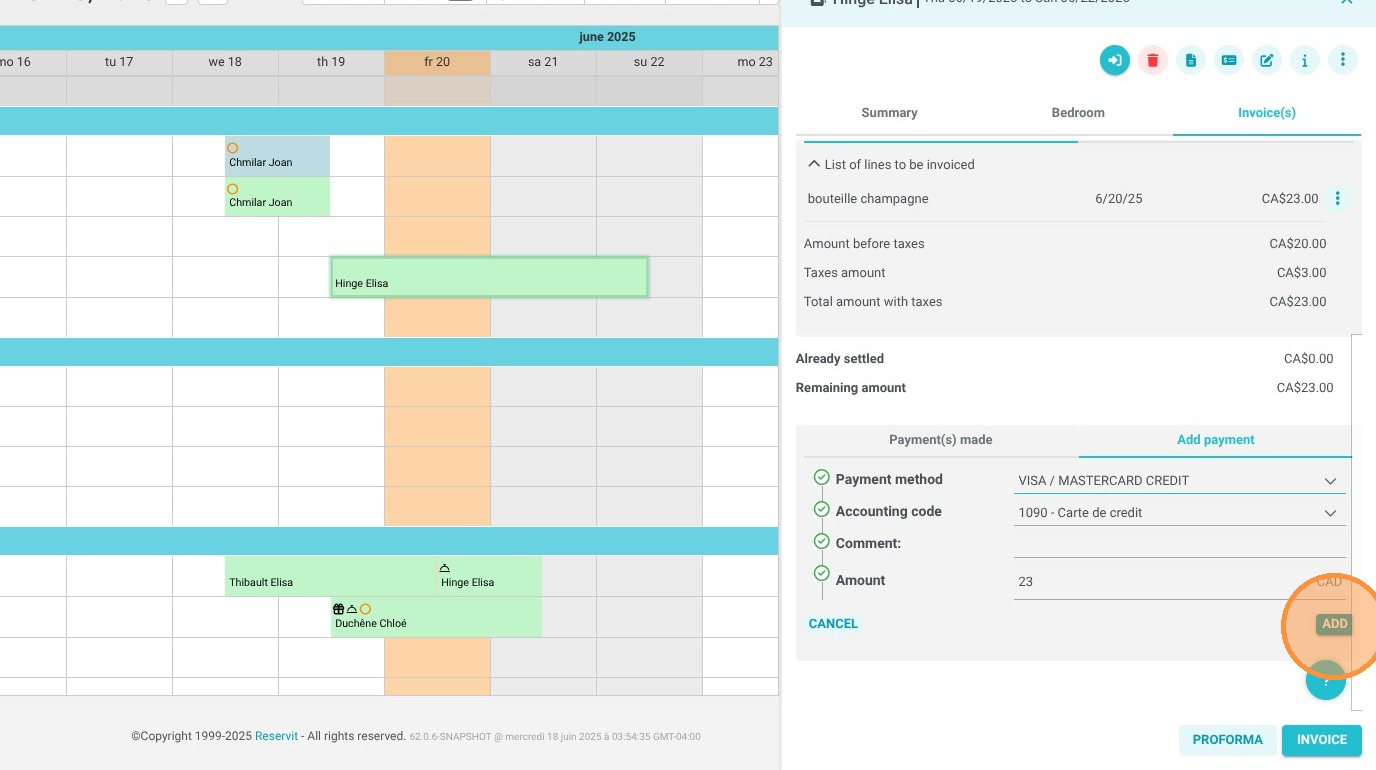
3. You can record a payment by clicking "Add a Payment" or directly access the payment terminal (within the payment methods).
Fill in the required fields, then click "Add."

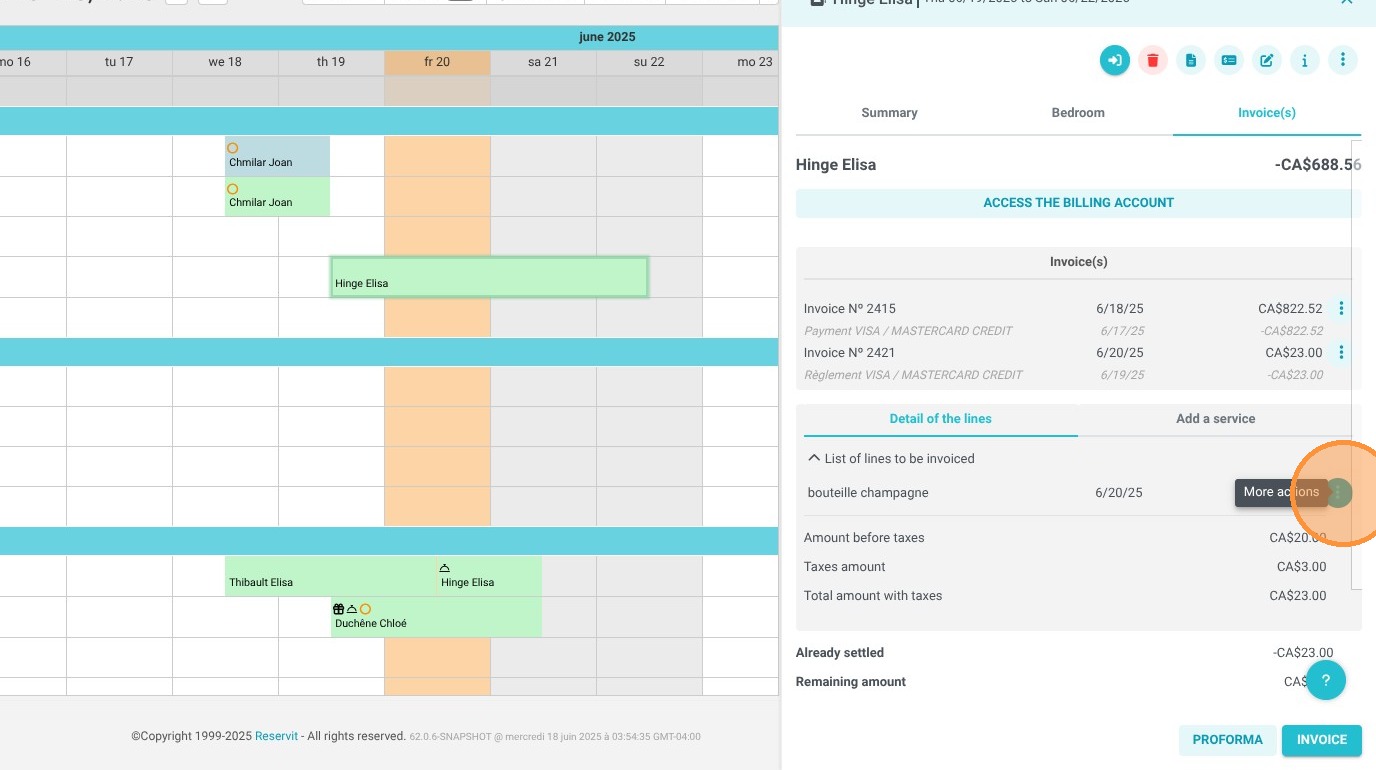
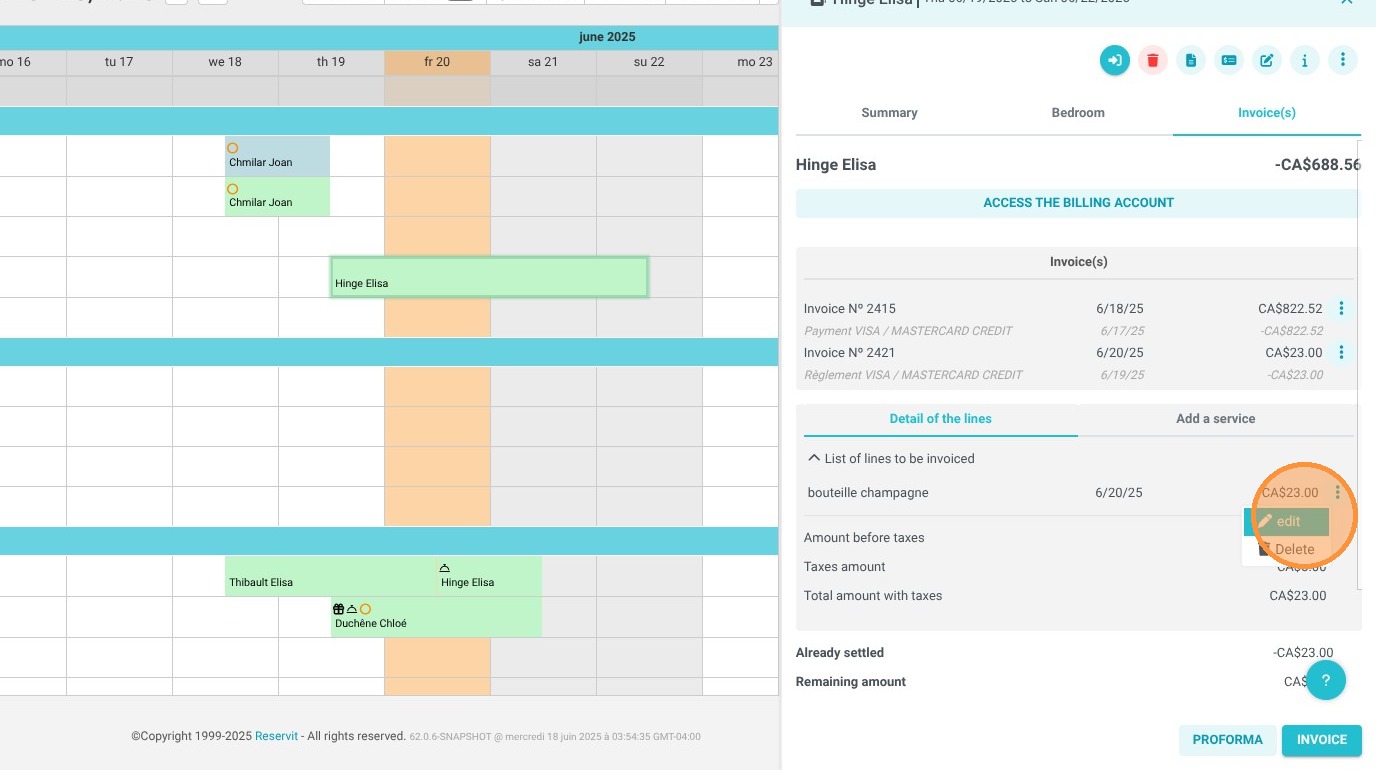
4. To modify or delete a service, click on the three dots at the end of the line item. This menu will allow you to "Edit" or "Delete" the service.
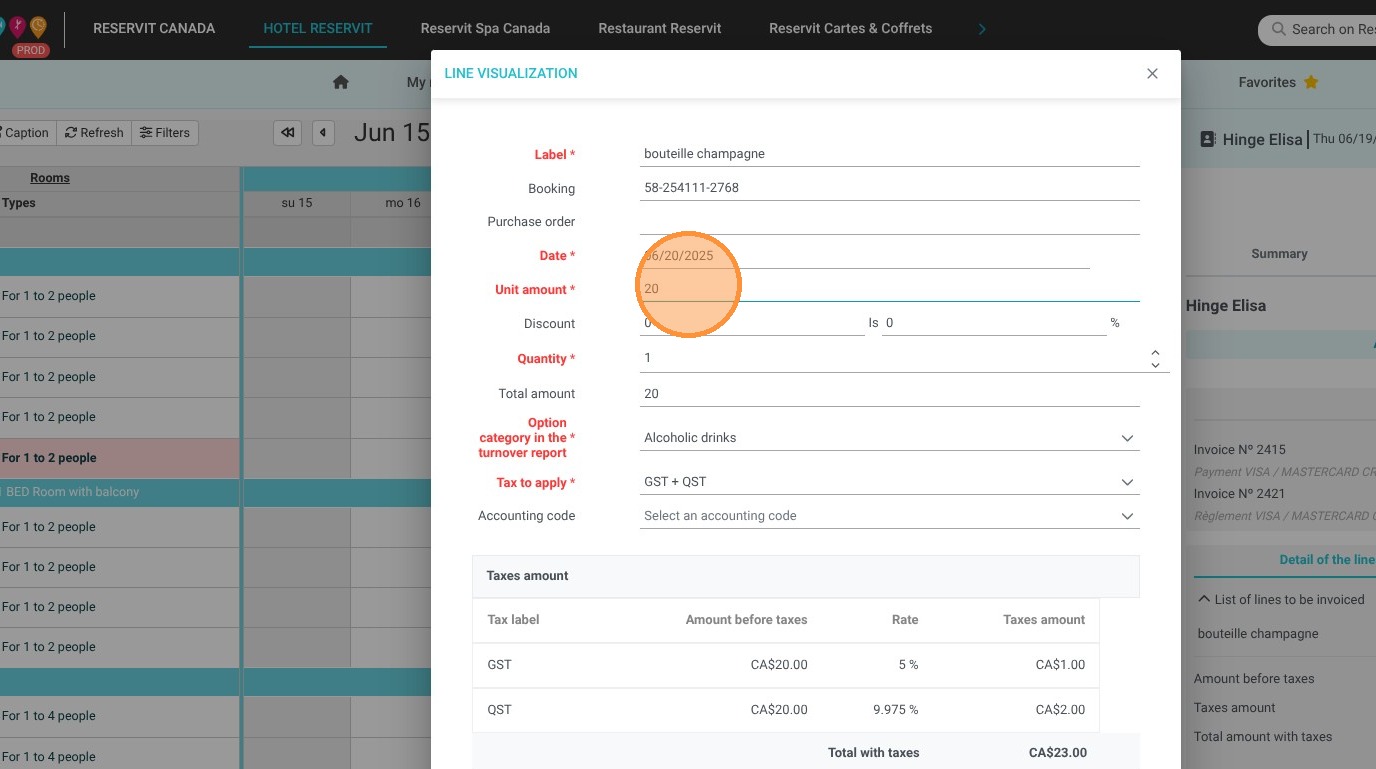
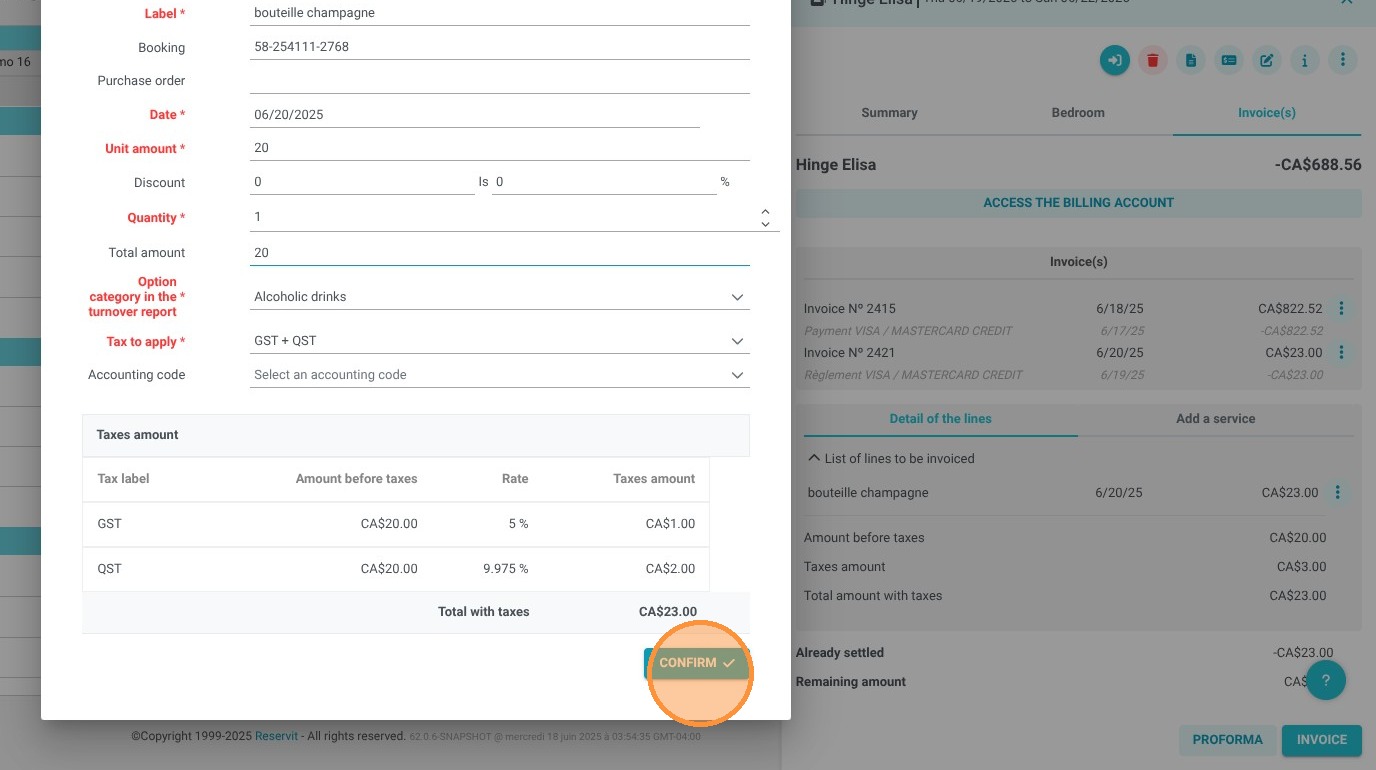
5. This window allows you to modify all fields, including the label, date, price, and amount. You can also add a discount for the service, specify the category this service will be linked to in the revenue report, set the taxes, and enter an accounting code.
Finalize your changes by clicking "Confirm".
6. You can then either invoice everything by clicking "Invoice," or view the "Proforma" invoice.
7. When you click on "Invoice", the invoice will be generated.
8. A window will pop up to inform you that the invoice is about to be created.
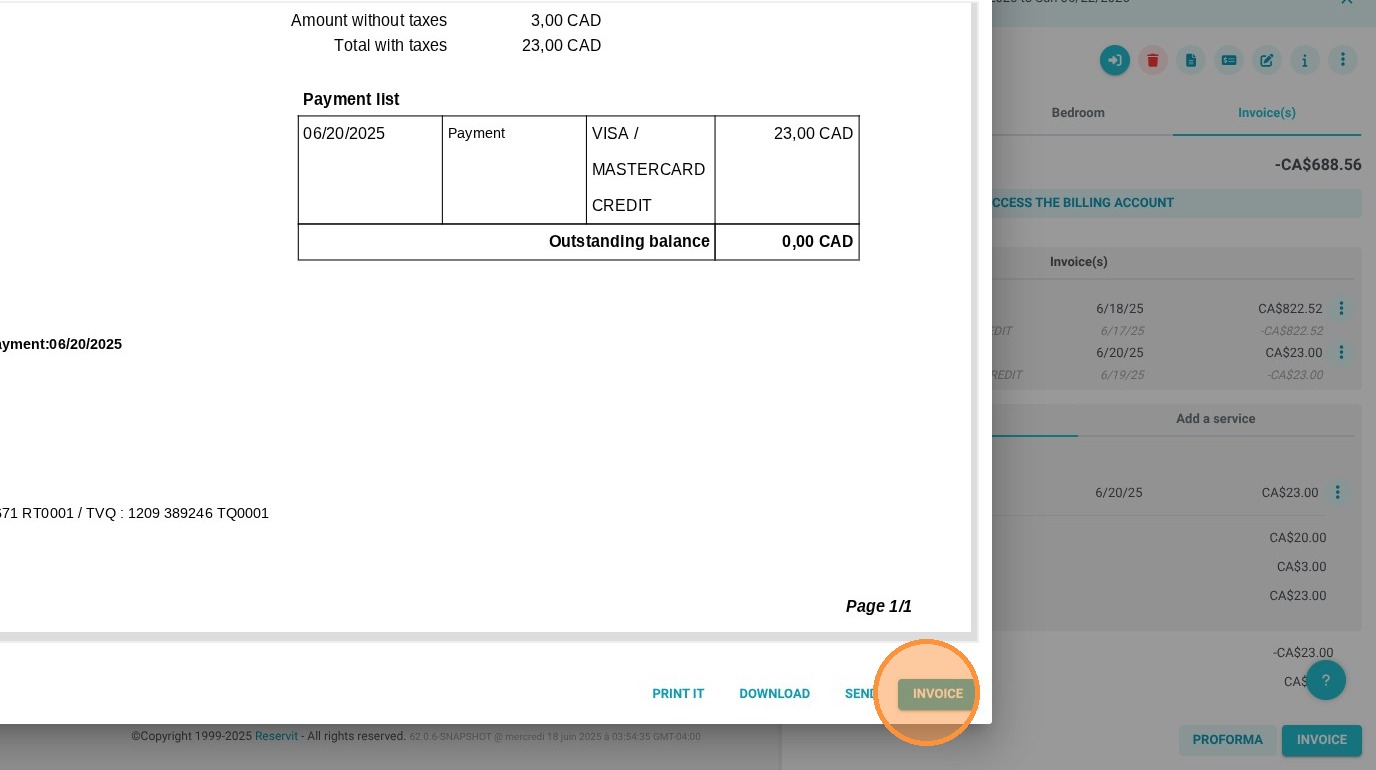
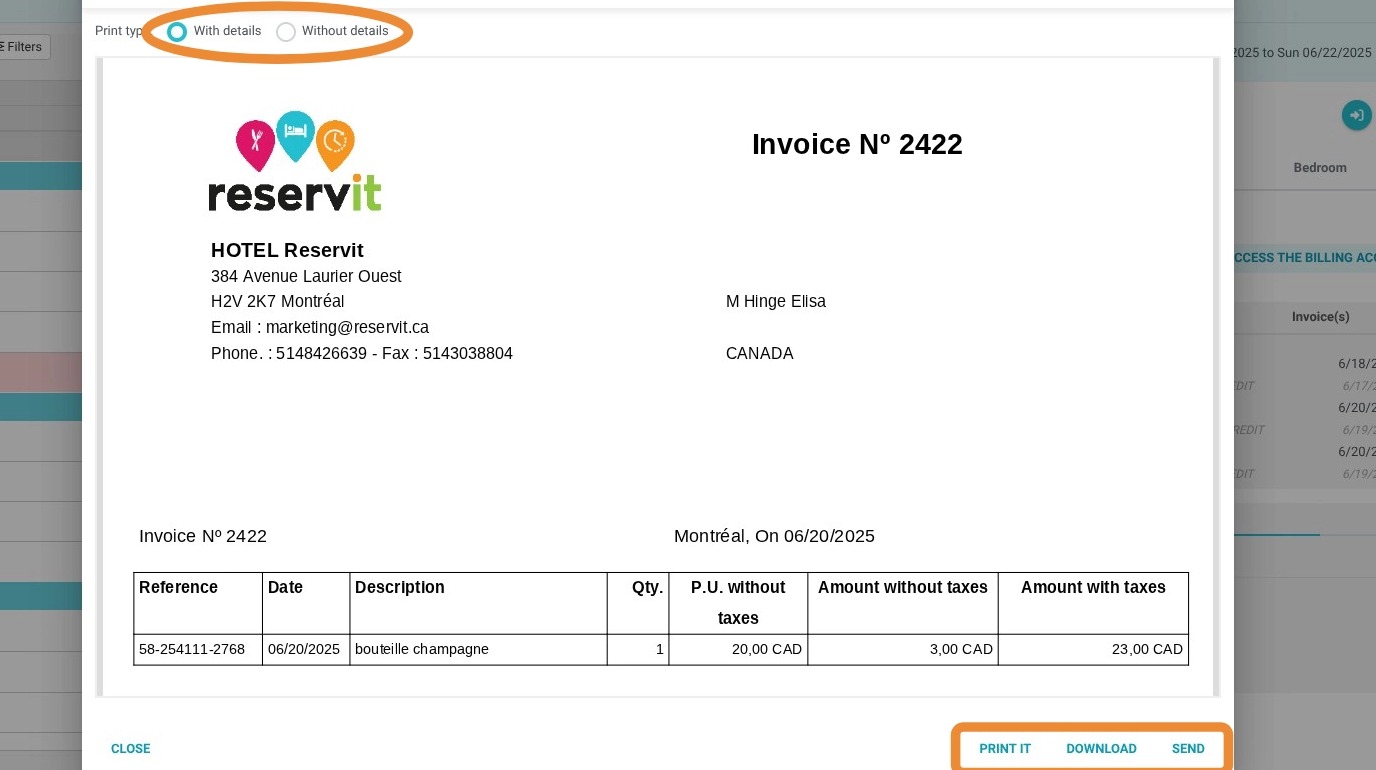
9. You have several options for the invoice, with or without itemized details: You can print it, download it, or send it by email.
10. For more extensive billing options, click on "Access the Billing Account". This will lead you to a broader menu.