Article summary: This practical guide explains how to fully customize the information displayed on your booking calendar within the Reservit Activities platform. You will learn how to select, organize, and prioritize the specific reservation details visible on your daily dashboard to perfectly match your business workflow. Mastering these display settings empowers your team to navigate the schedule more efficiently and manage daily bookings at a single glance.
The 5 key steps to customize your calendar display:
-
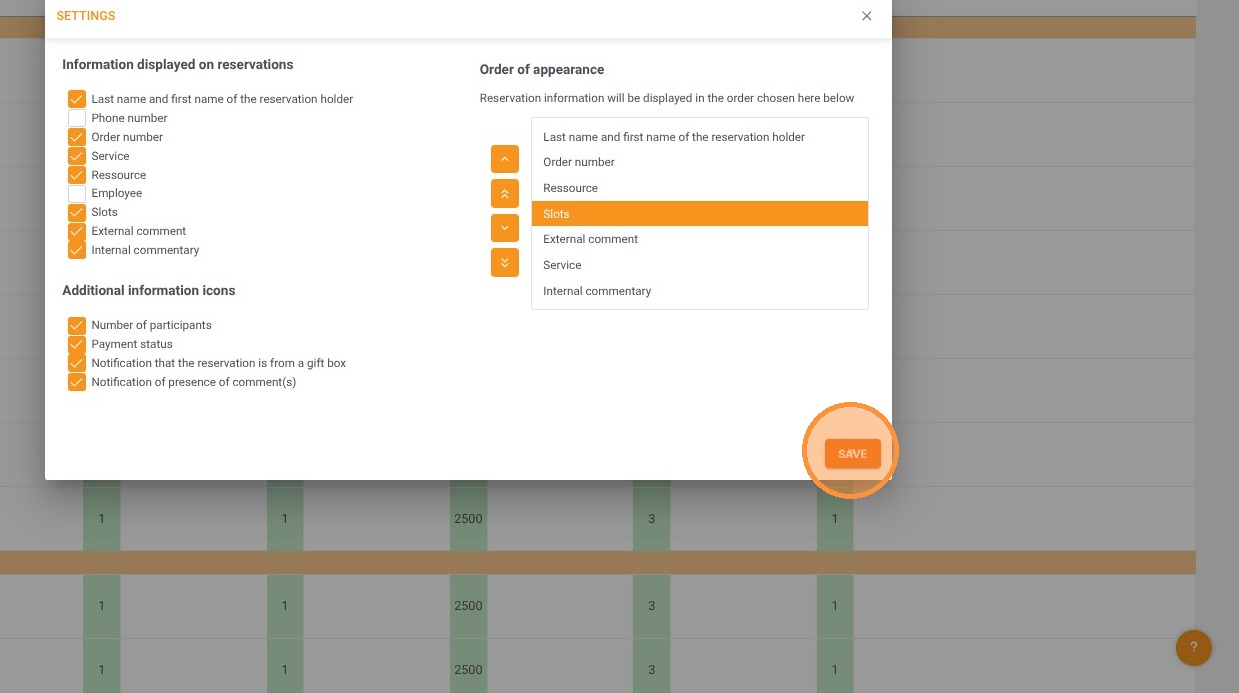
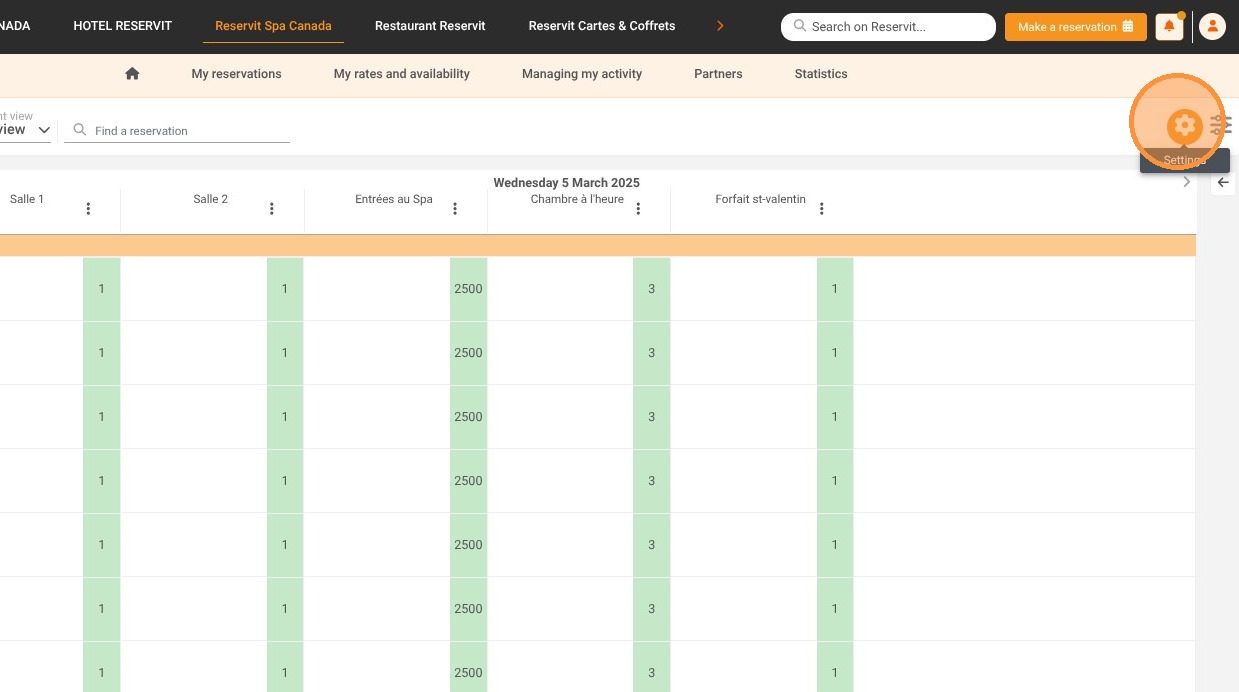
Access the configuration tool: Navigate to the "General Information > Home" page and click the gear icon to open your display settings.
-
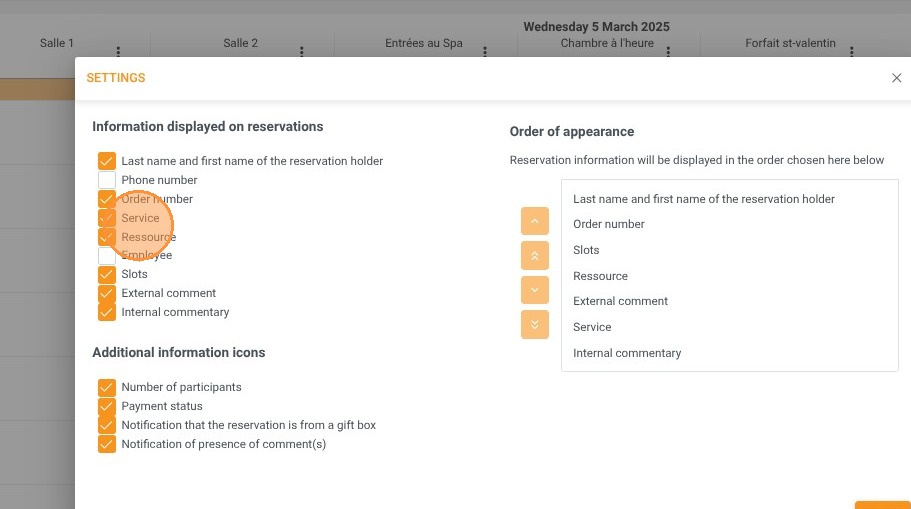
Select displayed information: Check or uncheck the specific reservation details and metrics you want to appear on your confirmed bookings.
-
Organize the data order: Select any active field and use the directional arrows to arrange the information layout according to your daily priorities.
-
Toggle additional details: Choose whether to enable or hide supplementary booking information on your main schedule view.
-
Save your customized view: Click the "Save" button to instantly apply your new personalized calendar layout to your dashboard.
Why follow this guide? Personalizing your calendar display instantly reduces visual clutter, allowing your front-desk staff to find critical guest information in seconds without clicking through multiple menus. By keeping only the most relevant operational data front and center, you streamline your daily management and drastically reduce the risk of scheduling oversights.
1. On the General Information > Home page, click on the configuration tool.
2. You can then check or uncheck the information you want to display about confirmed reservations.
3. You can change the order by selecting a field.
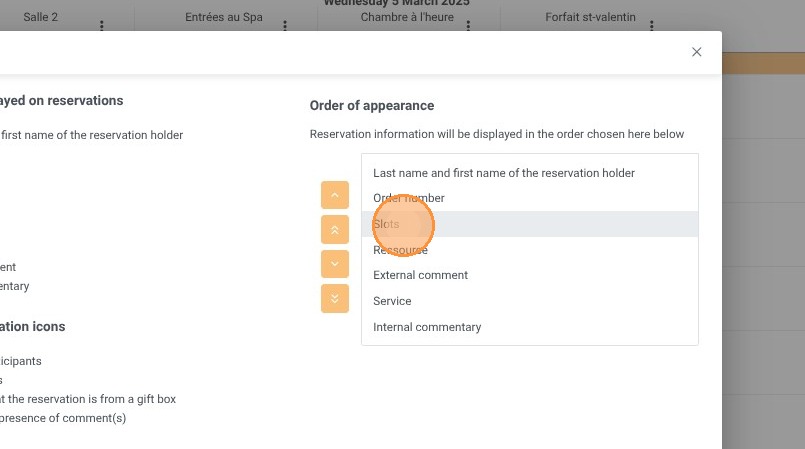
4. Use the arrows to adjust the display order.
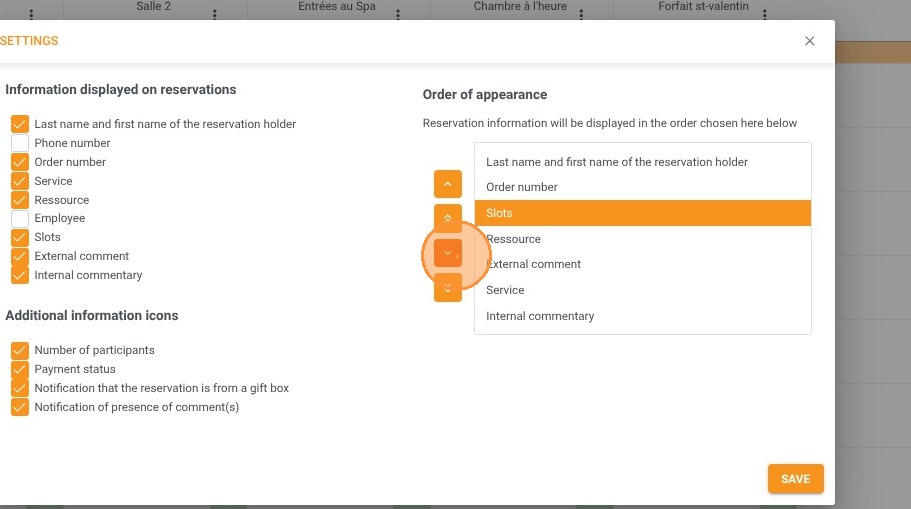
5. You can also choose whether to display certain additional information.
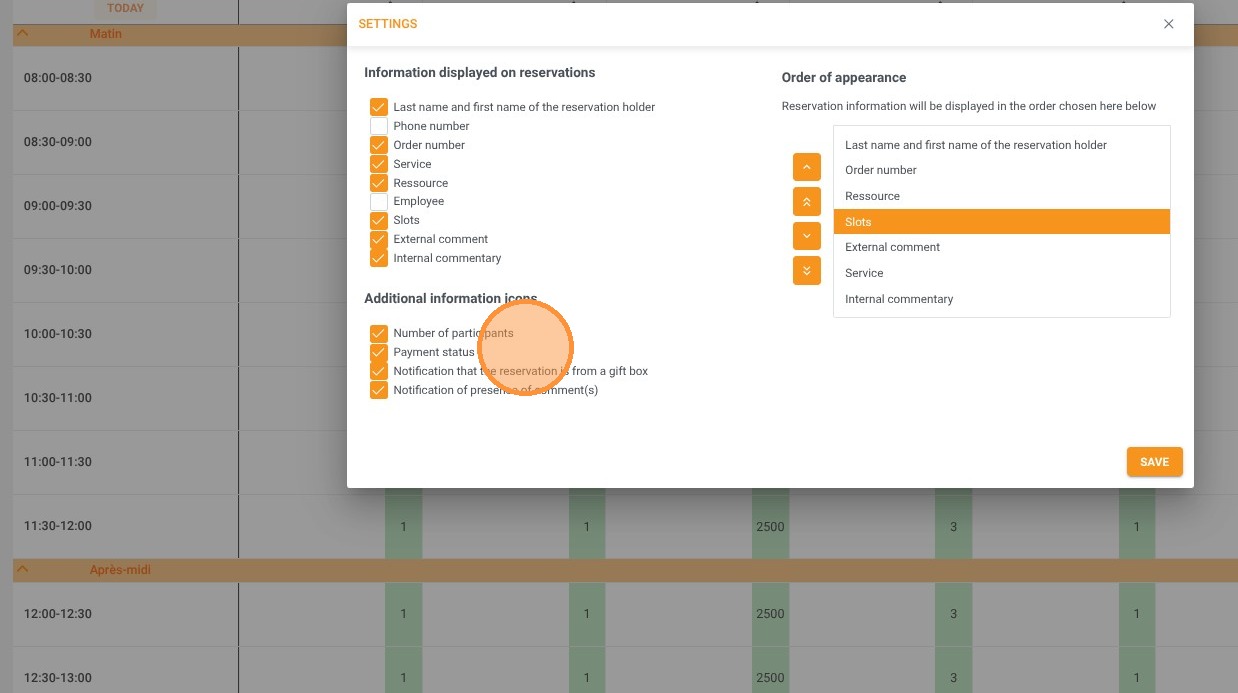
6. Click "SAVE" to apply these changes.