Article Summary: This quick-reference guide explains how to access, customize, and print the Agenda view inside Reservit PMS. You will learn how to adjust display preferences, filter out specific operational milestones like guest arrivals and departures, and audit underlying booking options. Mastering this daily timeline layout ensures your front desk, management, and housekeeping teams stay organized and perfectly aligned throughout each shift.
The 4 Key Steps to Utilize the Agenda Feature
-
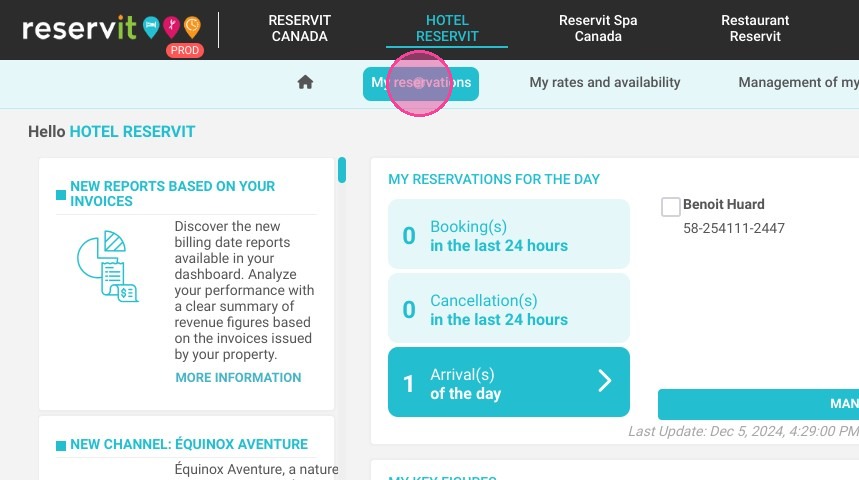
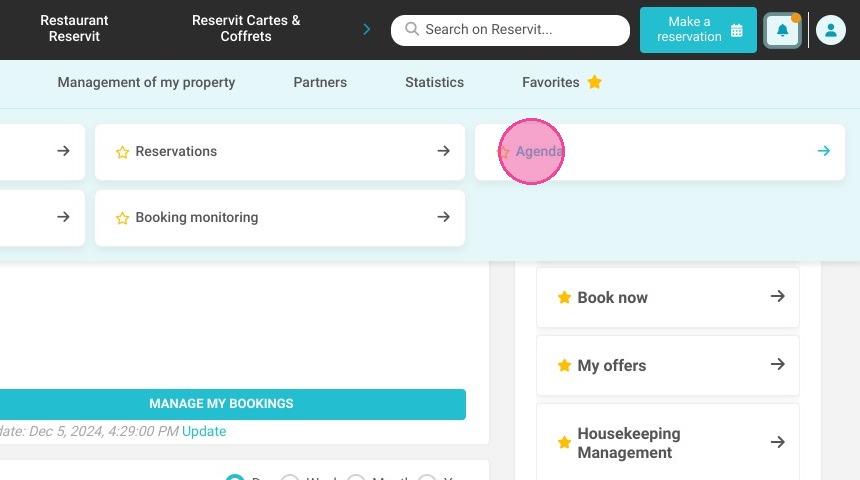
Access the Agenda Module: Navigate to your upper dashboard menu, click on "My reservations," and select the "Agenda" option from the sub-menu layout.
-
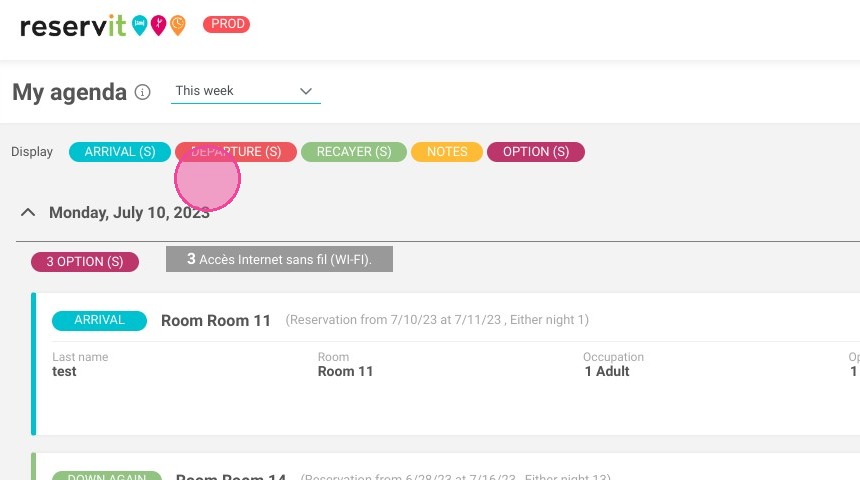
Customize Grid Views and Data: Adjust your overall calendar display layout and check or uncheck specific operational filters (such as Arrivals or Departures) to fine-tune exactly what data populates on your screen.
-
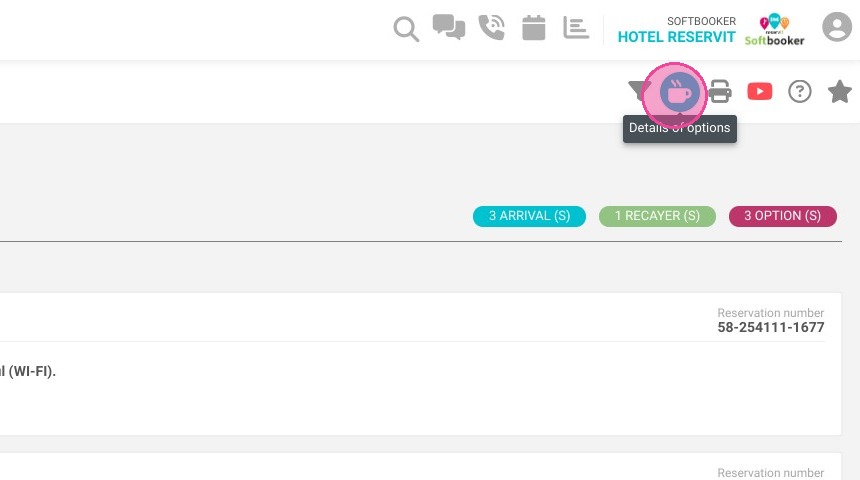
Review Hidden Option Details: Click on the designated option icon within a targeted line item to instantly expand and audit specific hidden booking parameters or custom guest choices.
-
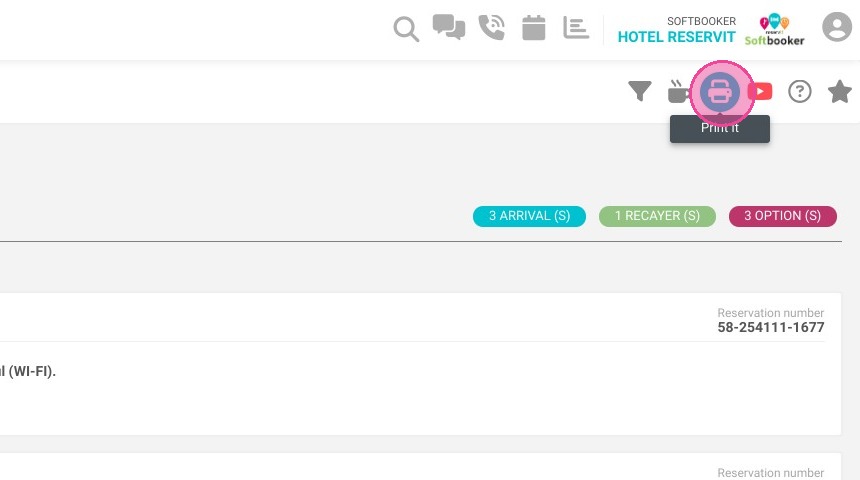
Generate Physical Reports: Use the inline print functions or click the primary printer icon to generate crisp, hard-copy layouts of your daily agenda pages or expanded option breakdowns.
Tip (Shift Handover Preparation): The Agenda print function is ideal for creating physical checklists right before morning or afternoon shift changes. Managers can rapidly run off copies of the day's departures and arrivals to hand to housekeeping or front-desk staff, keeping operations moving seamlessly even away from a terminal screen.
Why Follow This Guide?
Following this tutorial replaces messy timeline clutter with a clean, scannable, and task-oriented checklist tailored precisely to your shift's immediate requirements. It completely optimizes your property's daily workflow, shielding your front desk from overlooked guest requests, missed check-outs, or layout tracking gaps.
1. Click "My reservations"
2. Click "Agenda"
3. Choose the display.
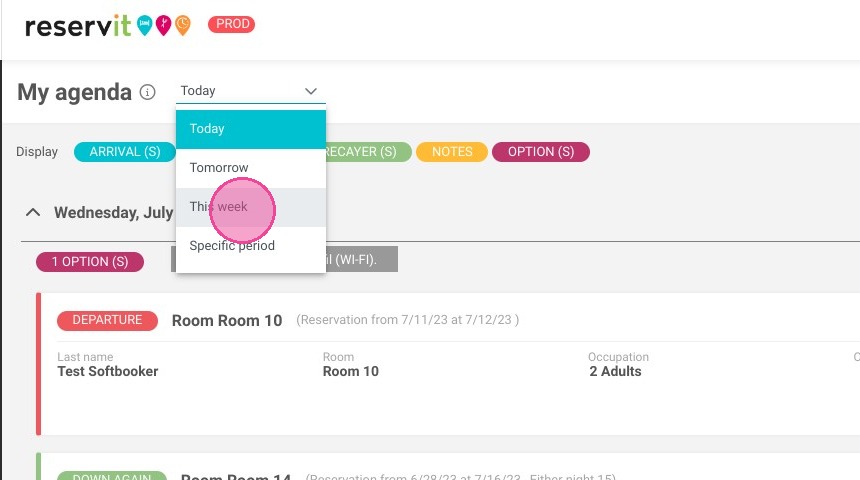
4. Select the data you want to display. (Arrivals, departure...)
5. Click on this icon if you want to check the options details
6. You can print those details.
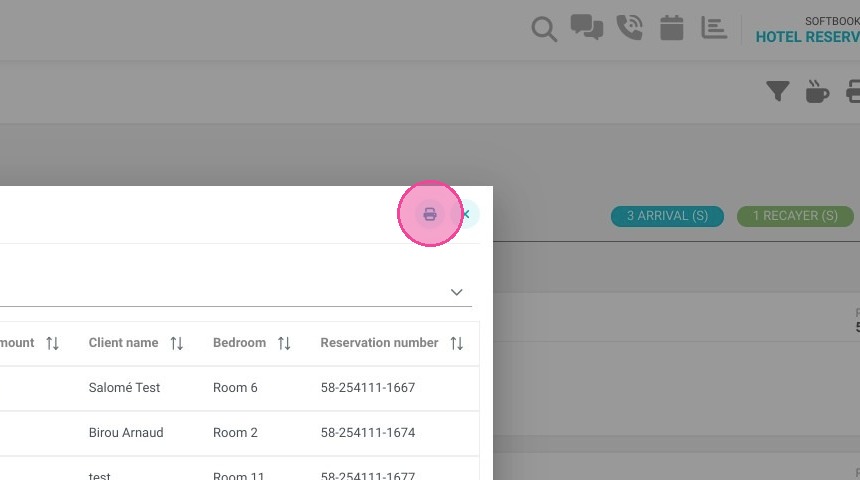
7. To print the agenda page you can click on the printer icon.