Help for use

How to Use Integrated Billing in the Reservit PMS Calendar | Streamlined Folio Actions

Article Summary: This operational guide introduces the integrated billing interface inside the Reservit PMS calendar view. You will learn how to access reservation summaries, post payments, add services, and distribute invoices directly from the side panel without losing sight of your room allocation grid. Mastering this centralized dashboard eliminates constant screen toggling, speeds up guest check-outs, and keeps front-desk accounting completely efficient.

The 5 key steps to manage billing within the reservation calendar:

  • Open the Integrated Side Panel: Navigate to the "Reservations planning" grid and left-click on any guest booking to instantly reveal the consolidated management tray on the right side of your screen.

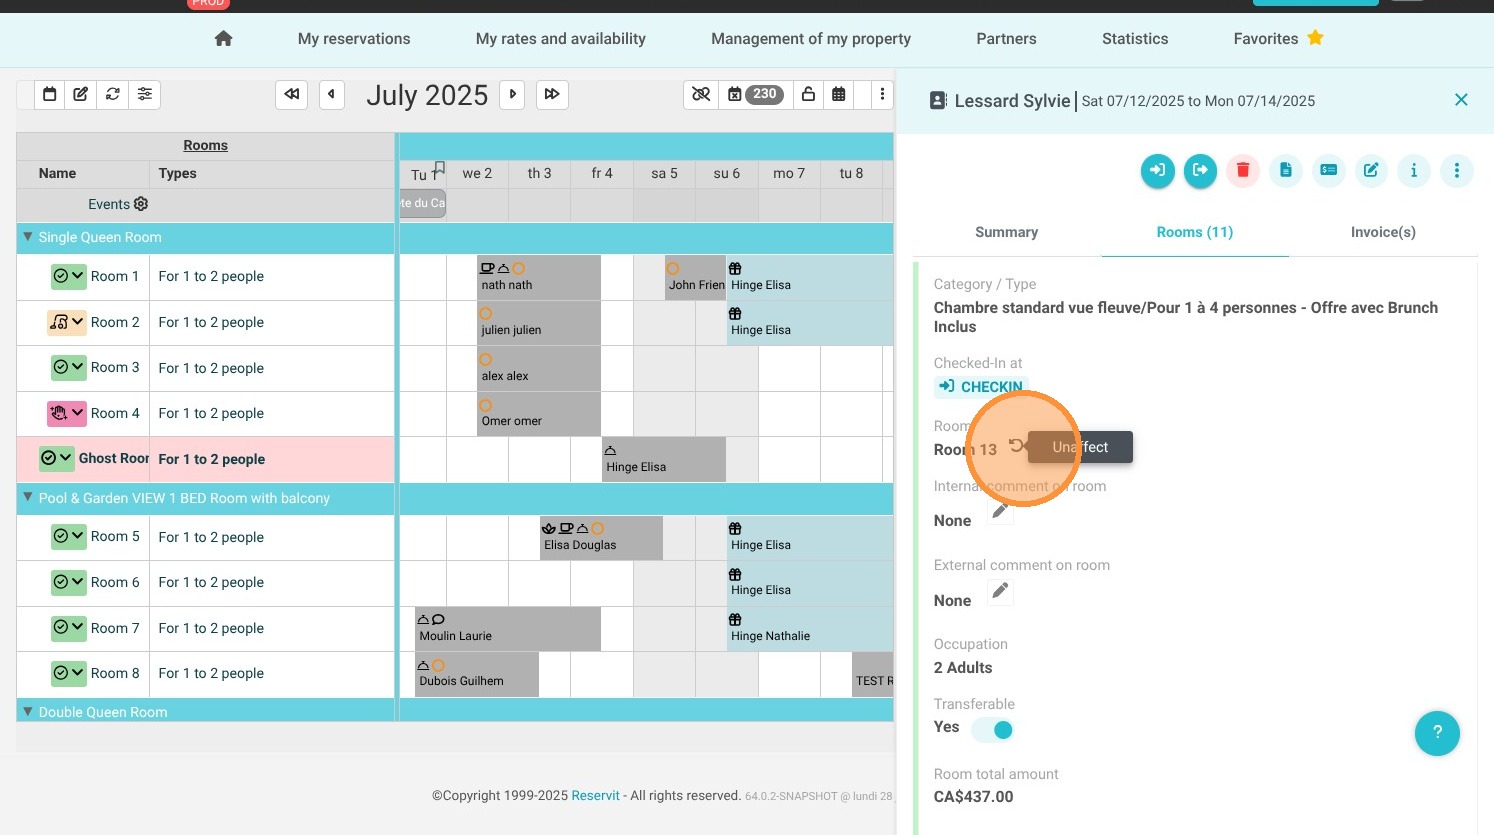
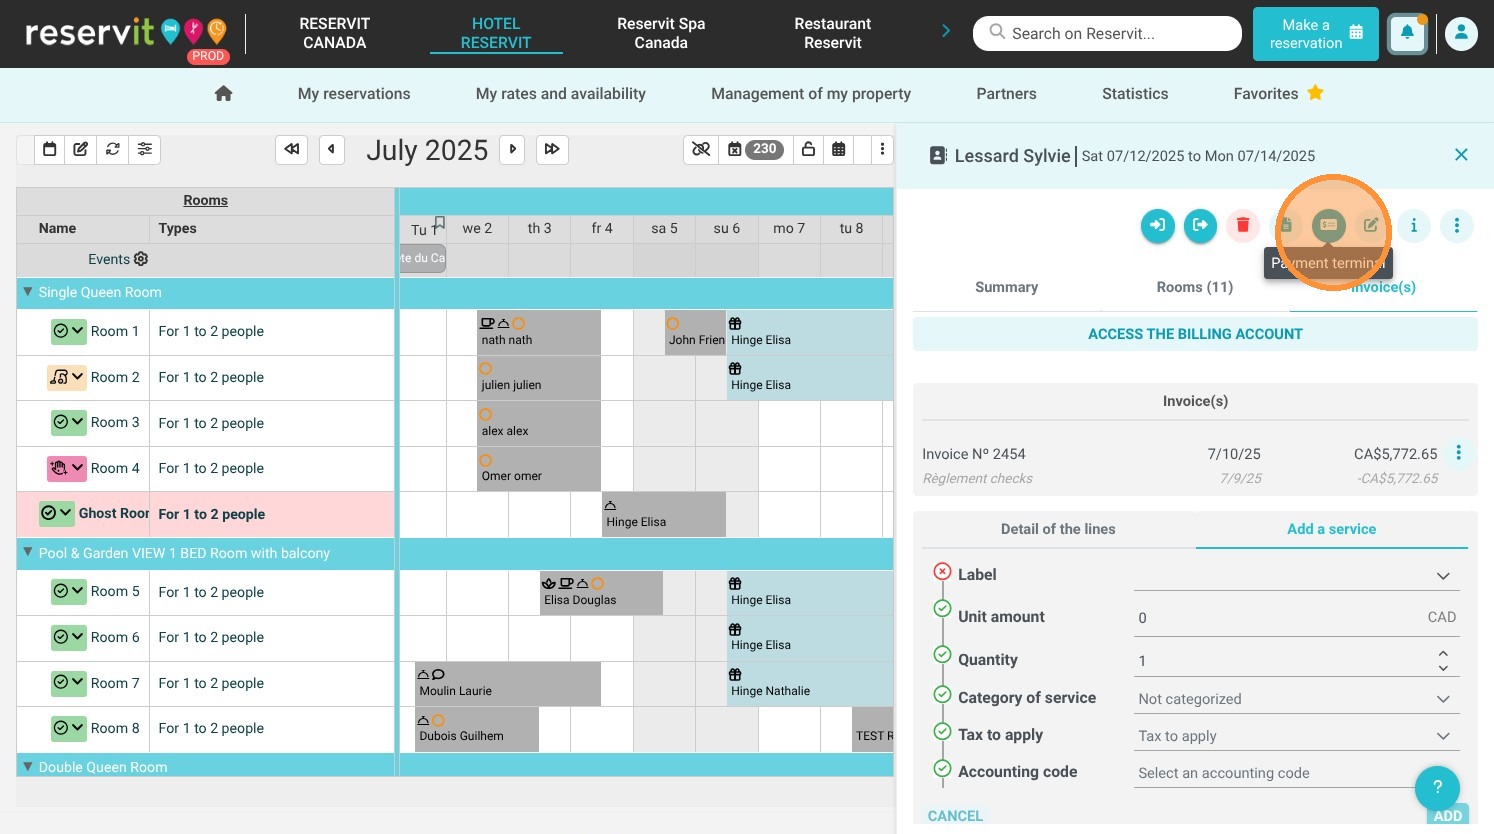
  • Navigate the Three Core Tabs: Toggle between the Reservation Summary (to view basic stay details or use the 360-arrow tool to unassign units), Booked Room or Unit Details, and the Billing menu.

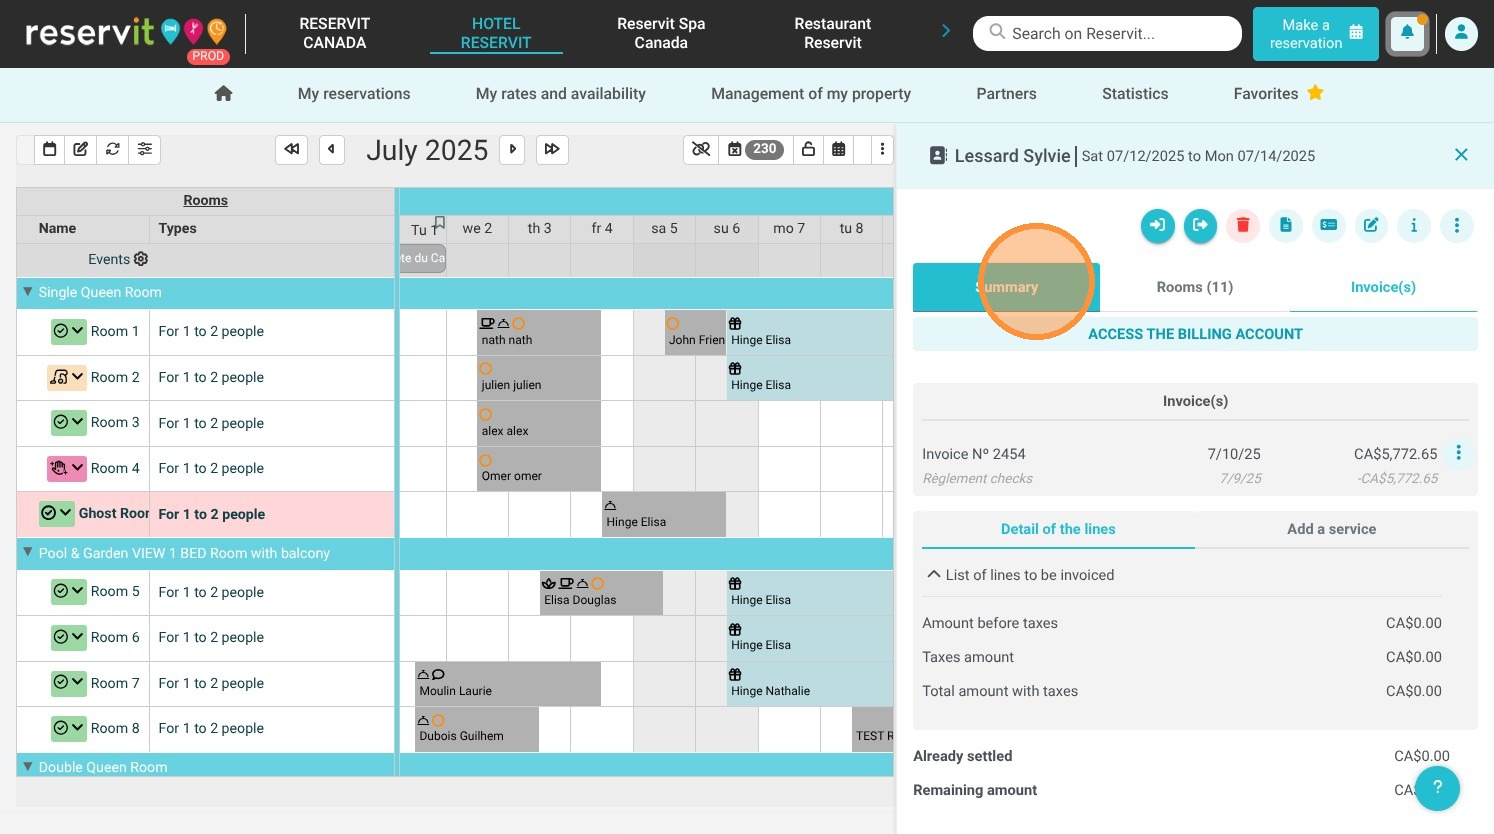
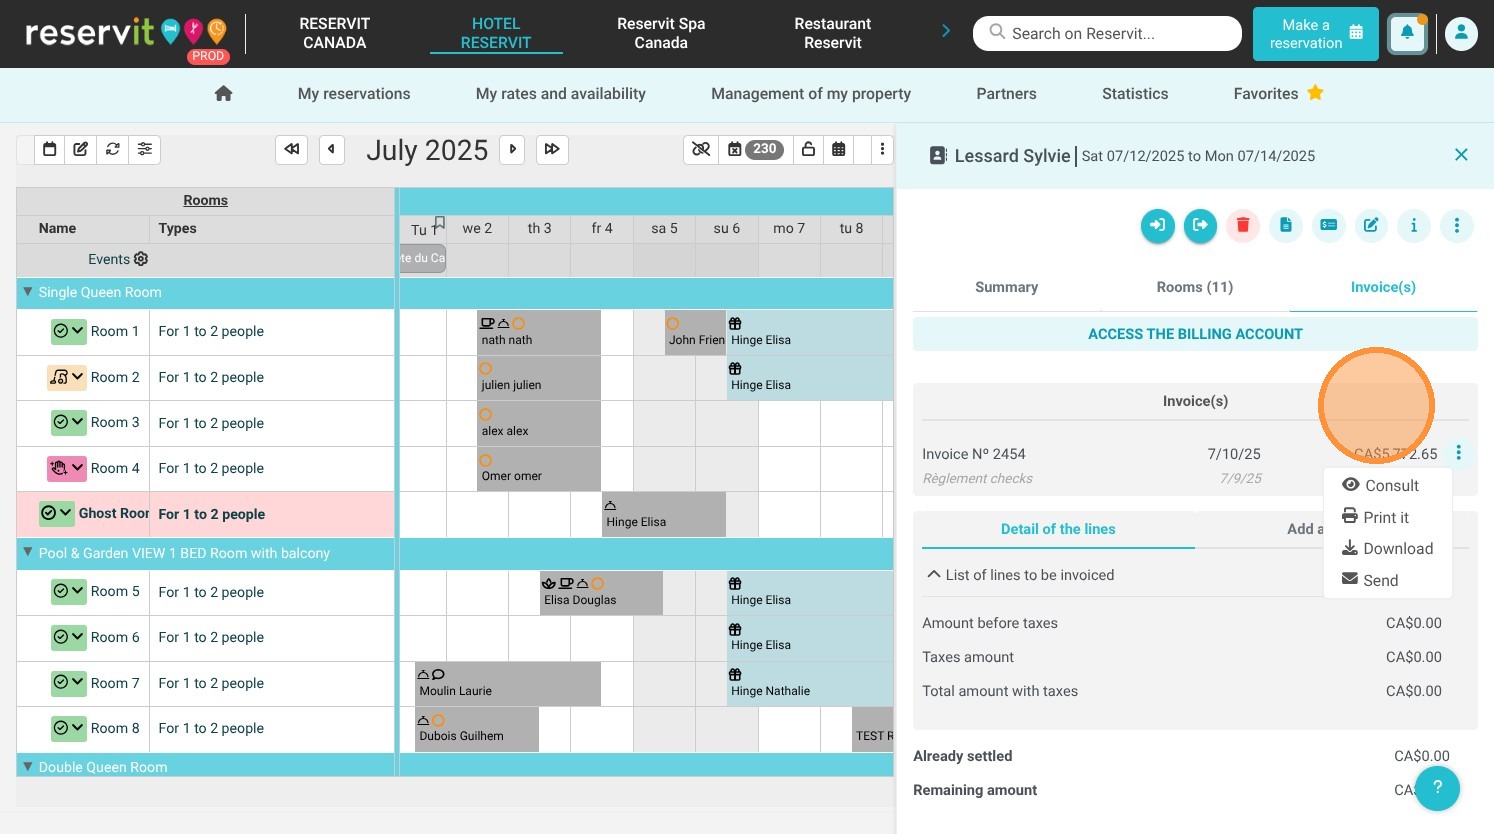
  • Process Payments and Invoices: Click on "Invoice(s)" to open the inline financial menu where you can click "Add a payment" to process a transaction, or use the three-dot action menu to view, print, download, or email folios seamlessly.

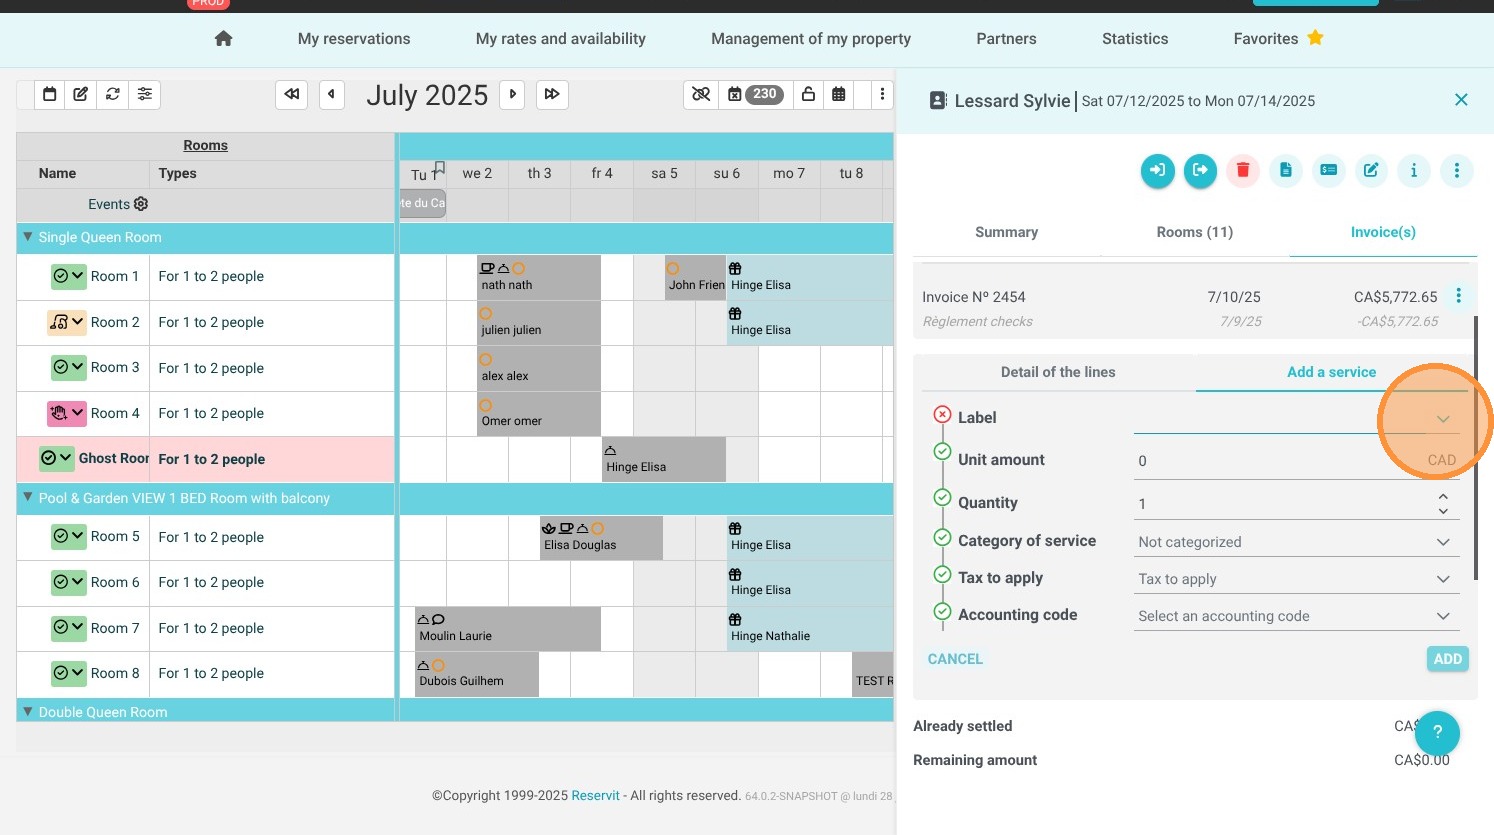
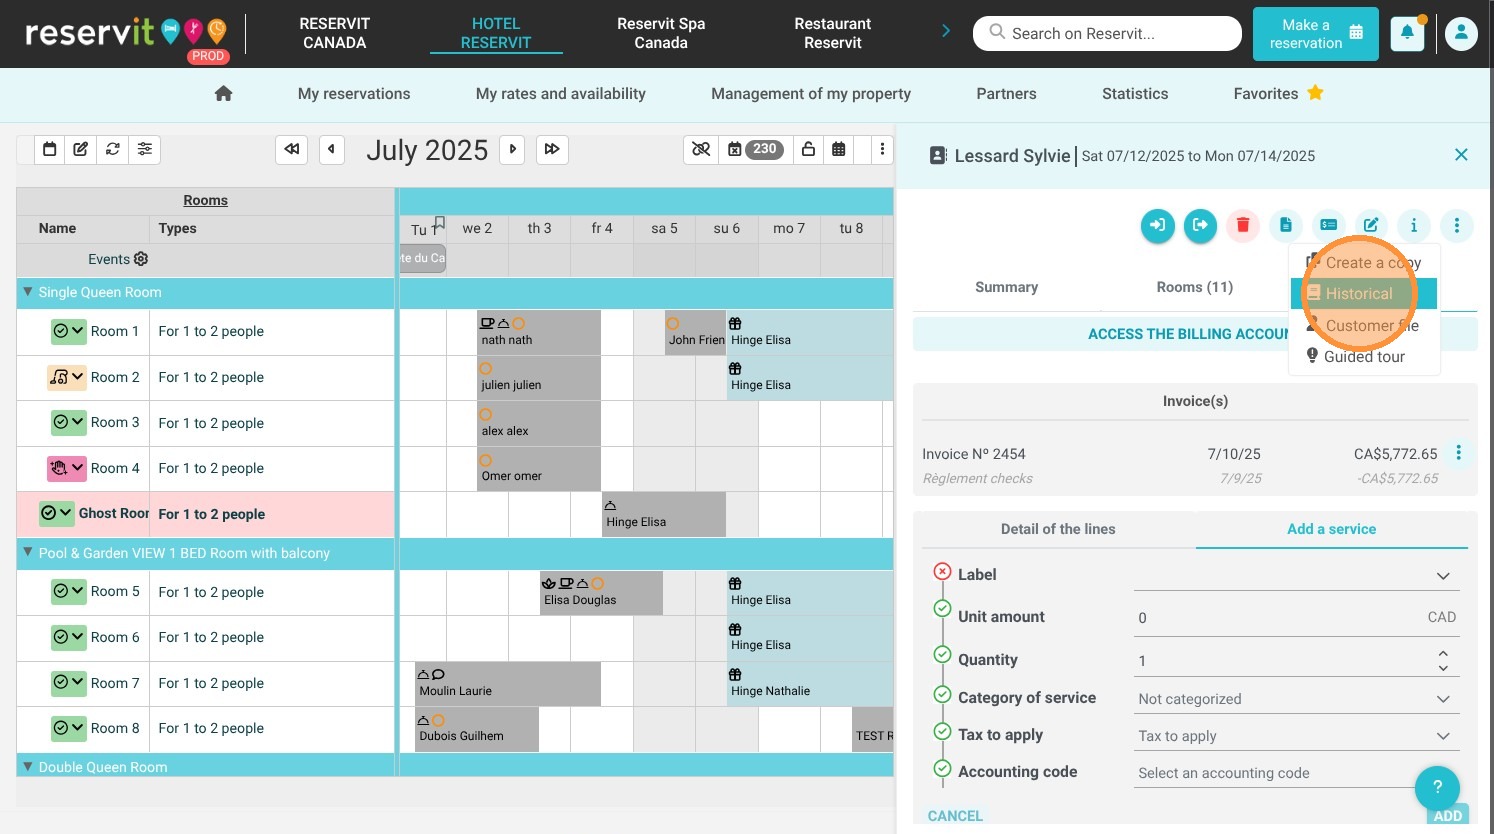
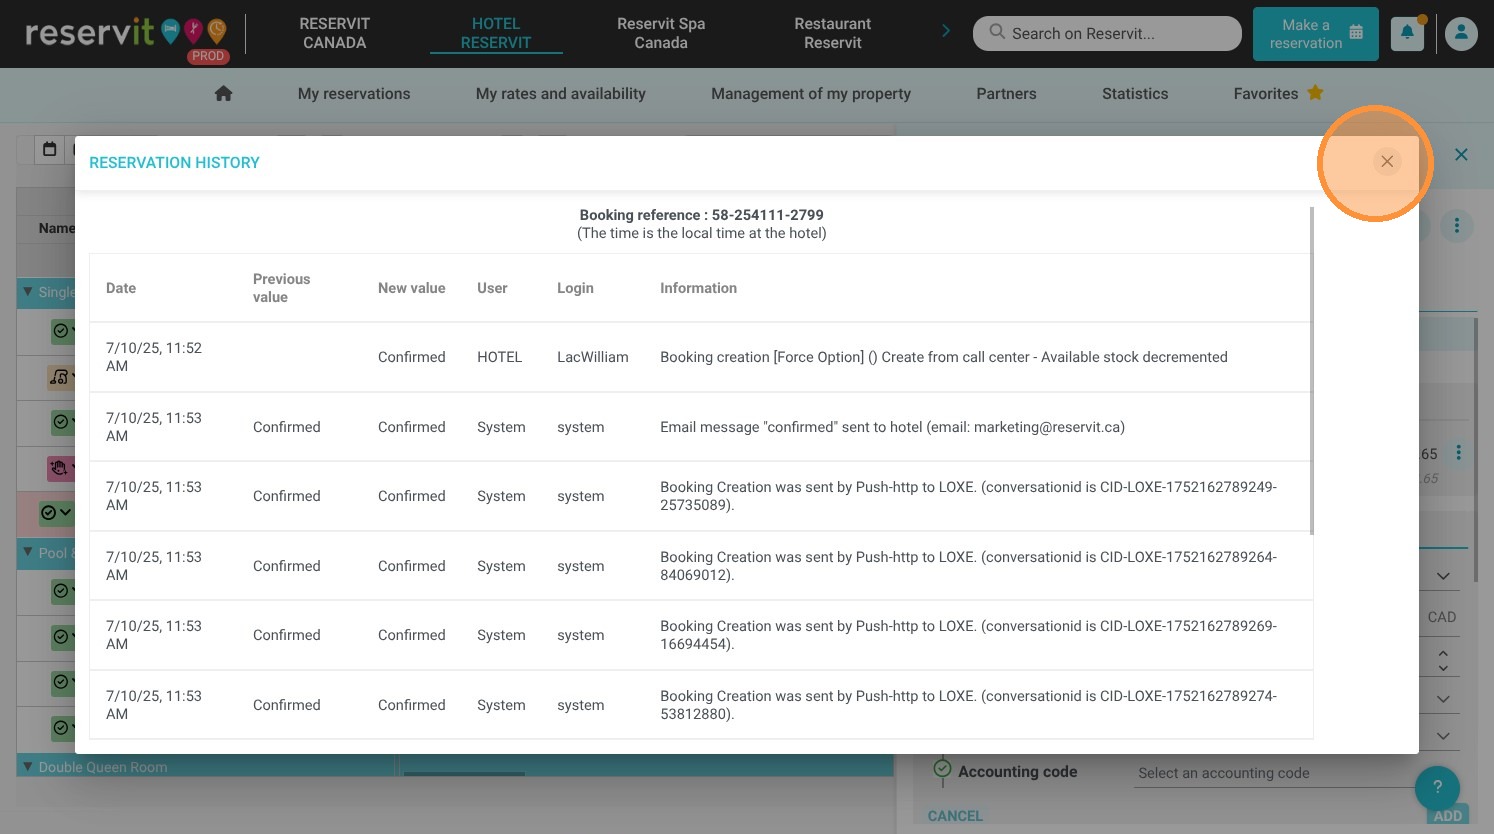
  • Post Services and Audit History: Use the "Add a service" link to add incidental charges to the guest account on the fly, or click the upper three-dot menu and select "Historical" to review the reservation's full configuration log.

  • Collapse and Return to the Grid: Click the close cross ("X") icon at the top right of the side panel to instantly hide the tray and return to full-screen management of your property's room availability grid.

Why follow this guide? Utilizing this integrated calendar workflow saves your front-desk team valuable time during peak arrival and departure windows by consolidating reservation edits and billing tools into a single layout. It optimizes operational efficiency, minimizes distractions, and reduces navigation errors, allowing your staff to focus entirely on delivering an exceptional guest experience.

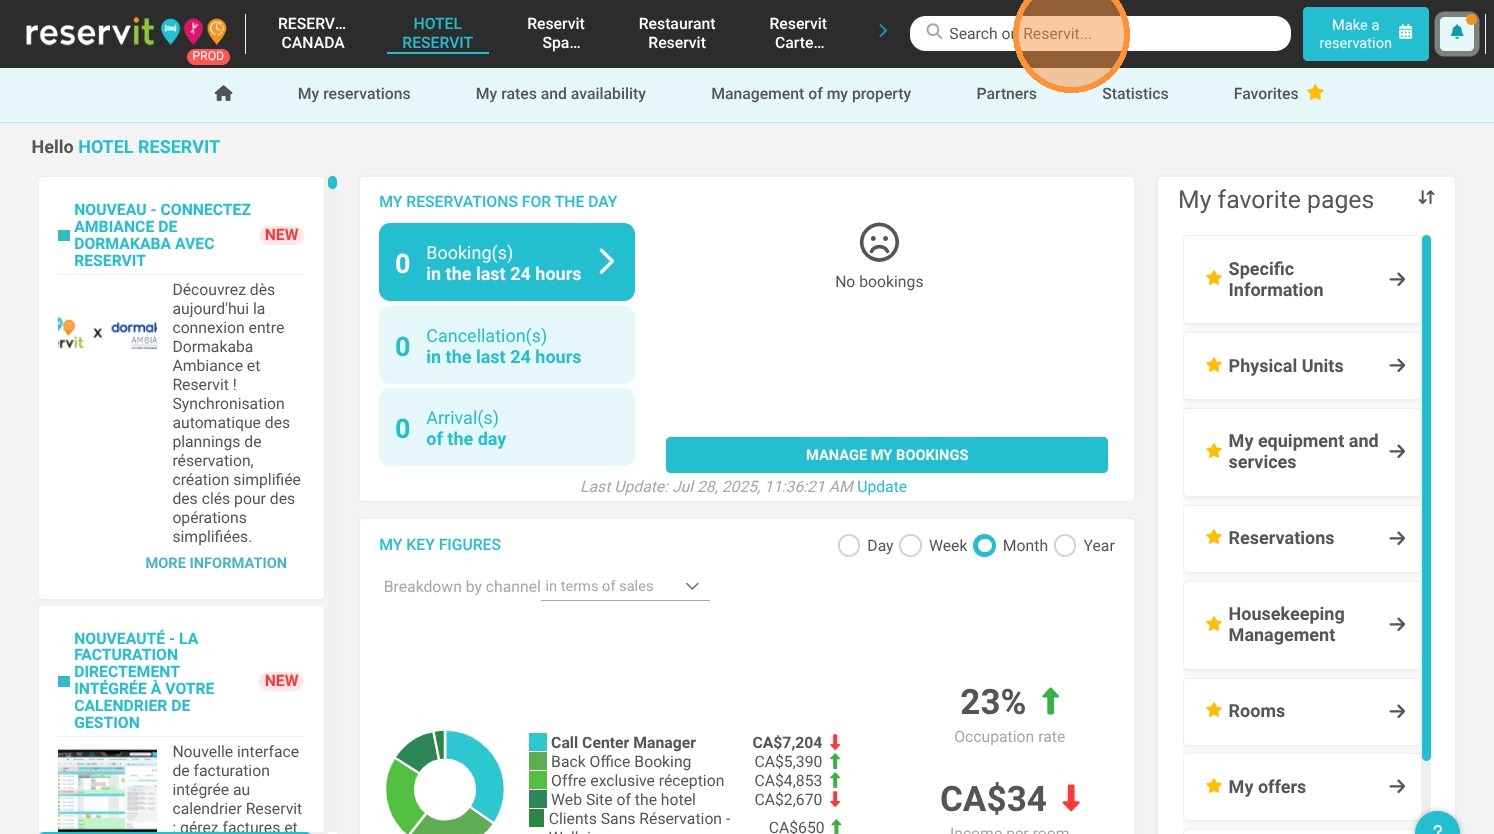
1. Click on the top right "Search on Reservit..."

https://colony-recorder.s3.amazonaws.com/files/2025-07-28/5162d77b-72a7-4123-bb5a-0efe53a6b380/ascreenshot_c82e3ef778ed44b78f4776a1756755c9_text_export.jpeg

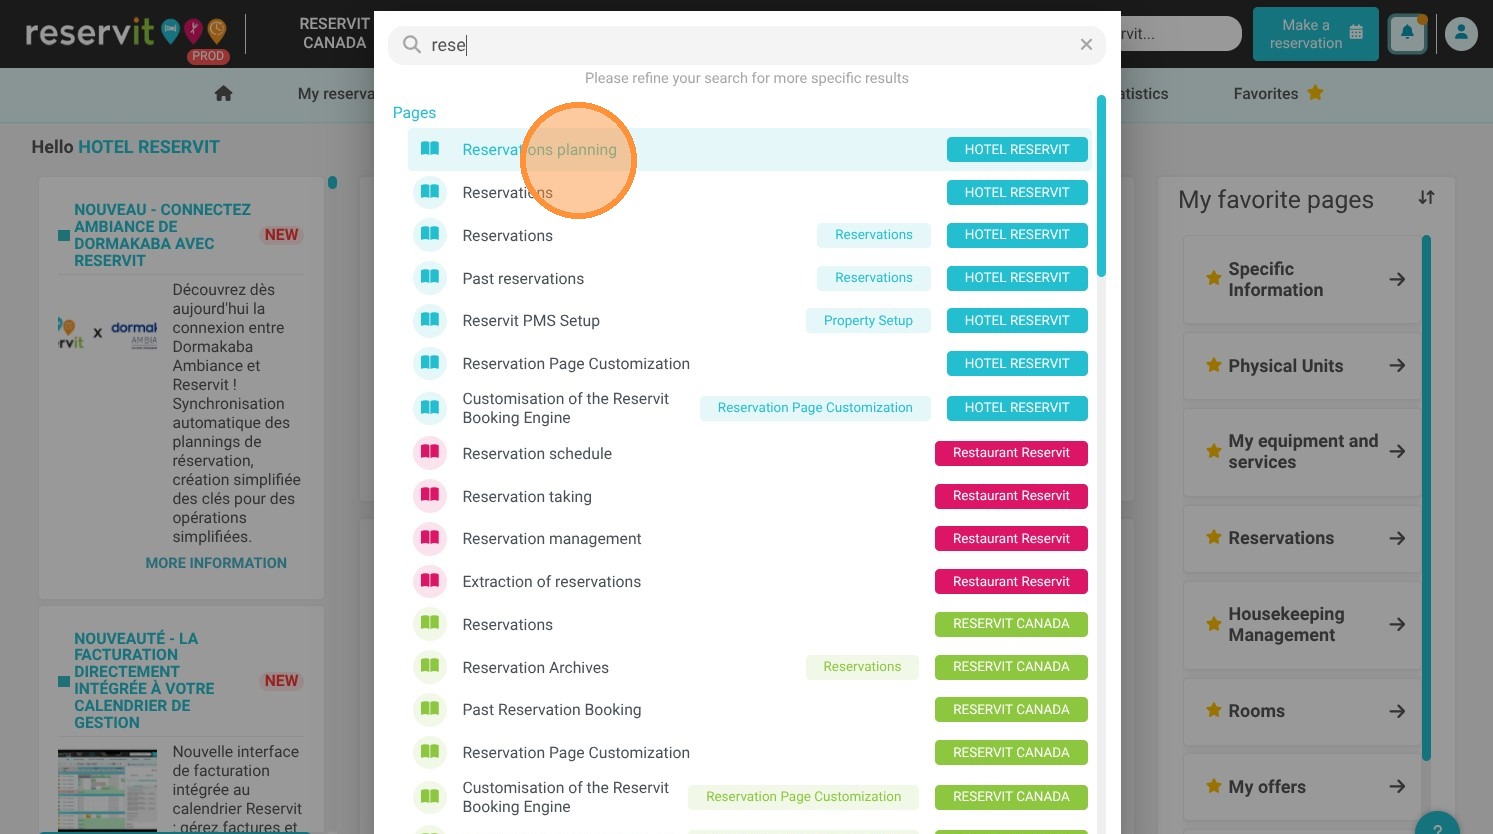
2. Go to the page "Reservations planning"

https://colony-recorder.s3.amazonaws.com/files/2025-07-28/f74614ce-3d4f-448a-9849-2f5736824ef4/ascreenshot_d2f34d444ea14d9a9be25eec85cdb9b7_text_export.jpeg

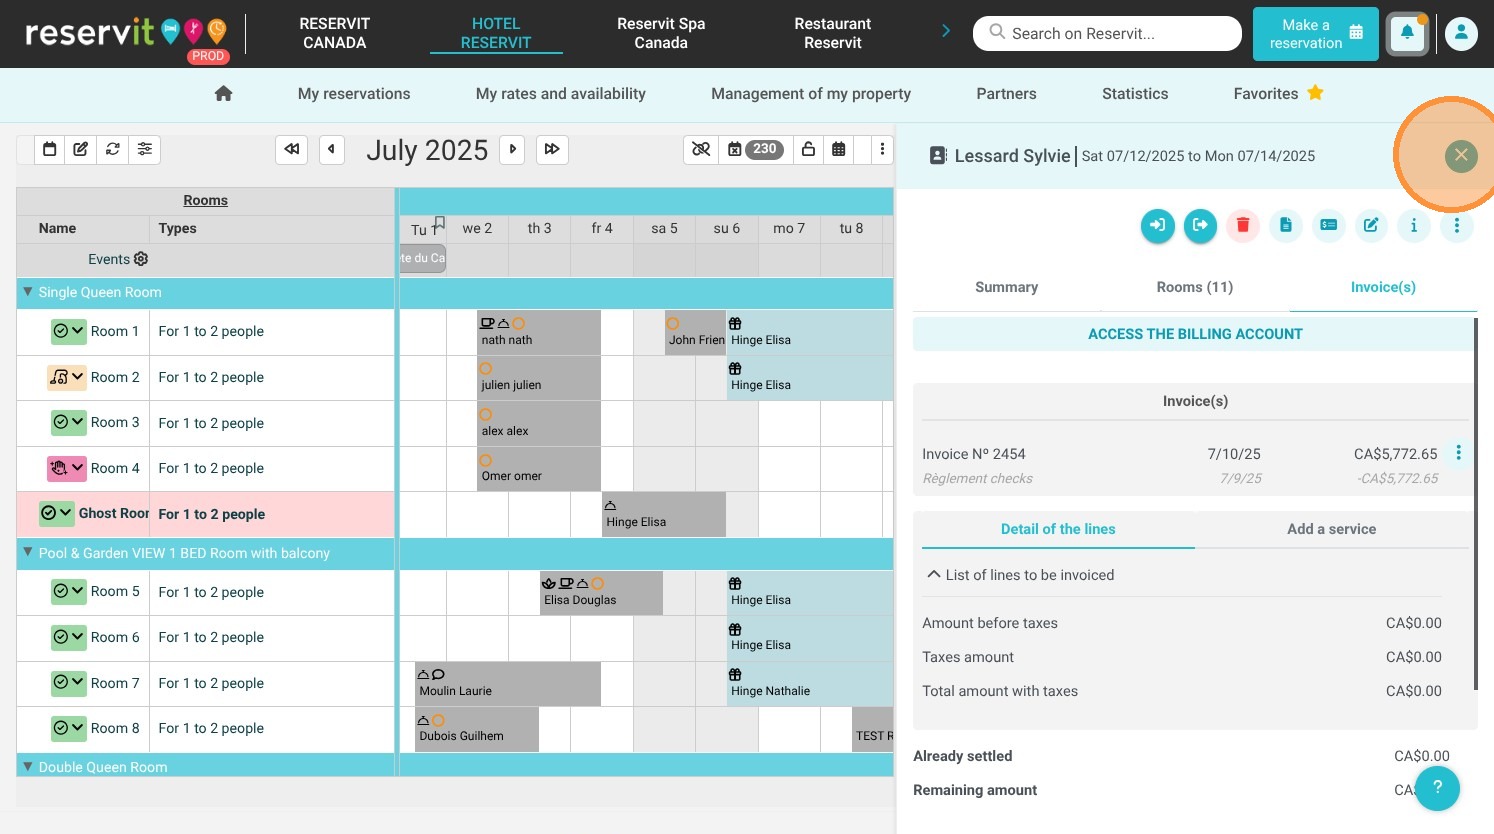
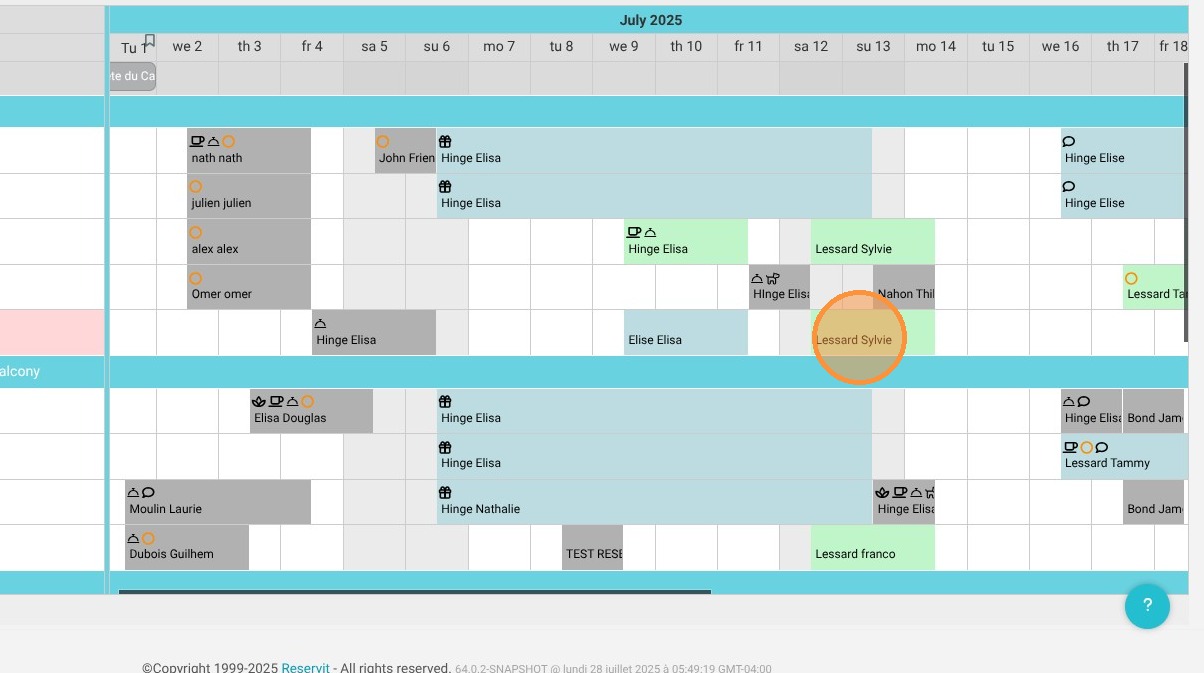
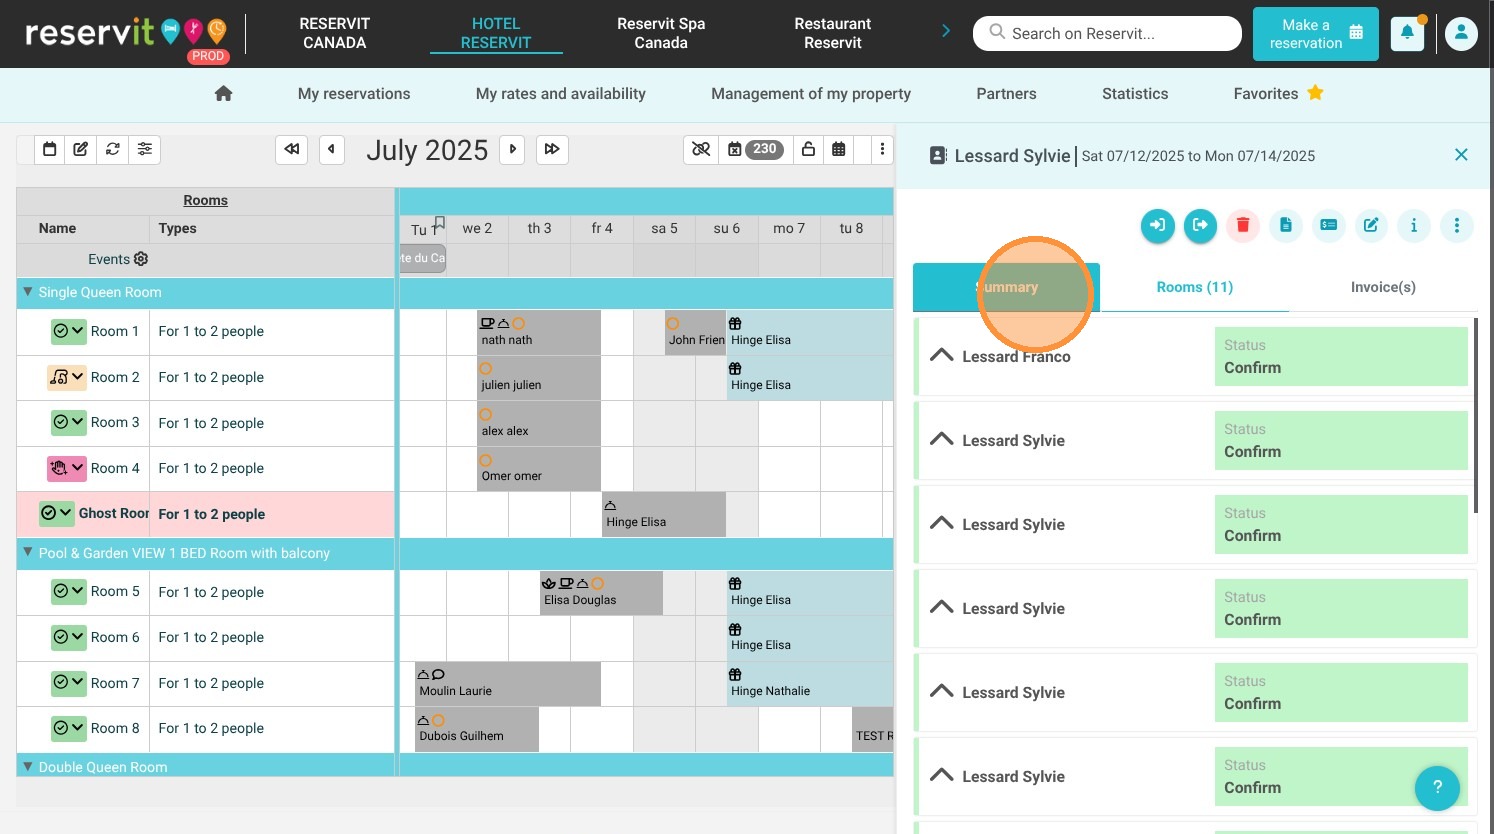
3. Let's take the example of a reservation in the name of "Sylvie Lessard."

Left-click on the reservation.

https://colony-recorder.s3.amazonaws.com/files/2025-07-28/bd68a5b1-261e-4570-a704-d3ef59d32712/ascreenshot_fb80201832ce41d48ca523e5508b7f08_text_export.jpeg

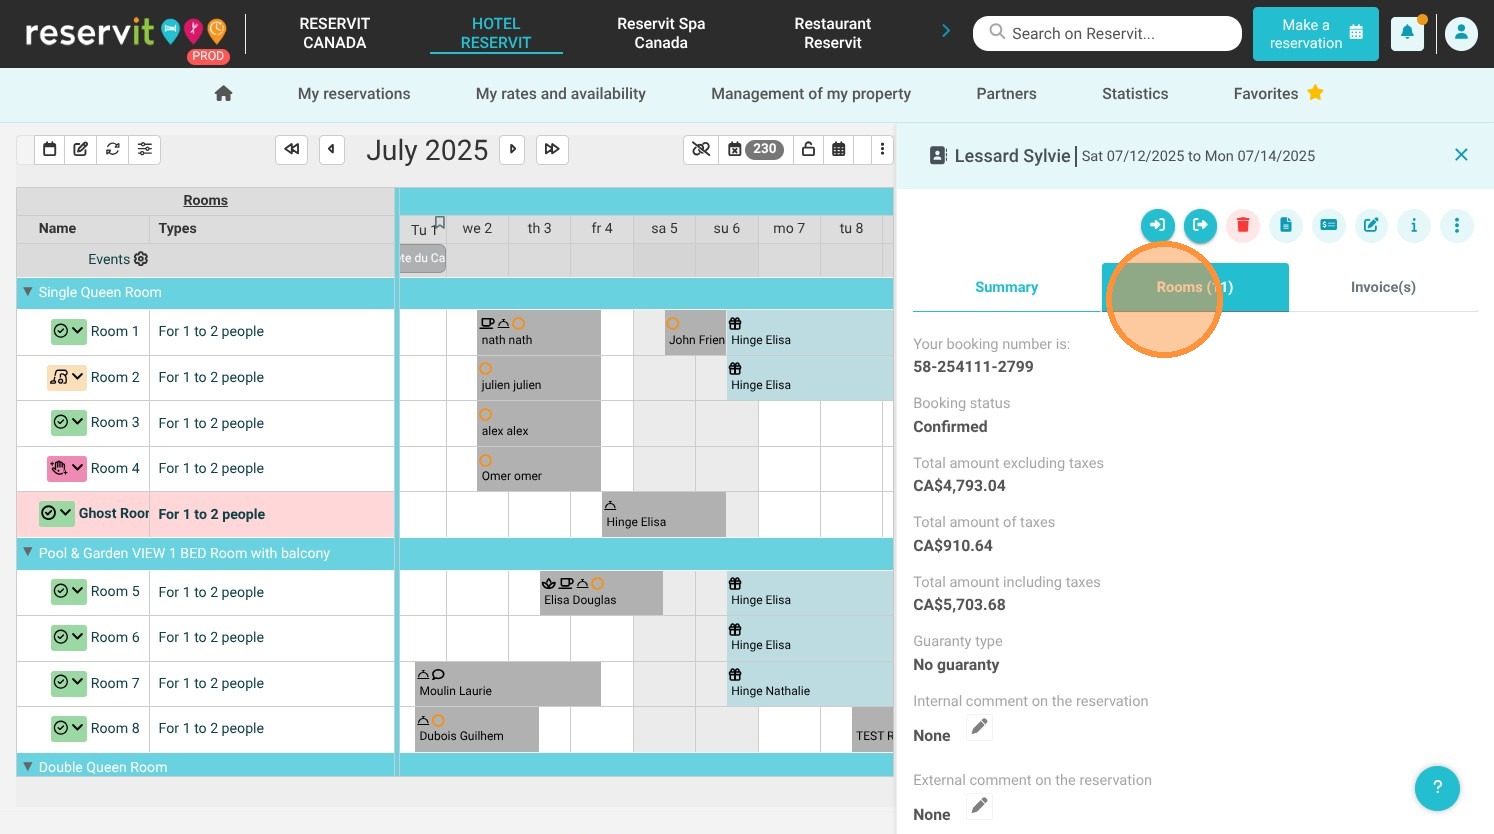
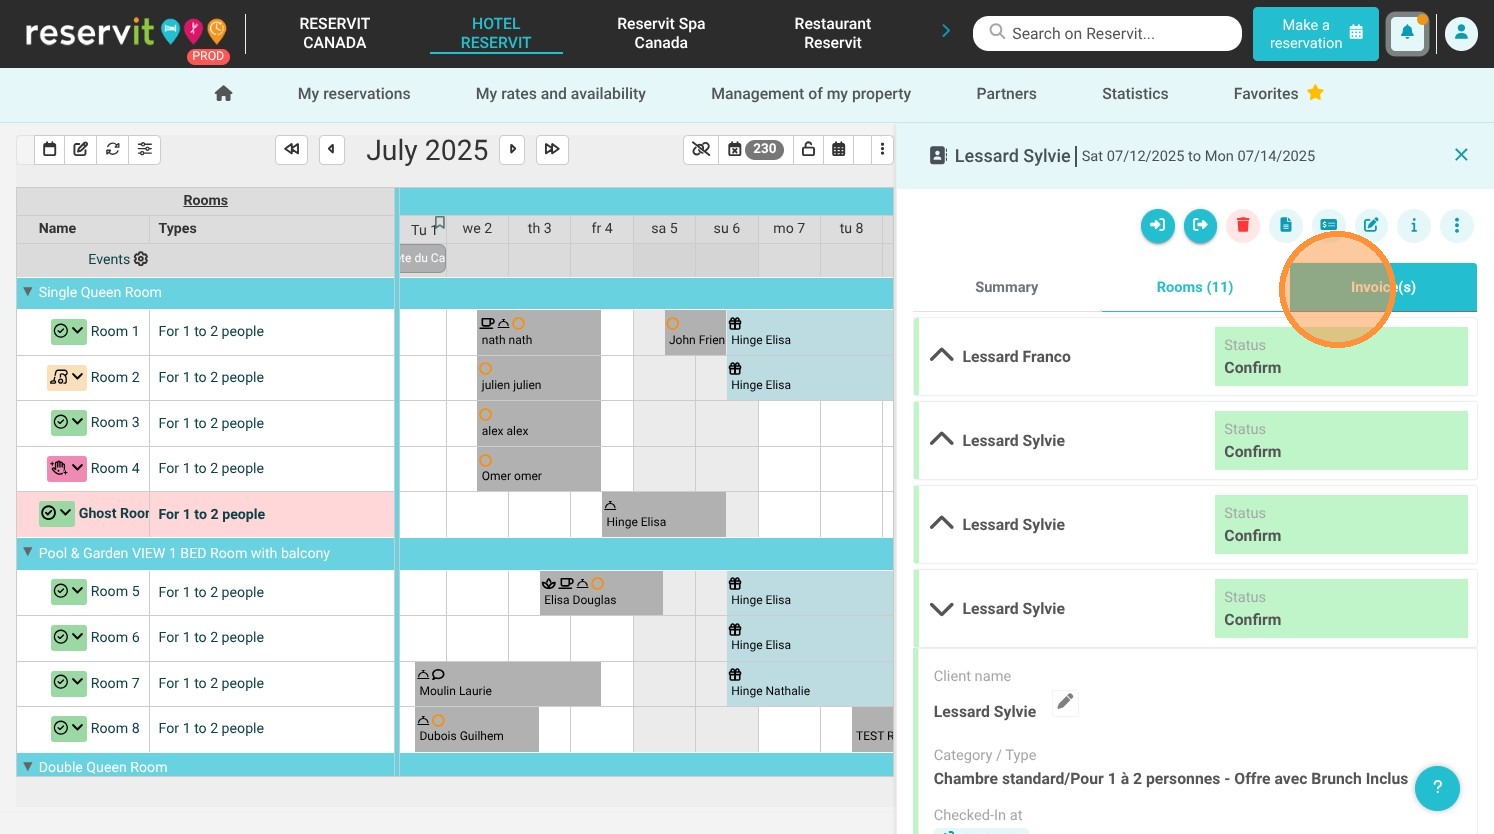
4. Here are the three main tabs you'll find:

Reservation Summary: This menu gives you a quick overview of the reservation, grouping together essential information.

Booked Room or Unit Details: Here you'll find all the information specific to the booked unit.

Billing: This menu is dedicated to financial management. It includes payments, access to guest account details, and billing account lines.
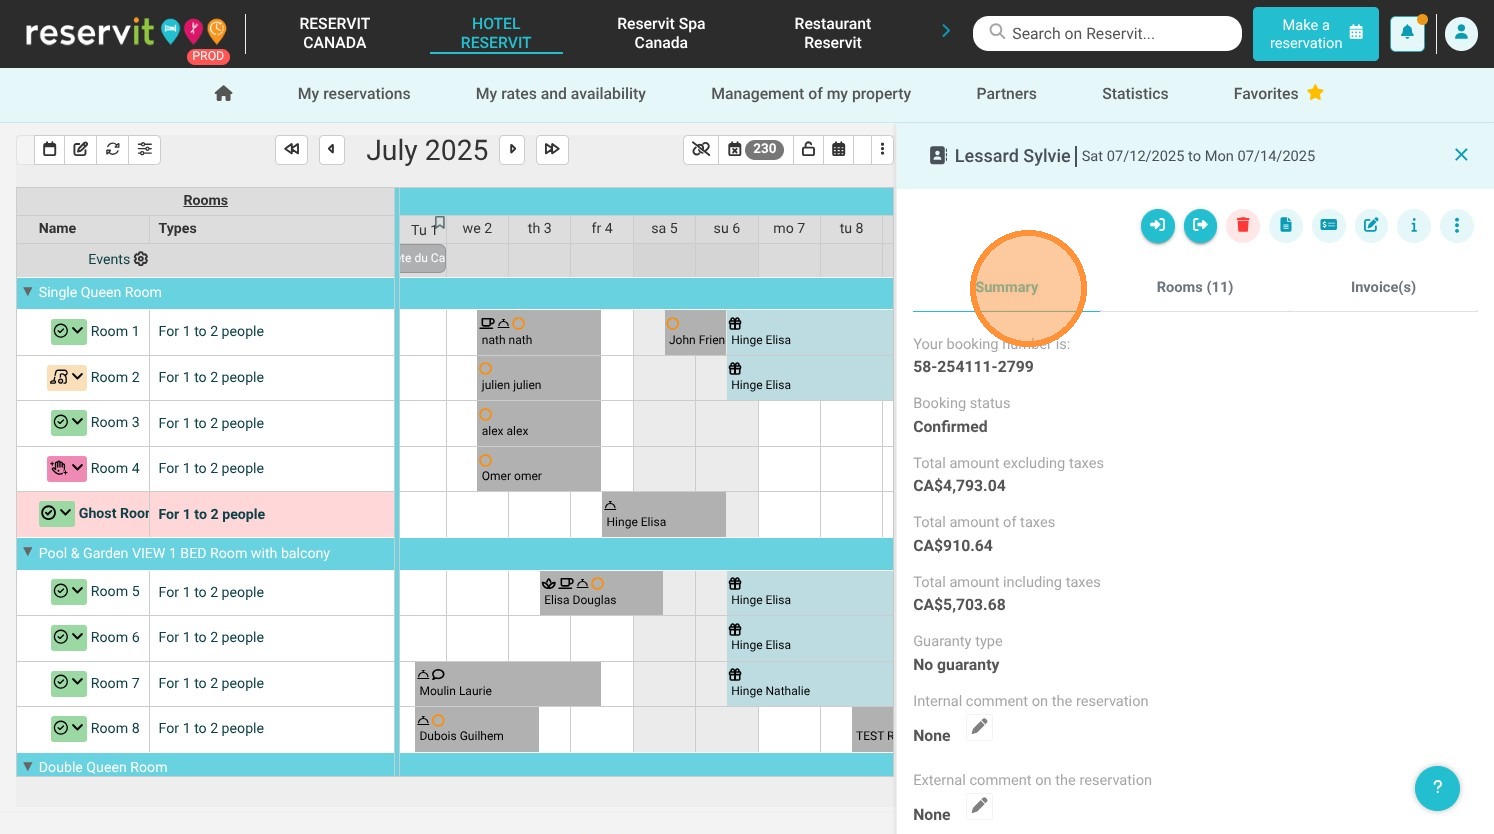
https://colony-recorder.s3.amazonaws.com/files/2025-07-28/345f76ad-0904-4129-a1b3-cd1ffbc378d3/ascreenshot_d56b690a911e40ccb3d9fb07ad7e69f6_text_export.jpeg
https://colony-recorder.s3.amazonaws.com/files/2025-07-28/3e2ce634-3b07-4351-990f-60905c7876ee/ascreenshot_0a118111ed5747b29a136db0cb6448e3_text_export.jpeg
https://colony-recorder.s3.amazonaws.com/files/2025-07-28/c1ffb687-cded-4739-b3e5-9e89a2bc990c/ascreenshot_49154039602048f08387321337e22926_text_export.jpeg
https://colony-recorder.s3.amazonaws.com/files/2025-07-28/2202fdf4-feb1-4ace-ac5f-3633710c629e/ascreenshot_32e86a3098574bea955194907dec6a75_text_export.jpeg

5. Click "Summary"

https://colony-recorder.s3.amazonaws.com/files/2025-07-28/94ffef13-6a01-4ab7-a5f6-b222add992b5/ascreenshot_3334c279a8954b31b123389bad2b8883_text_export.jpeg

6. You need to click on the 360 arrow to now unassign your units

https://colony-recorder.s3.amazonaws.com/files/2025-07-28/d574dfc4-7e61-4596-aac5-9d4db0317a11/ascreenshot_4a67658a5f734b818a5a4a73c4486417_text_export.jpeg

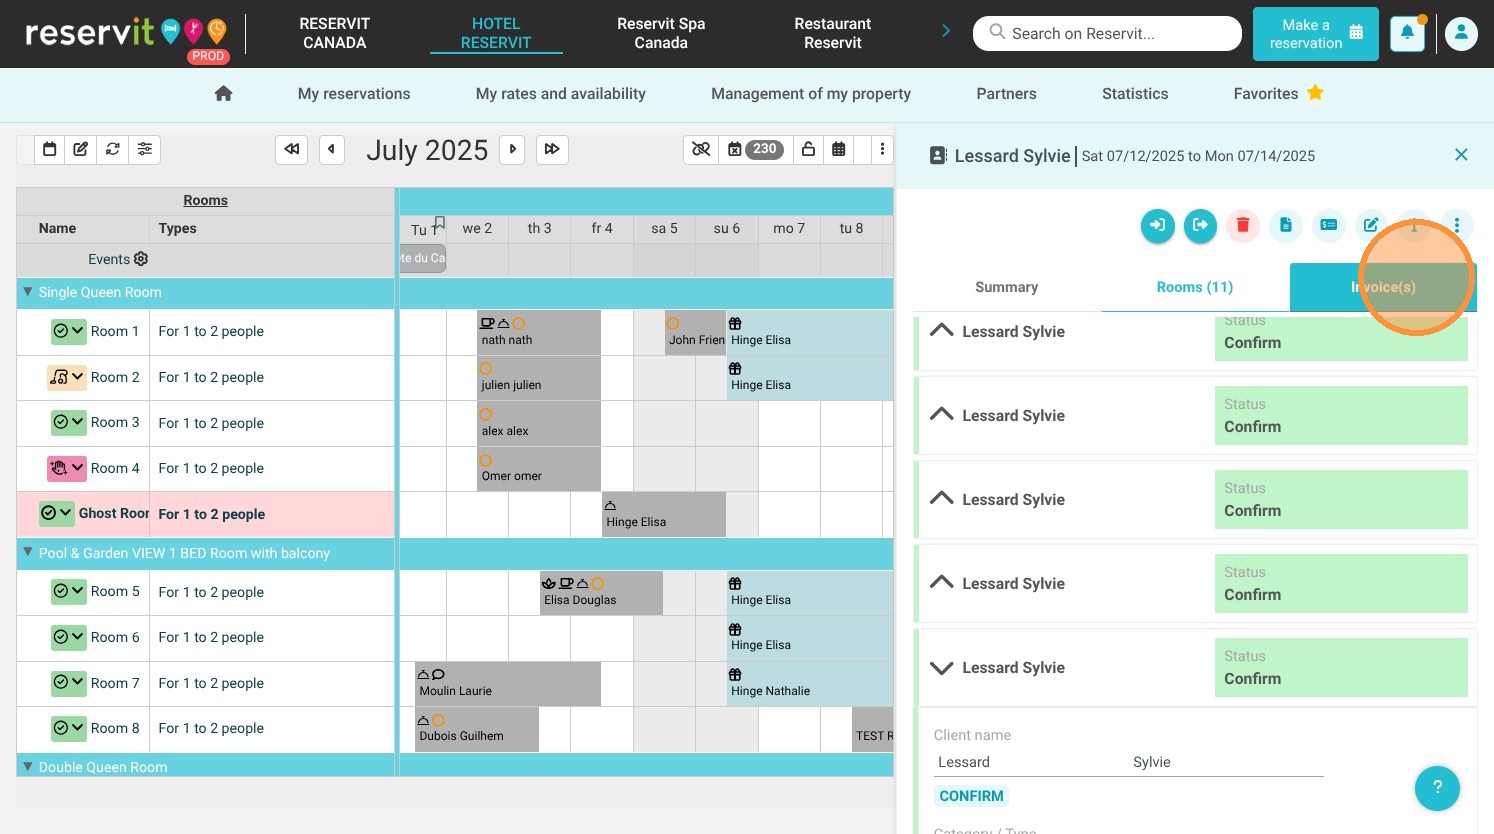
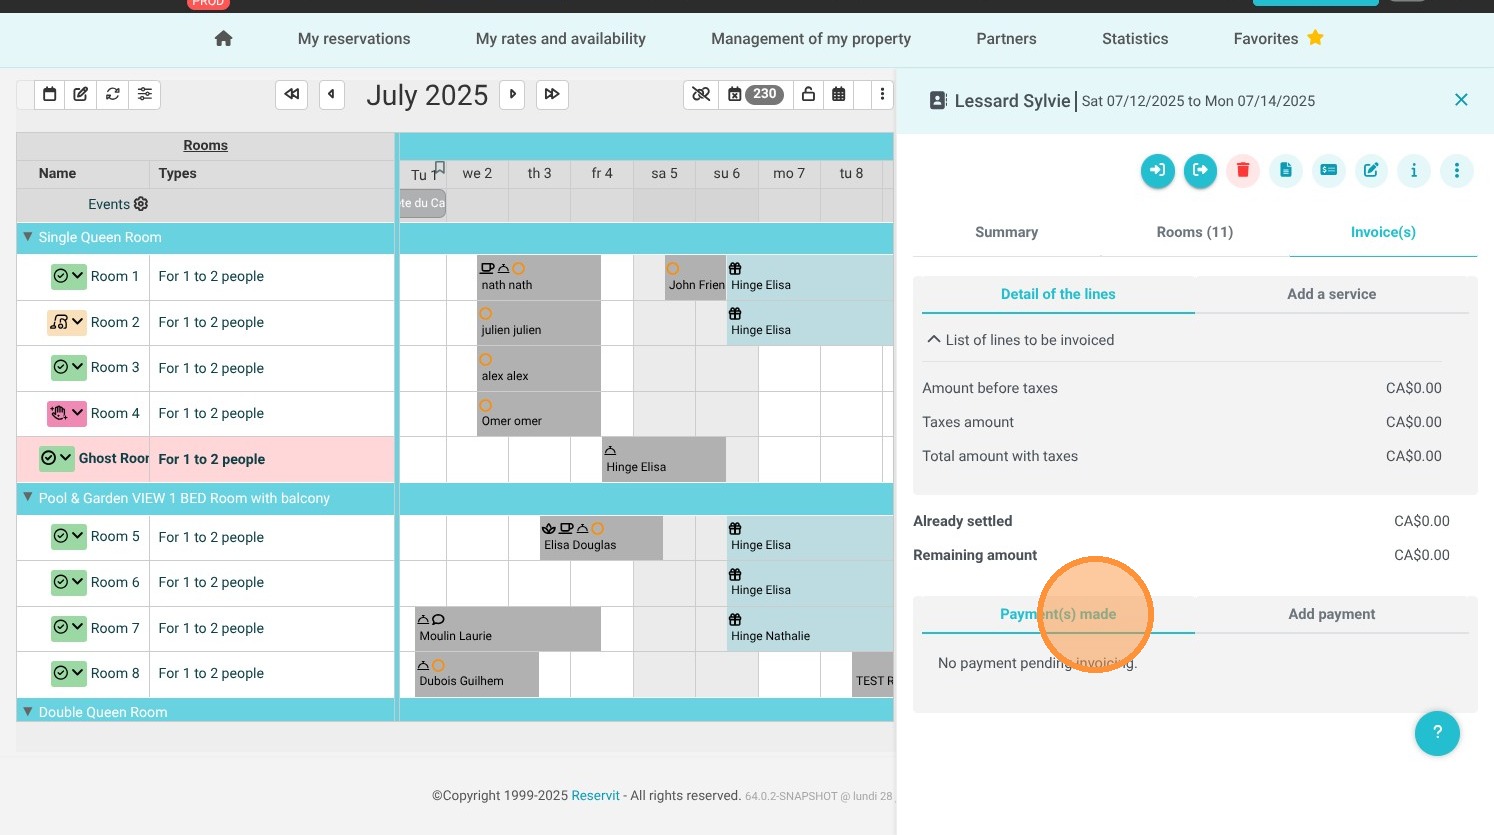
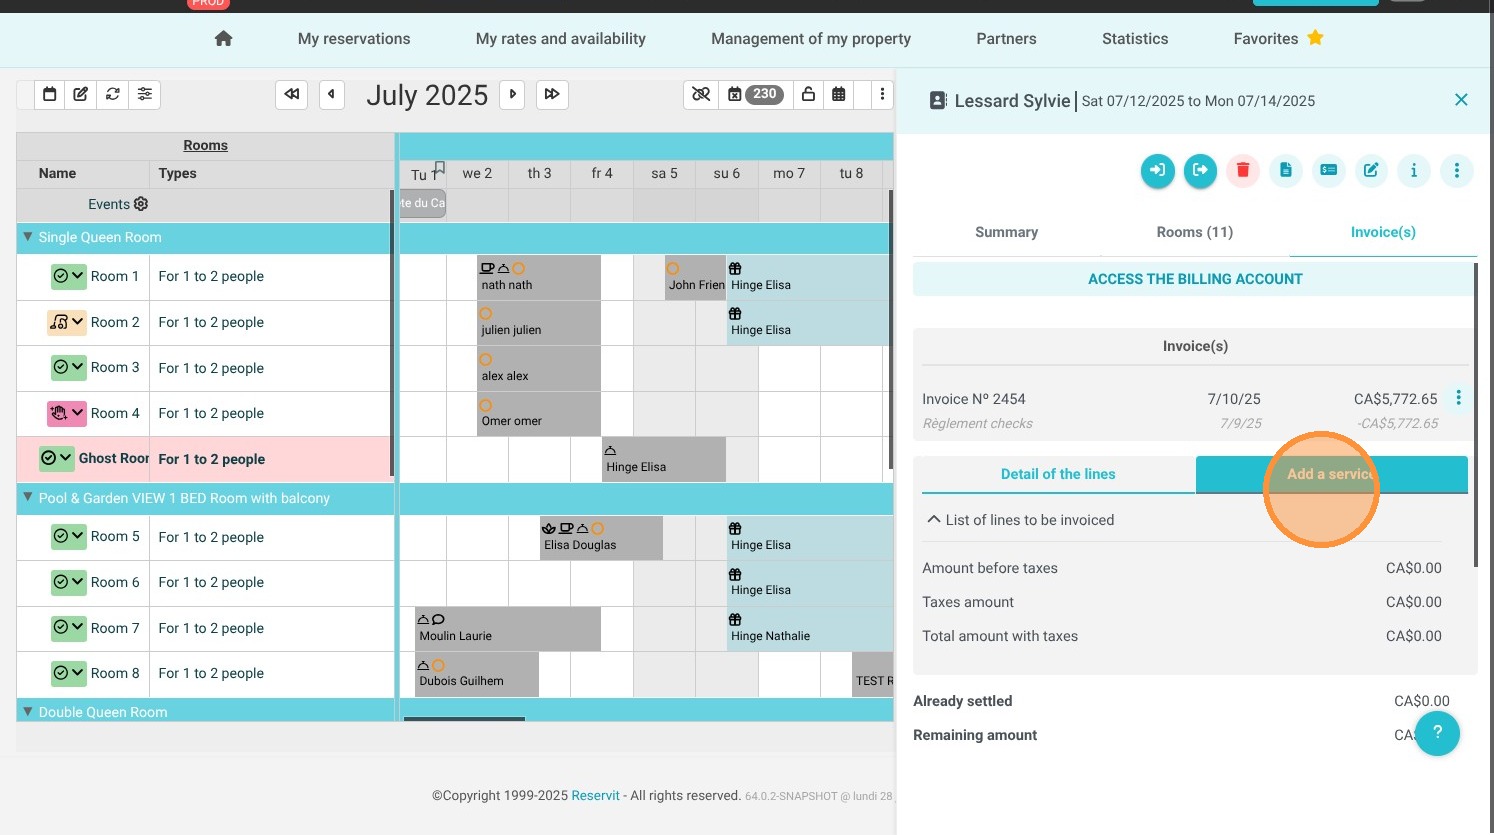
7. To directly manage your invoices, click on "Invoice(s)"

https://colony-recorder.s3.amazonaws.com/files/2025-07-28/0ade3403-bc24-4dcd-afa4-5a067724902d/ascreenshot_2e5feda1218d446e8bfa986467f5c480_text_export.jpeg

8. With the 3 points, it is now possible to consult/print/download/send the invoice from the schedule screen without directly accessing the billing account.

https://colony-recorder.s3.amazonaws.com/files/2025-07-28/46d20fd4-e46e-4b2d-8c1e-b5022e882b5a/ascreenshot_55dfa5583c7a400a9a6470a965763651_text_export.jpeg

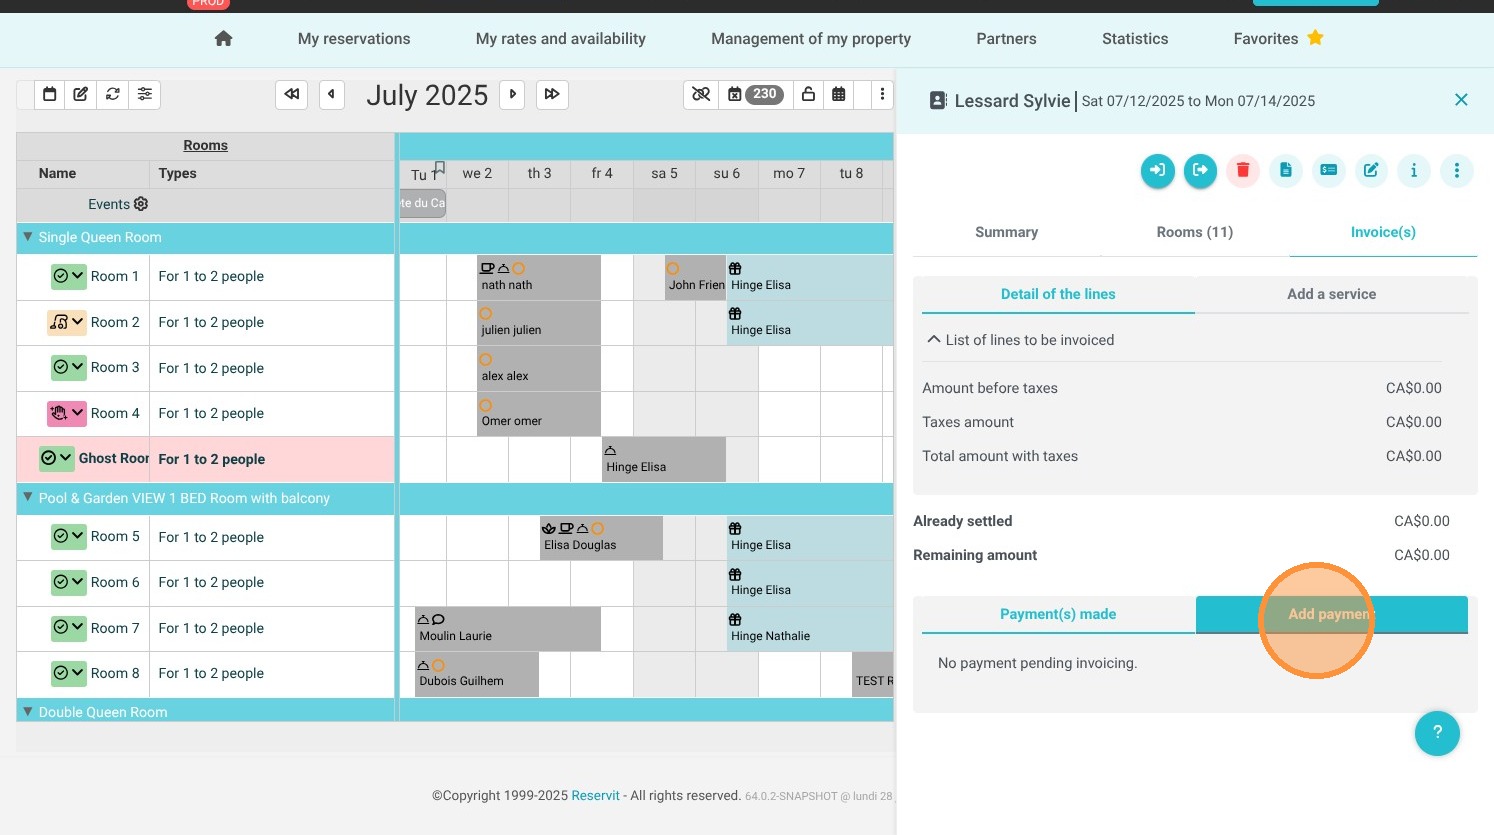
9. Also be able to "Add a payment"

https://colony-recorder.s3.amazonaws.com/files/2025-07-28/c11a7f36-f435-430c-9f3d-d125ef9f864d/ascreenshot_a9584d5e2c5242679c39c2801f3a5bc0_text_export.jpeg
https://colony-recorder.s3.amazonaws.com/files/2025-07-28/f7f31a1e-3239-4022-861f-8dfcbc612487/ascreenshot_362376349710451bb4a0560b7d93fc54_text_export.jpeg
https://colony-recorder.s3.amazonaws.com/files/2025-07-28/b25b3476-a7a7-4099-b9d0-06433e7b9085/ascreenshot_a86eb1323e724a4f896e452efa377a91_text_export.jpeg

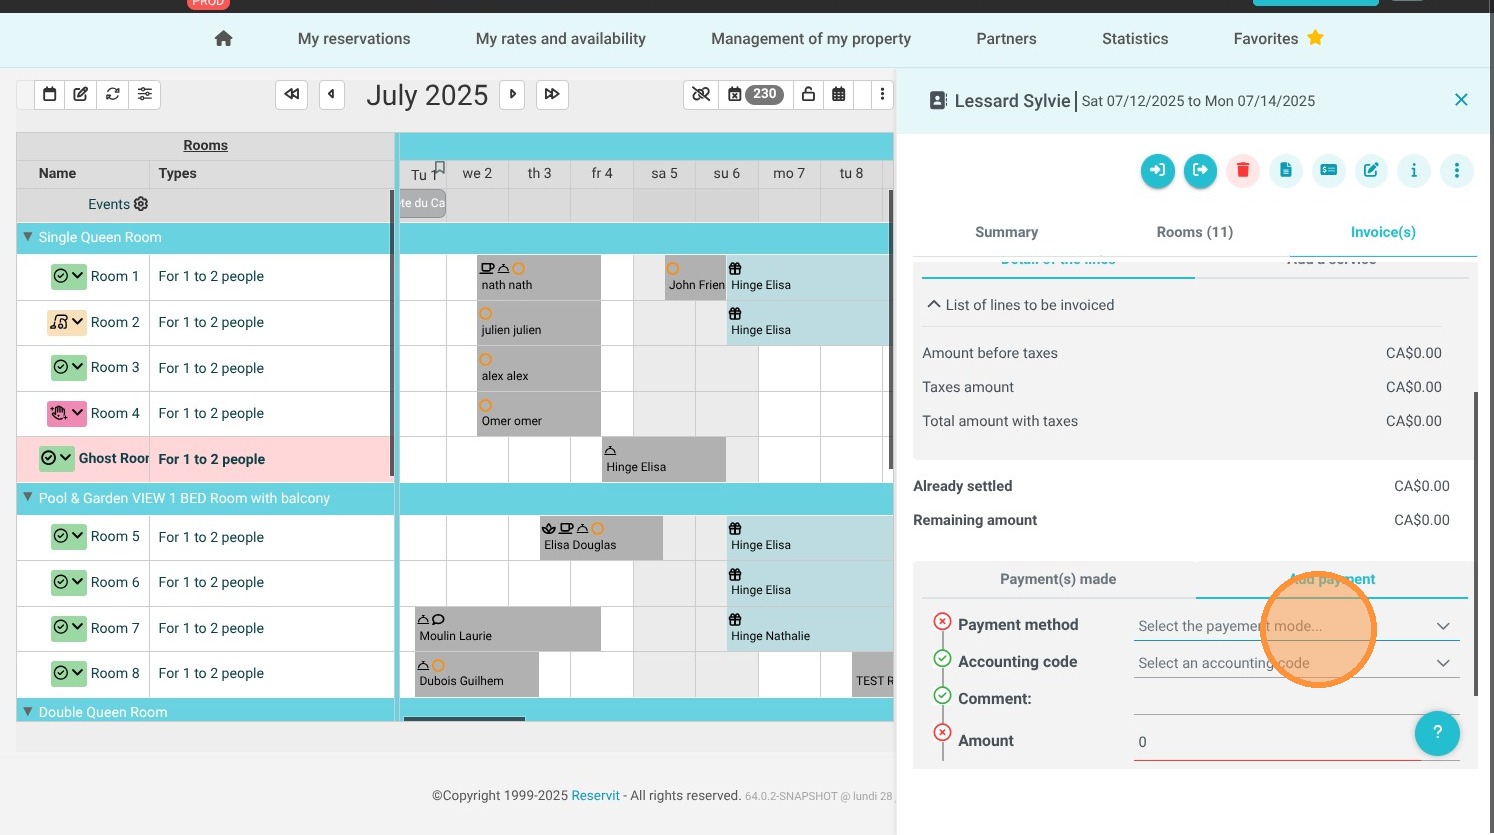
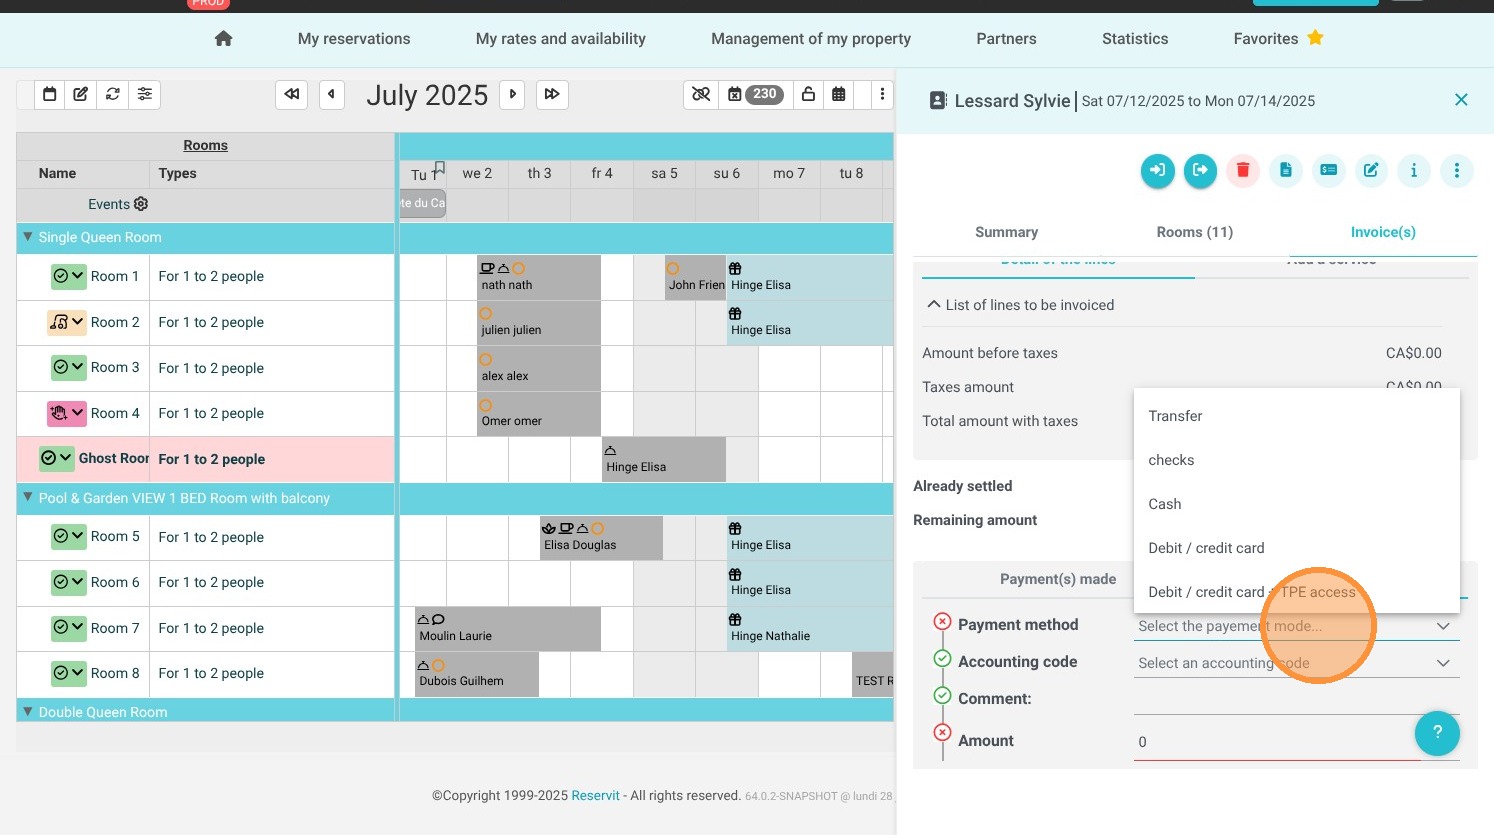
10. Click "Select the payment mode..."

https://colony-recorder.s3.amazonaws.com/files/2025-07-28/6441dca4-9ea5-40da-9c8b-8d407bf808d3/ascreenshot_5fd02dd7e0444b0e8fc7ae27aabdf031_text_export.jpeg

11. It is also possible to "Add a service"

https://colony-recorder.s3.amazonaws.com/files/2025-07-28/c45d3e4e-1a8c-45e1-99ff-eb61dc0b8753/ascreenshot_715913f0eda148c4bb403b7b49ba3049_text_export.jpeg
https://colony-recorder.s3.amazonaws.com/files/2025-07-28/01676aa7-f737-4cd0-bb0f-6d6ccbb18a4f/ascreenshot_2e42dc65366b4ee4846434d4e93fbcf7_text_export.jpeg
https://colony-recorder.s3.amazonaws.com/files/2025-07-28/45a857a7-30ef-4c27-94e7-fbdee488e67c/ascreenshot_a0500c2994854eaeb4e3ebb1a6970cc9_text_export.jpeg

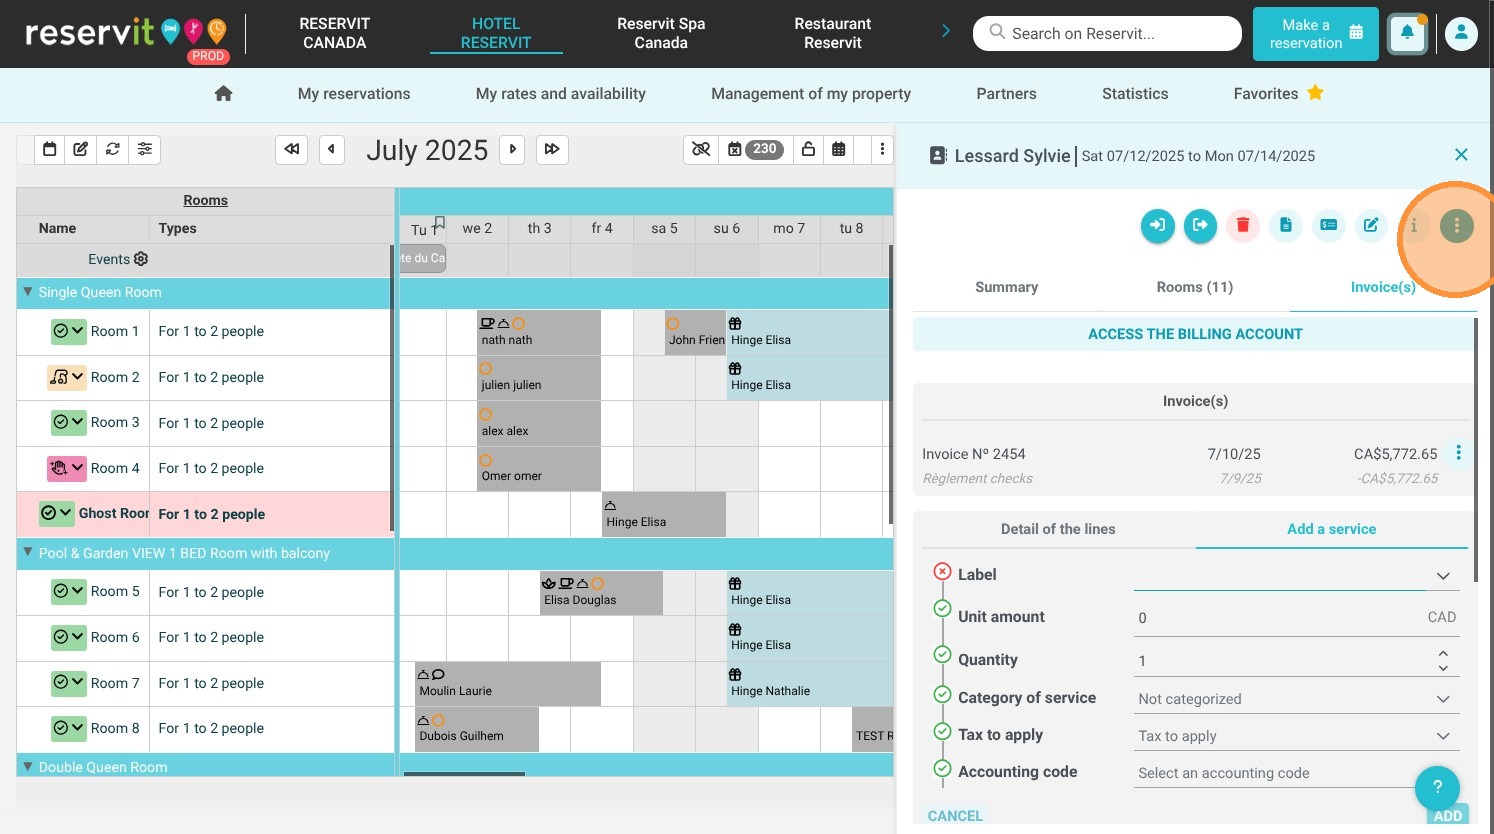
12. The 3 dots at the top right allow you to access other features such as history
Click "Historical"
See History screen

https://colony-recorder.s3.amazonaws.com/files/2025-07-28/6f36d4a5-dfd9-4301-a714-0ce2da15ee43/ascreenshot_e3be8c8689ba4a61b6922a510fc3ce9b_text_export.jpeg
https://colony-recorder.s3.amazonaws.com/files/2025-07-28/8e45d02f-da54-4372-bf95-87947dcbeec2/ascreenshot_6dcdd36145734039bc05aa5890d53f21_text_export.jpeg
https://colony-recorder.s3.amazonaws.com/files/2025-07-28/c9774423-f9c5-429b-914b-823d49b5b963/ascreenshot_4ffcbfa47e6c41d3bc44f85612d9de3f_text_export.jpeg

13. Access to the payment terminal remains unchanged

https://colony-recorder.s3.amazonaws.com/files/2025-07-28/ff8bbb98-4319-440e-9868-29642118a96c/ascreenshot_70869d4bbc414c359fd29ad45d444fbe_text_export.jpeg
https://colony-recorder.s3.amazonaws.com/files/2025-07-28/a184e3cd-8335-46a6-b157-e6293f33dd76/ascreenshot_d493100665884b3db62e342a84d9fe18_text_export.jpeg

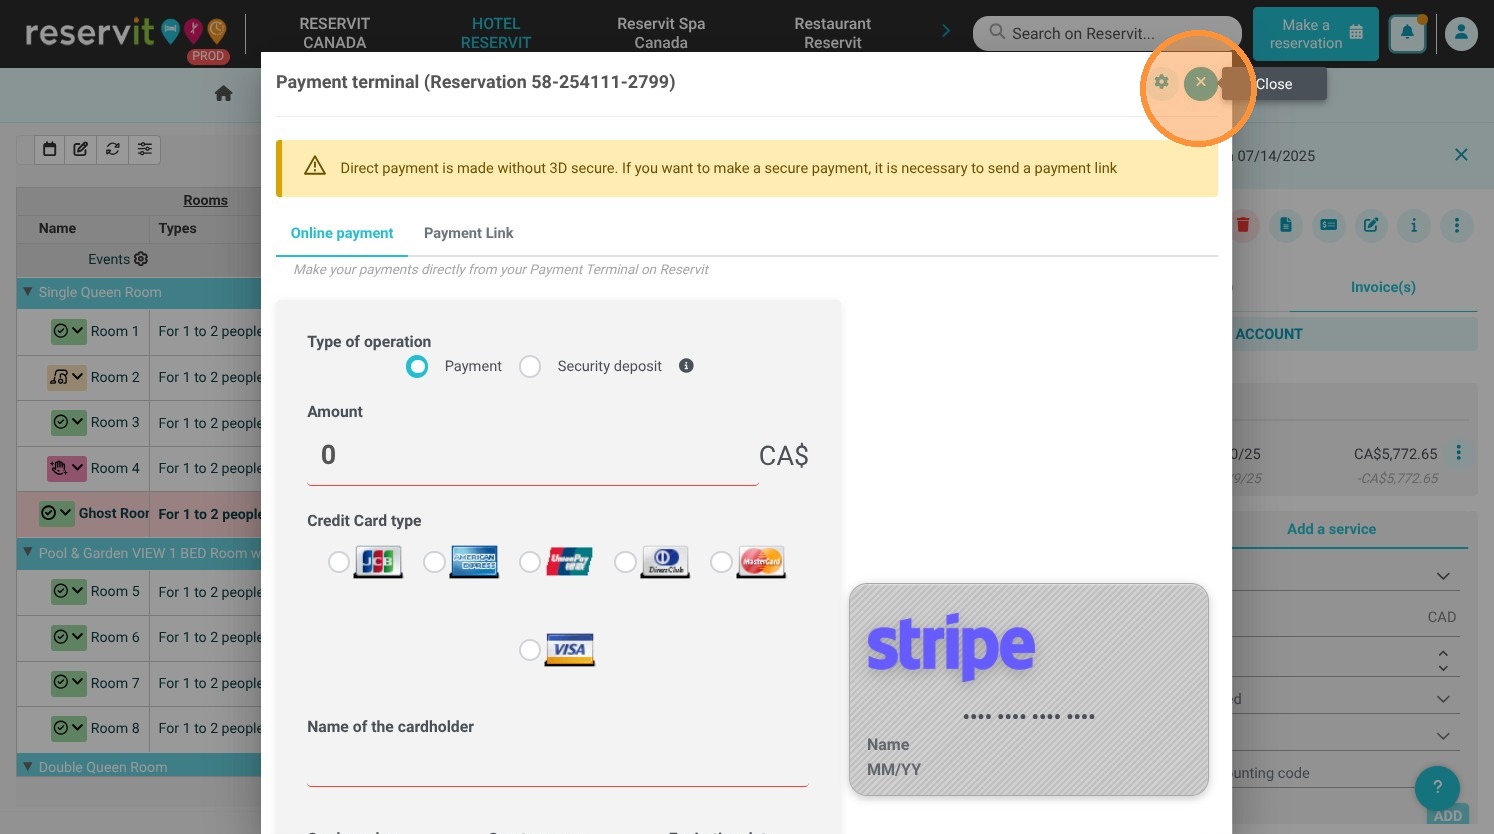
14. To exit the booking panel on the right, click on the cross to return to viewing the schedule in the background!

https://colony-recorder.s3.amazonaws.com/files/2025-07-28/dc5eff1f-8998-4796-a6b0-e80a1c137579/ascreenshot_a34d18befd044ace88e8952d7a3f6a27_text_export.jpeg