Article Summary: This tutorial explains how to effectively configure and customize your property's interactive map within the Reservit platform. You will learn how to upload your custom property visual, personalize location markers, and accurately position individual units or campsites directly onto the layout. By setting up this engaging, visual feature, you provide guests with a more intuitive booking experience, allowing them to confidently choose their ideal spot.
The 5 key steps to set up your interactive map:
-
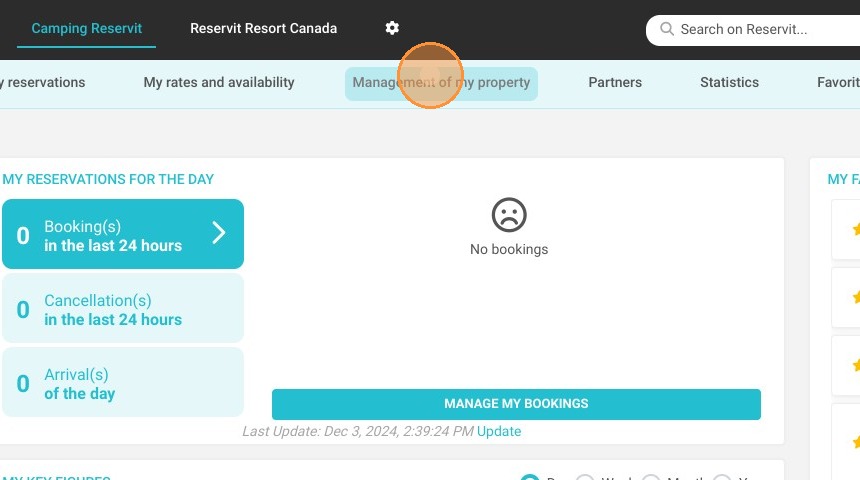
Access the Map Settings: Navigate to the "Management of my property" menu, select "Property Setup," and open the "Interactive Map" configuration tool.
-
Upload Your Visual: Upload the custom image, photo, or illustrated layout of your property that will serve as the background for your map.
-
Customize the Markers: Personalize the appearance of your available units by defining the specific color, shape, and size of your map markers.
-
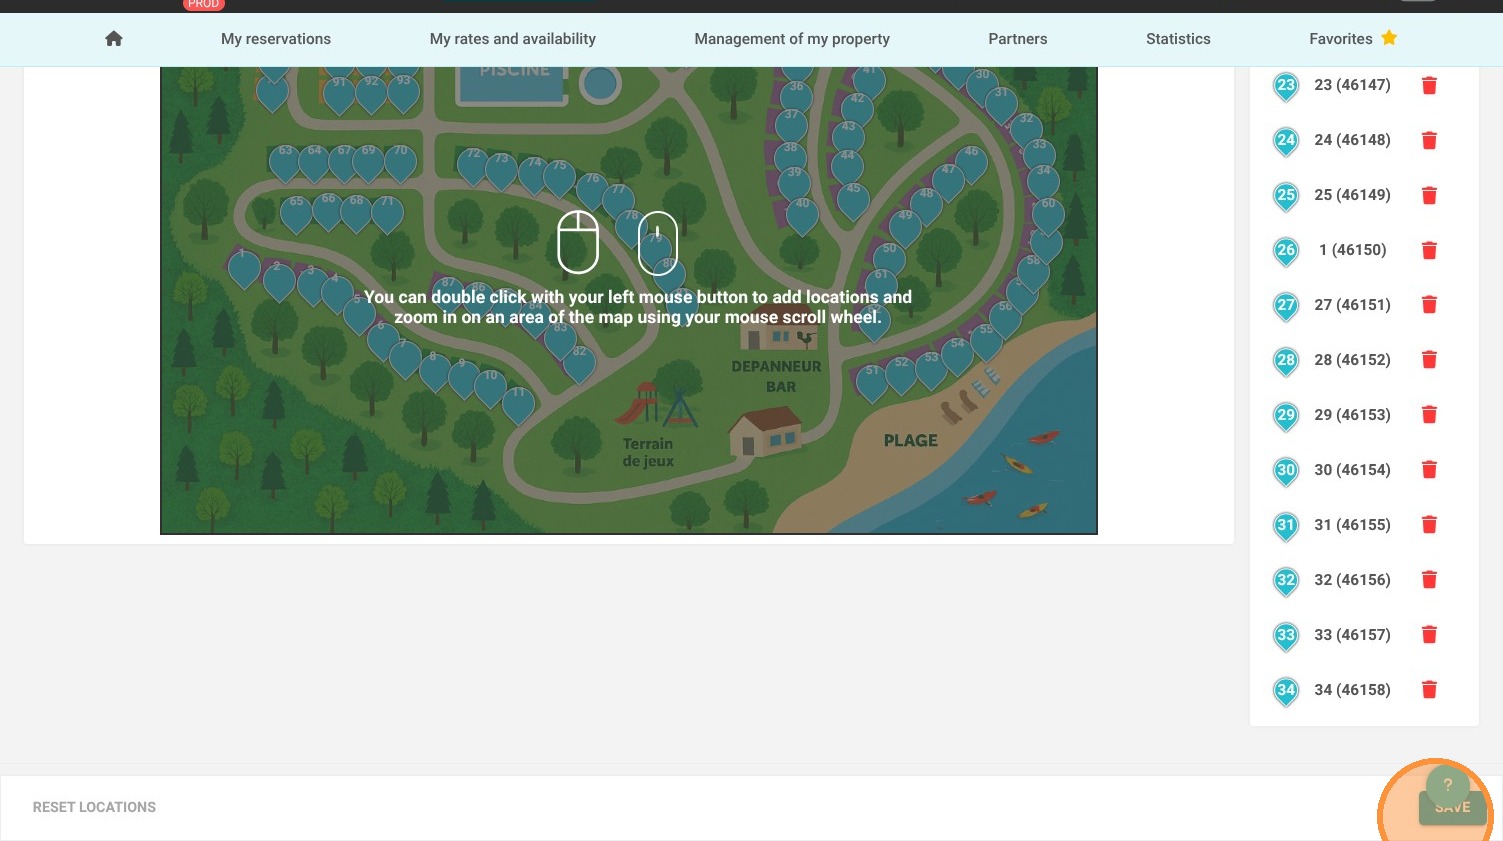
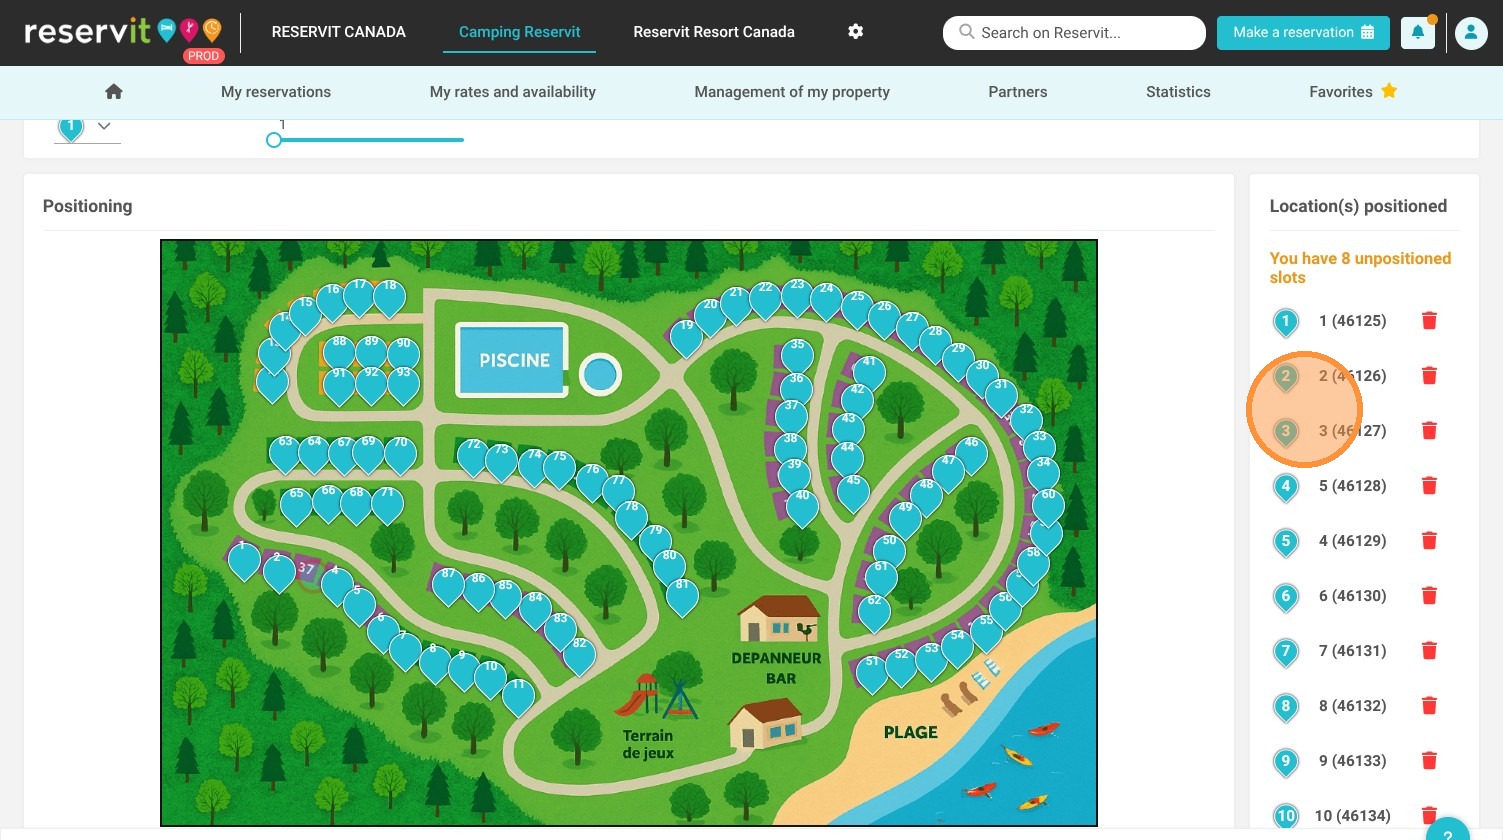
Position Your Units: Double-click directly on the uploaded map to place, assign, or reposition specific units and pitches exactly where they belong on the property.
-
Save Your Configurations: Click the "Save" button to lock in your marker placements and instantly update your interactive layout.
Why follow this guide? Offering a visual, interactive map eliminates guest confusion and drastically reduces pre-booking inquiries regarding unit locations and proximity to amenities. This guide saves you valuable time by walking you through the exact setup and placement process, ensuring a flawless configuration that enhances the user journey and drives higher conversion rates.
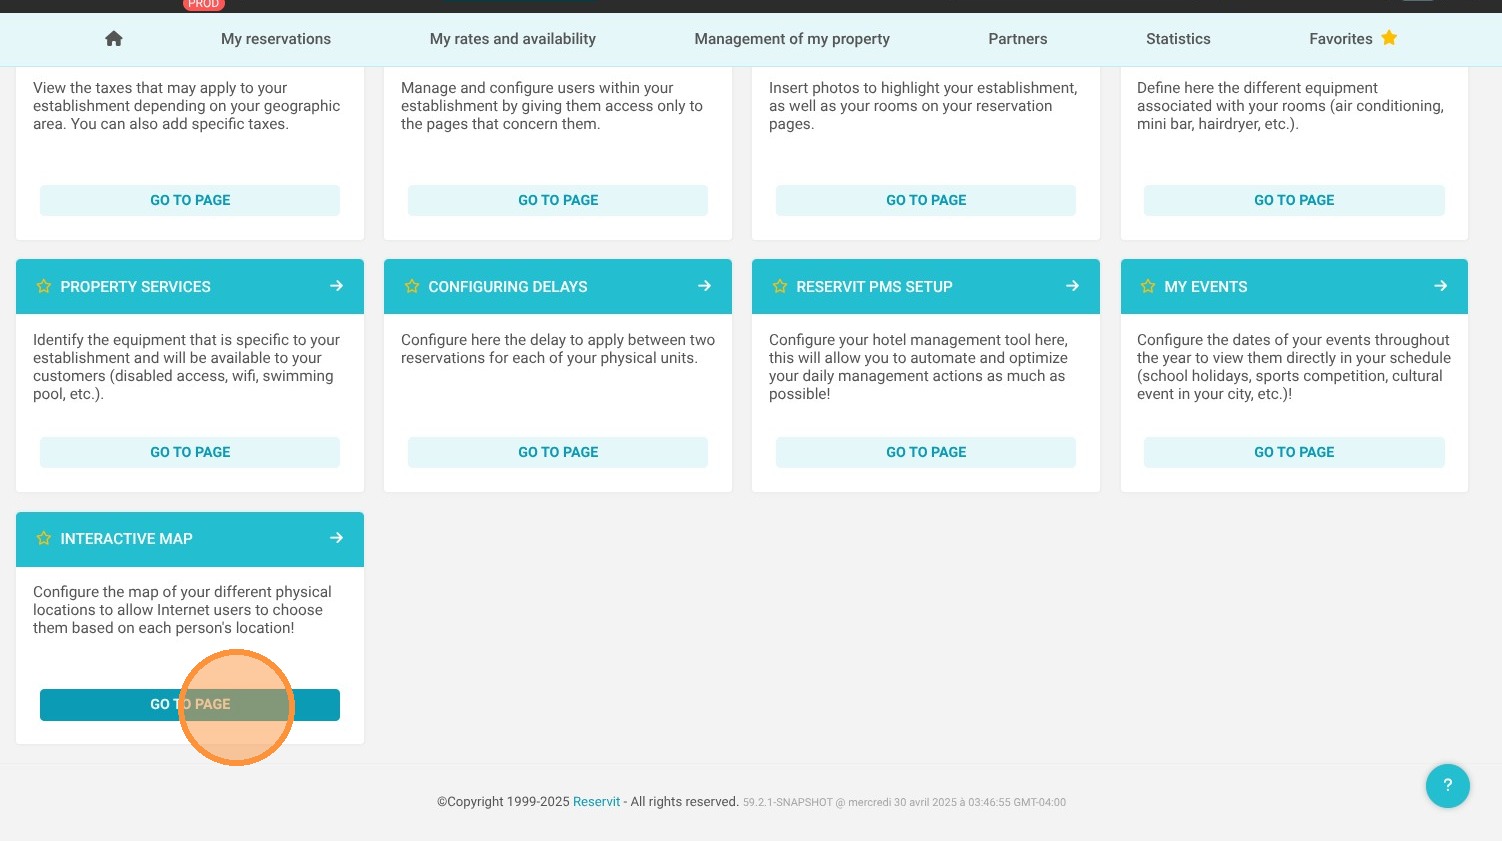
1. Go to "Management of my property" then ''Property Setup" and ''Interactive Map"
2.
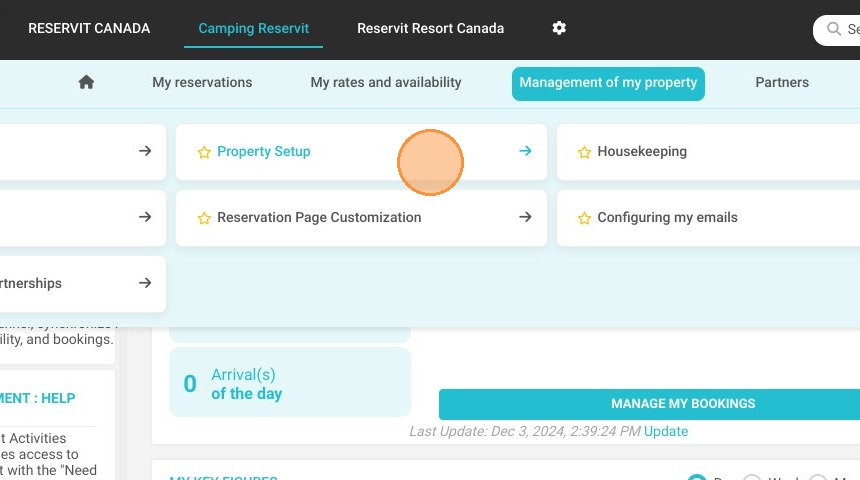
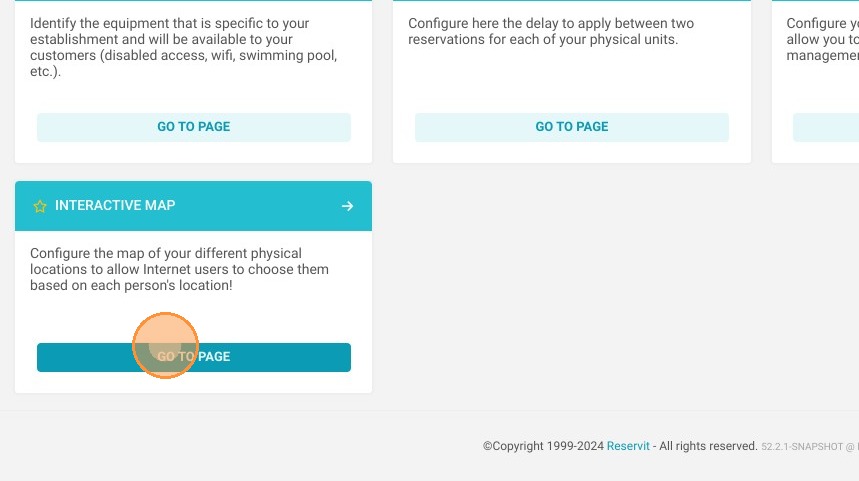
3. Click "Go to page"
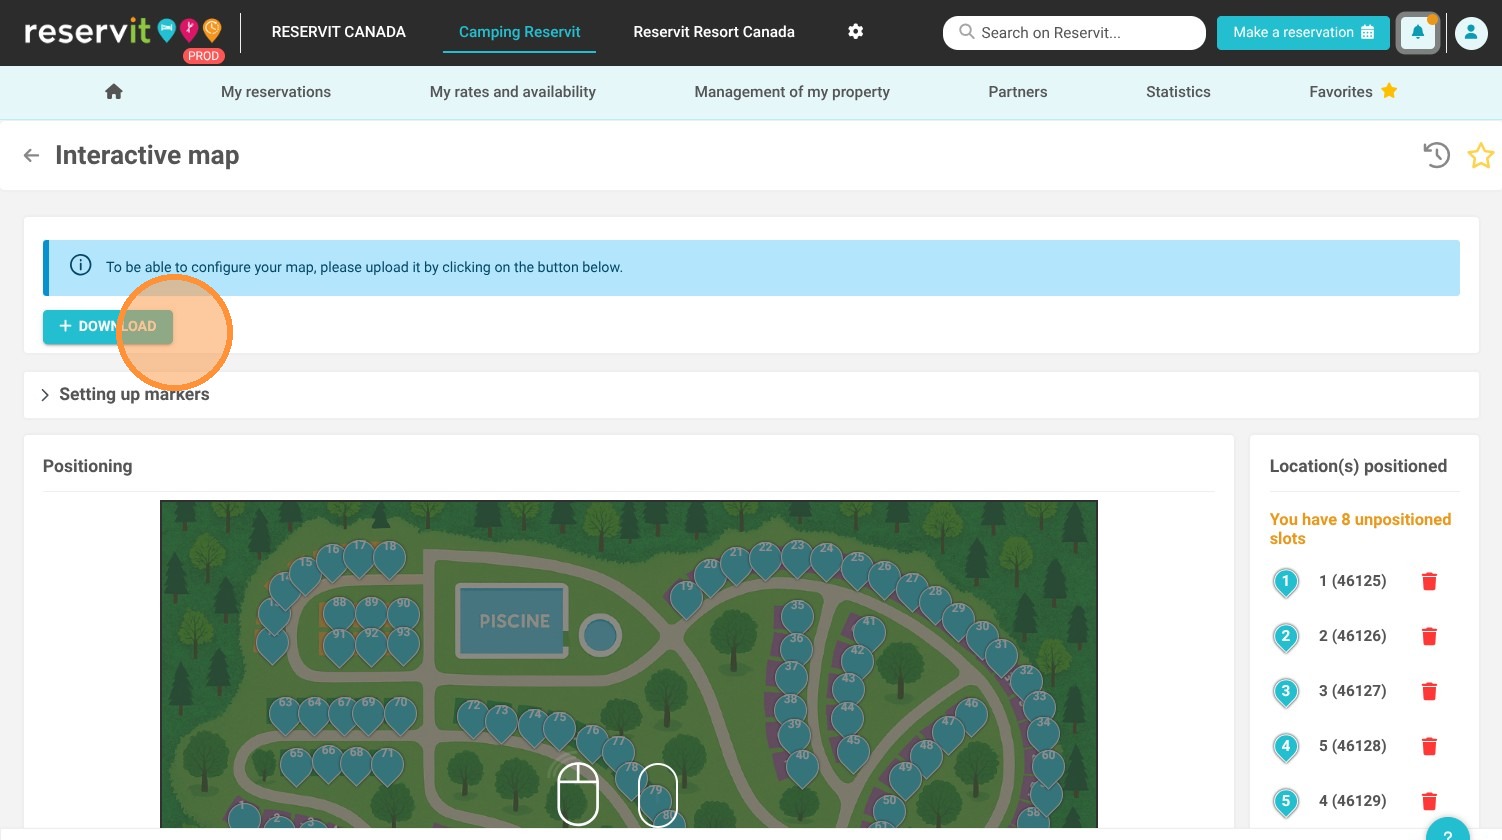
4. First, upload the visual of your map, i.e. the photo on which you will position the locations.
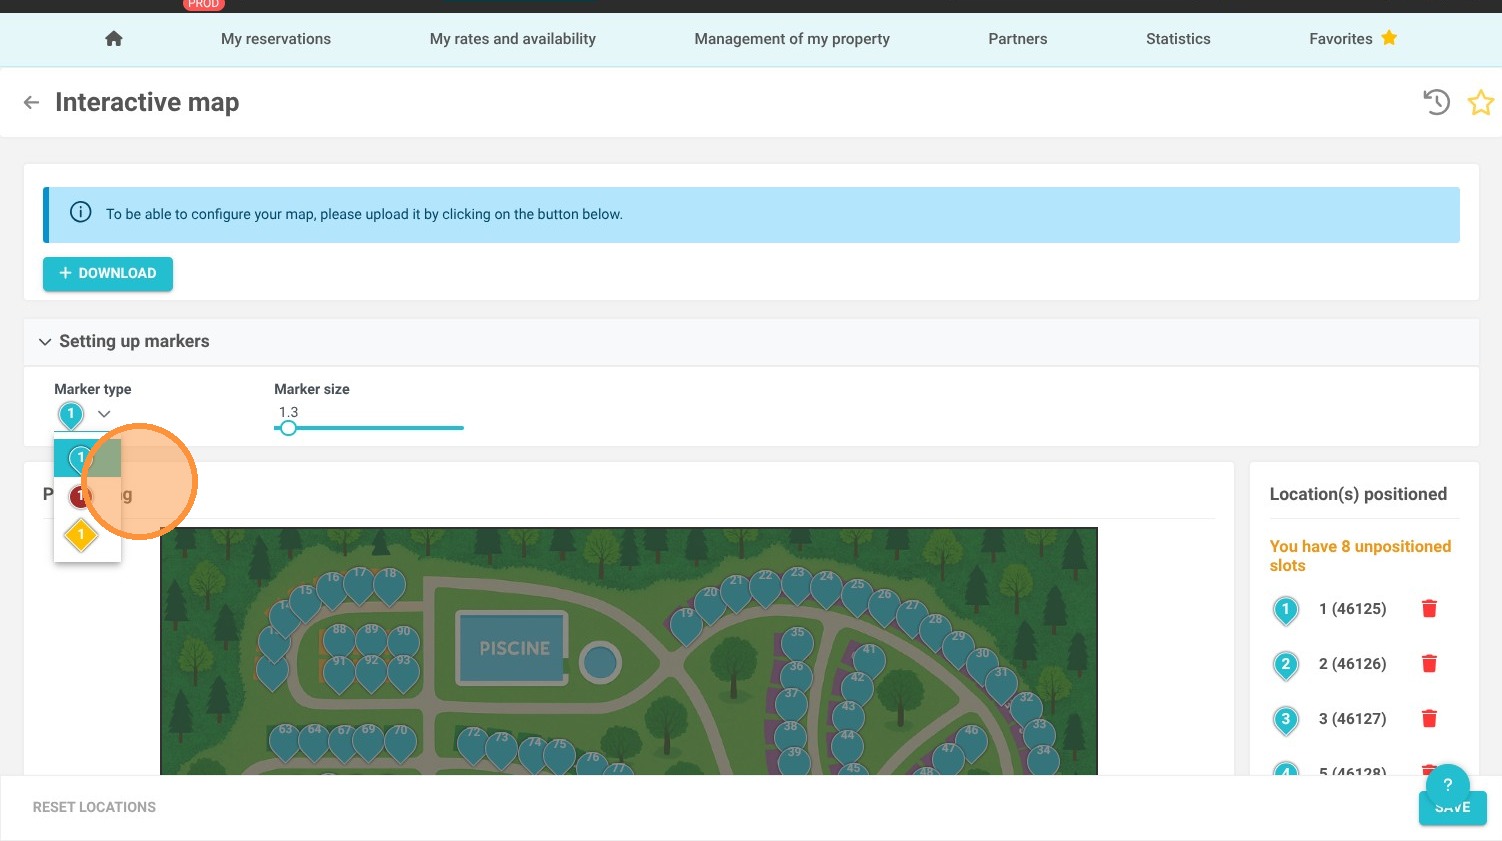
5. Once this is done, you can configure the markers. You can choose the color, shape and size.
6. Click on the map below to position the locations.
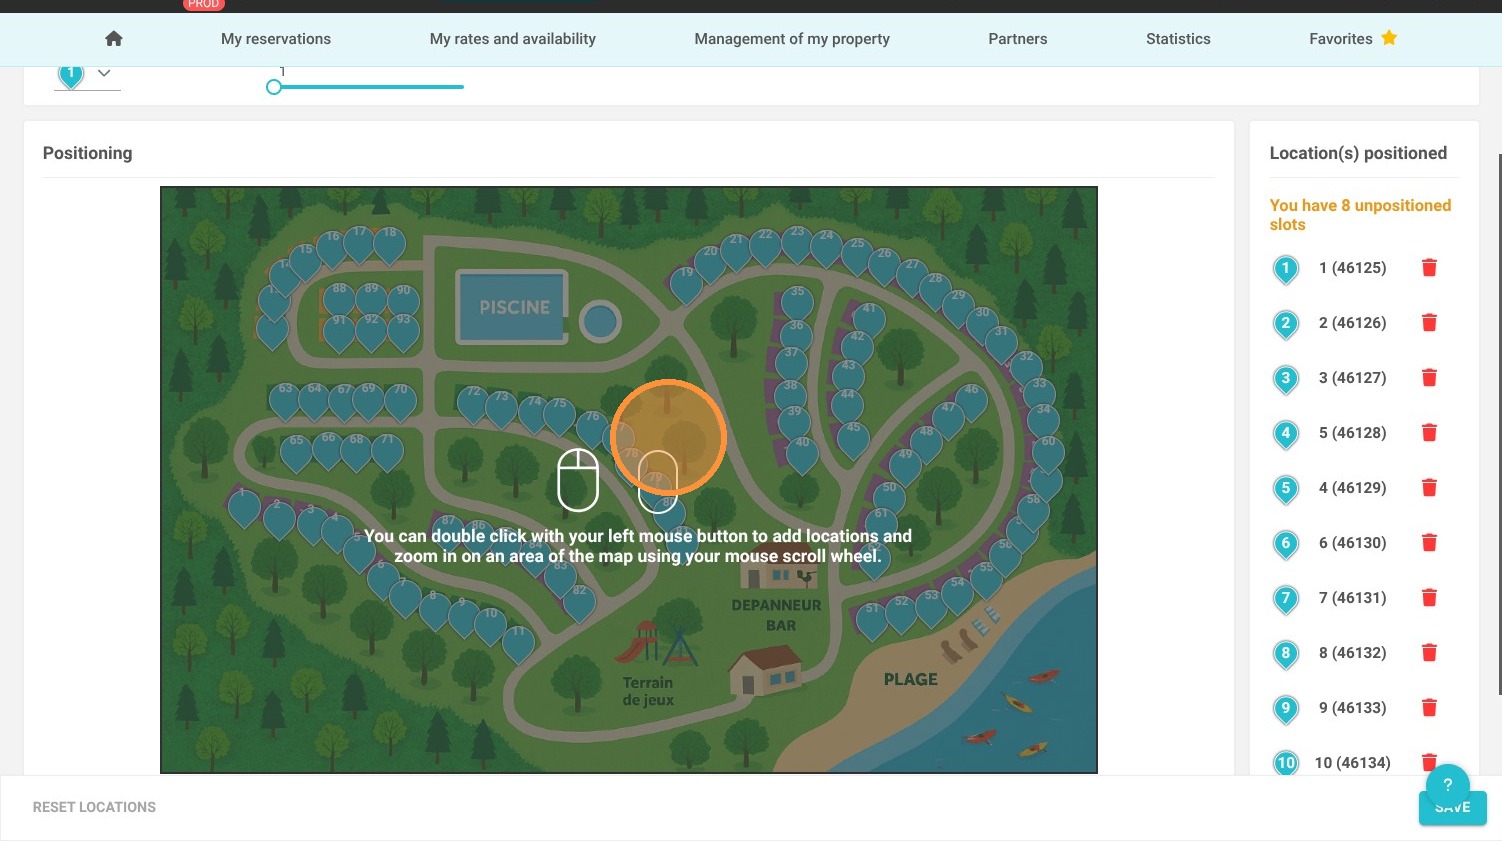
7. The system will tell you if there are any slots left to position. Below for example, there are 8 left.
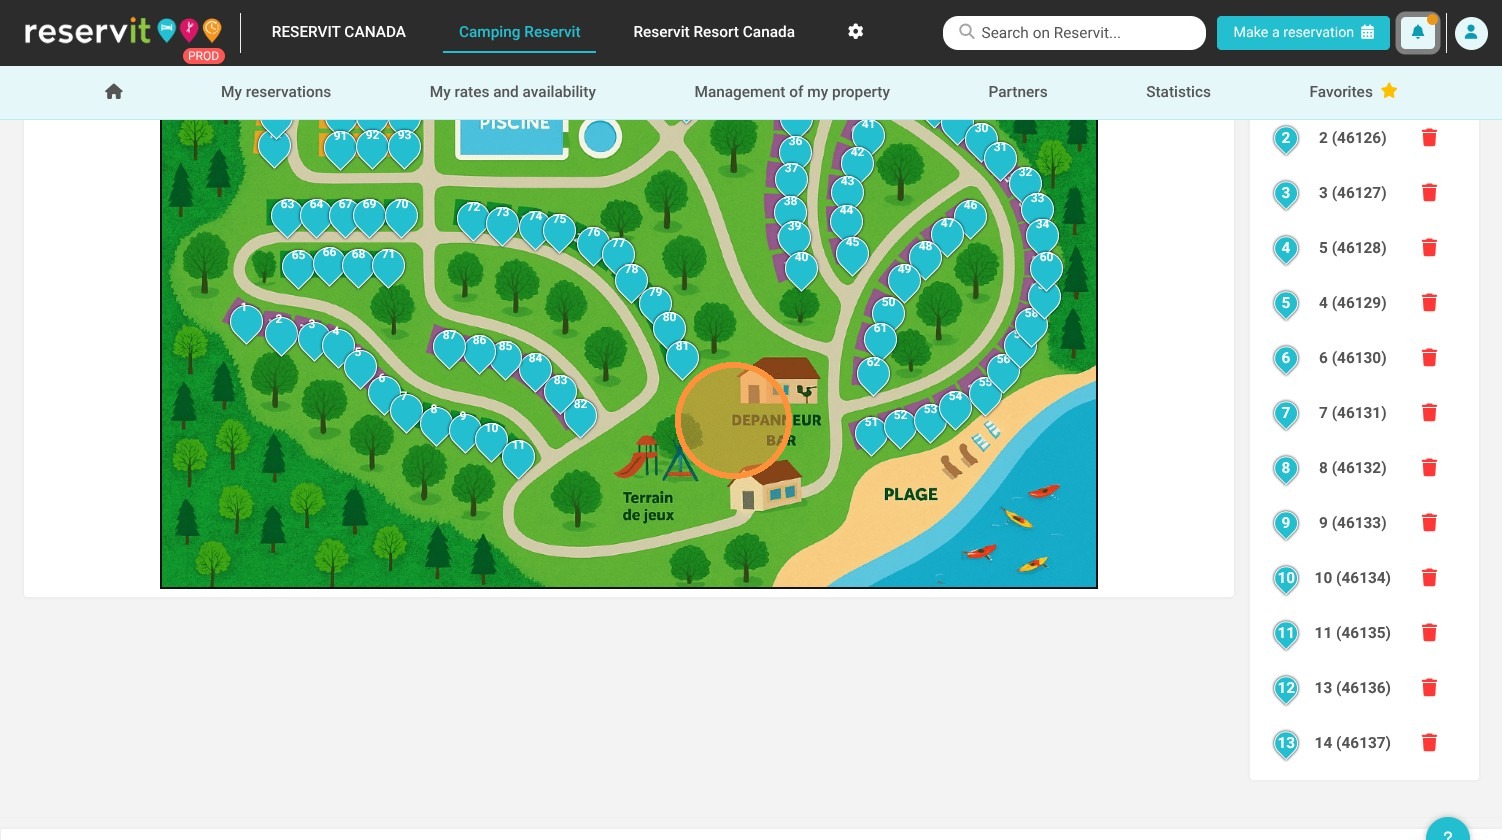
8. If we delete unit 1 to reposition it, we can then double click on the location.
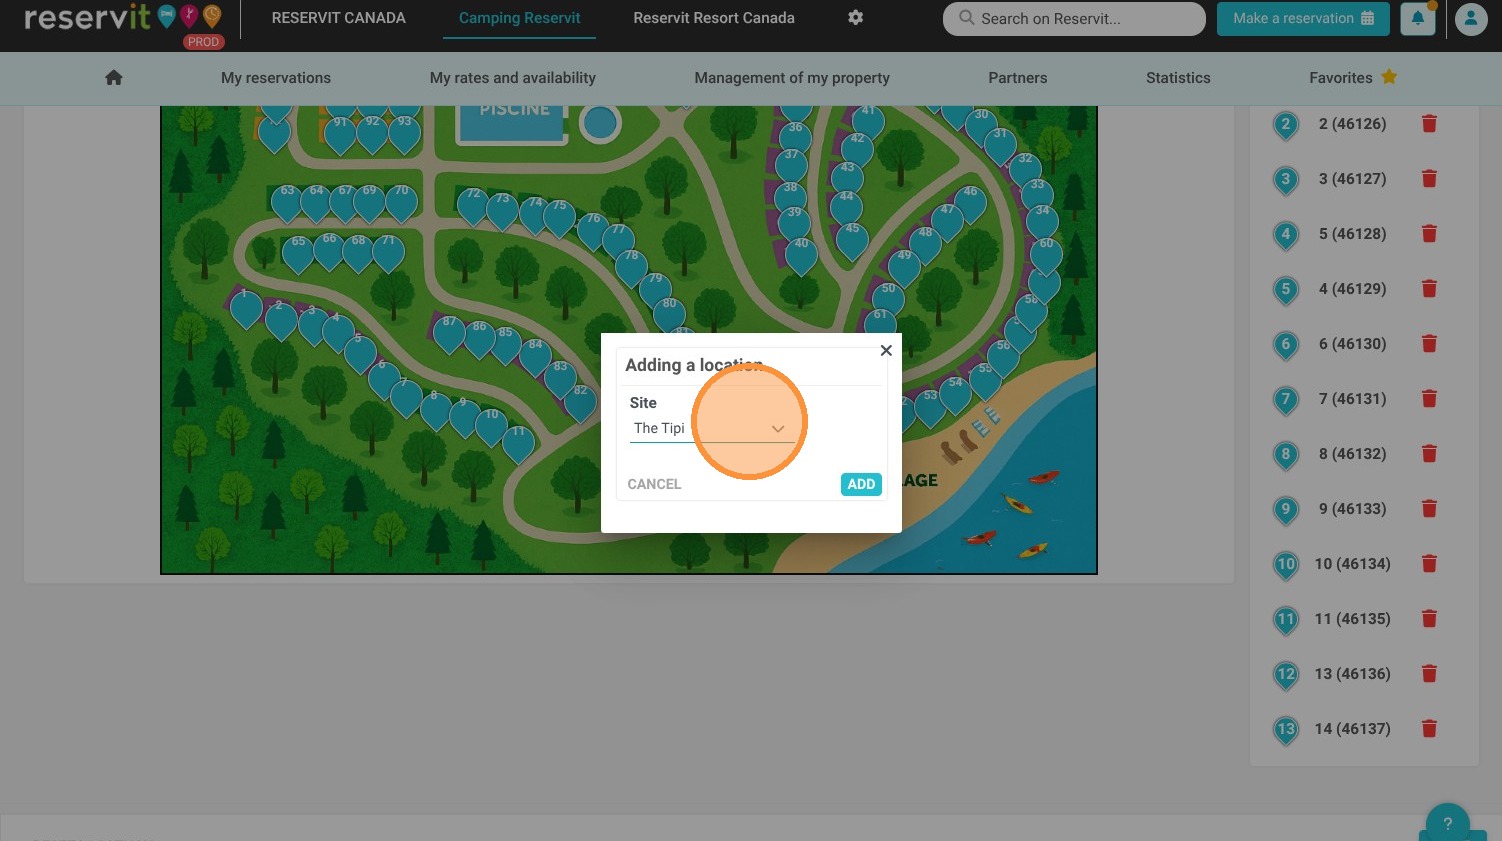
9. Then select Unit 1 to add. Then click on Add
10. Click "Save"