Article Summary: This tutorial explains how to customize your automated confirmation emails within Reservit Accommodation. You will learn how to navigate the email configuration settings to accurately edit the messages sent directly to guests after an online booking. By managing these templates carefully, you can maintain professional, brand-aligned communication while ensuring your reservation terms and conditions are perfectly clear.
The 4 key steps to edit your confirmation emails:
-
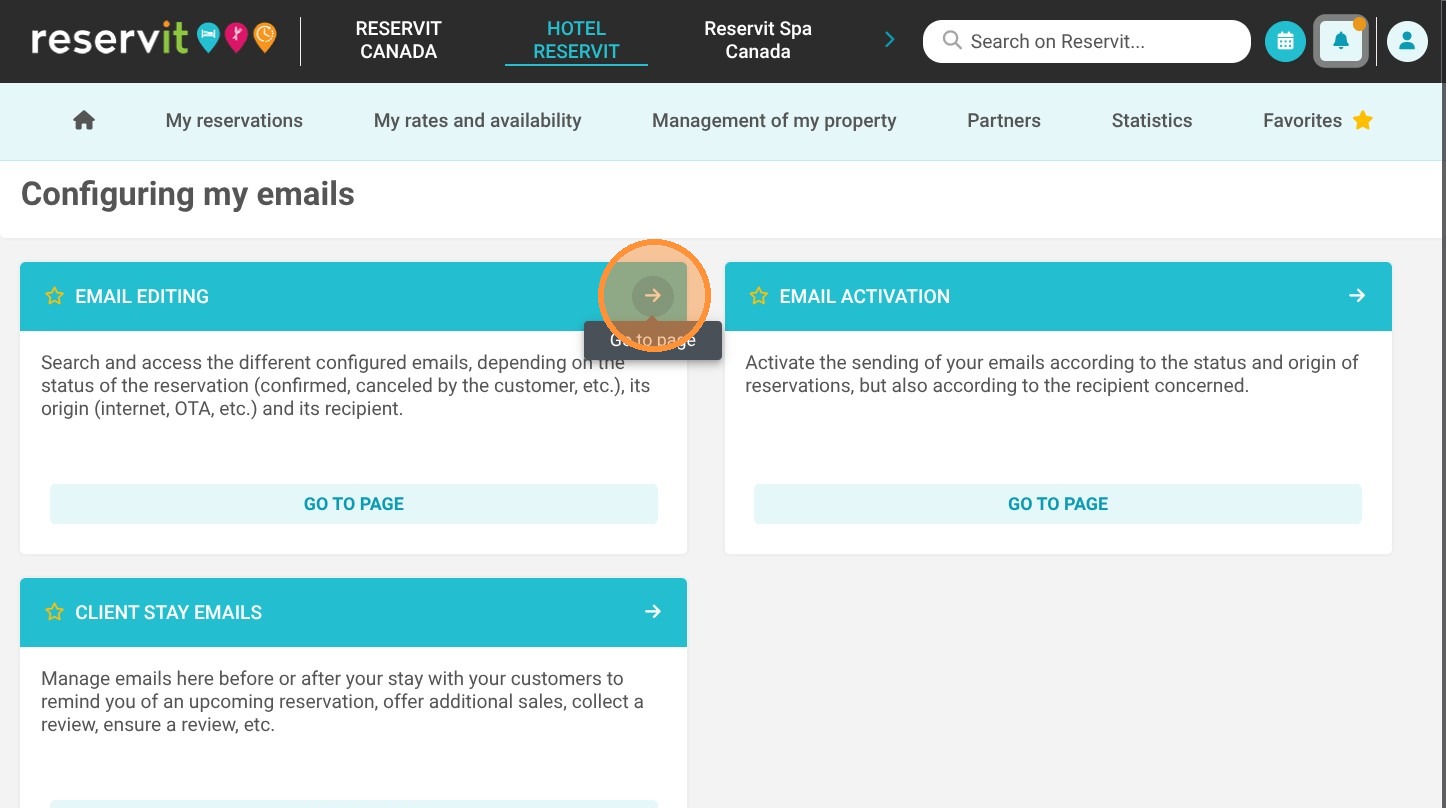
Access Email Settings : Navigate to the "Management of my property" menu, select "Configuring my emails," and click on "Email Editing."
-
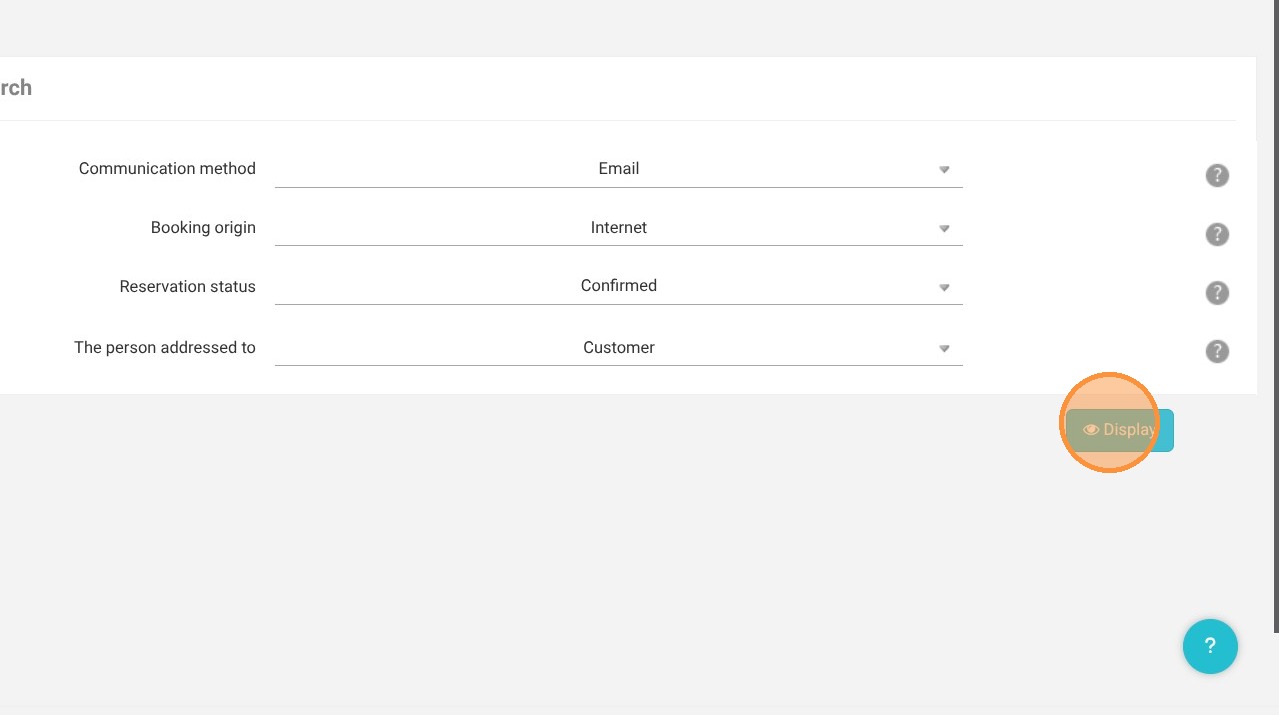
Select the Communication Type : Choose "Email" as your communication method and select "Internet" to target reservations made specifically online.
-
Open the Editor : Click the "Display" button to load the email template and access the text editing tools.
-
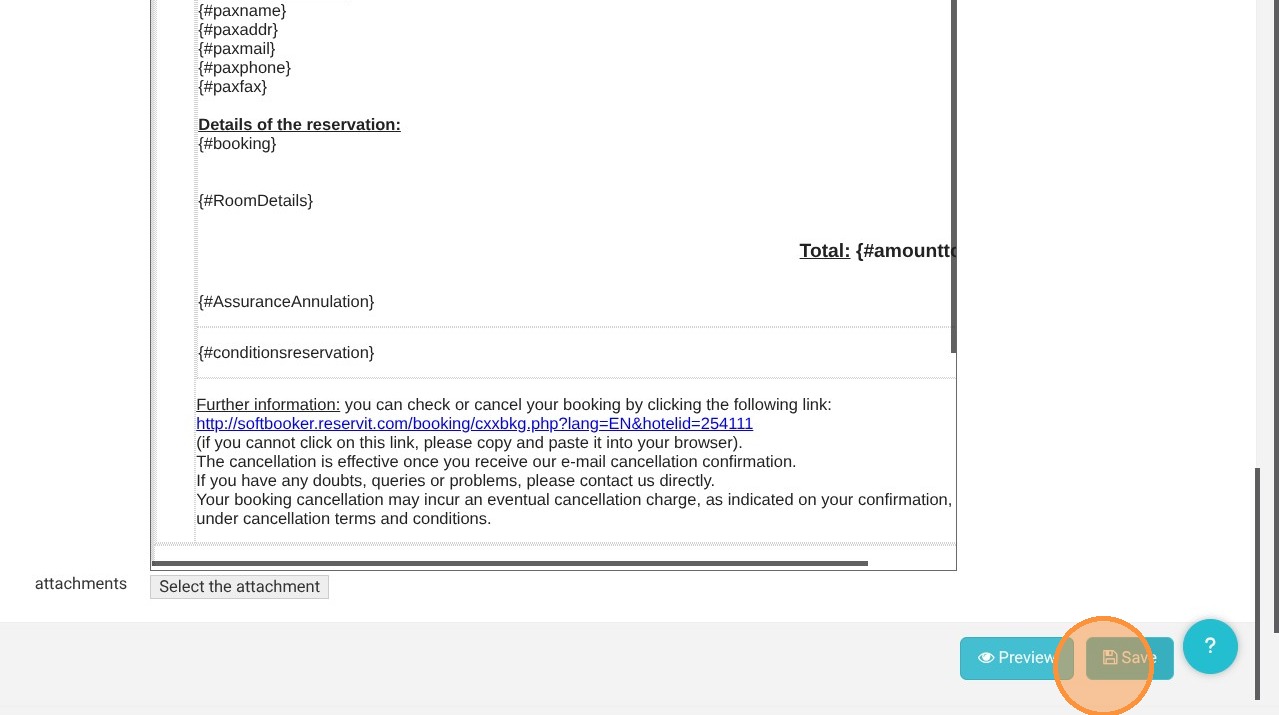
Edit and Preview : Make your necessary adjustments to the email content, then always click "Preview" to verify the layout and formatting before saving your final changes.
Why follow this guide? Modifying your confirmation emails guarantees that your guests receive immediate, accurate reservation policies the moment they book. This straightforward guide saves you valuable time by showing you exactly where to find and update these automated templates, preventing critical communication errors and streamlining your digital guest journey.
Alert: We recommend editing this email only when absolutely necessary. Its primary purpose is to confirm the reservation with the guest and to provide the associated terms and conditions. Keep in mind that this message may not be read carefully.
To share important information prior to arrival, we suggest using pre-stay emails, which are specifically designed for that purpose.
1. Click "Management of my property"

2. Click "Configuring my emails"

3. Click ''Email Editing''
4. Select the communication method “Email.” The booking origin refers to how the reservation was made (e.g., direct entry, online, etc.). Choose “Internet” for confirmations of reservations made online.

5. Click "Display"
Tip: The email editor will appear. You can then adjust the settings according to your needs.
6. Click on “Preview” before saving.