Article Summary: This comprehensive tutorial will teach you how to easily create a tentative booking with a specific release date using Reservit Accommodation. You will learn how to place a room on hold, set an expiration timeline for the option, and finalize the reservation once the guest makes their decision. Mastering this feature allows you to efficiently manage temporary holds without risking lost revenue from expired or forgotten guest requests.
The 5 Key Steps to Create a Tentative Booking:
-
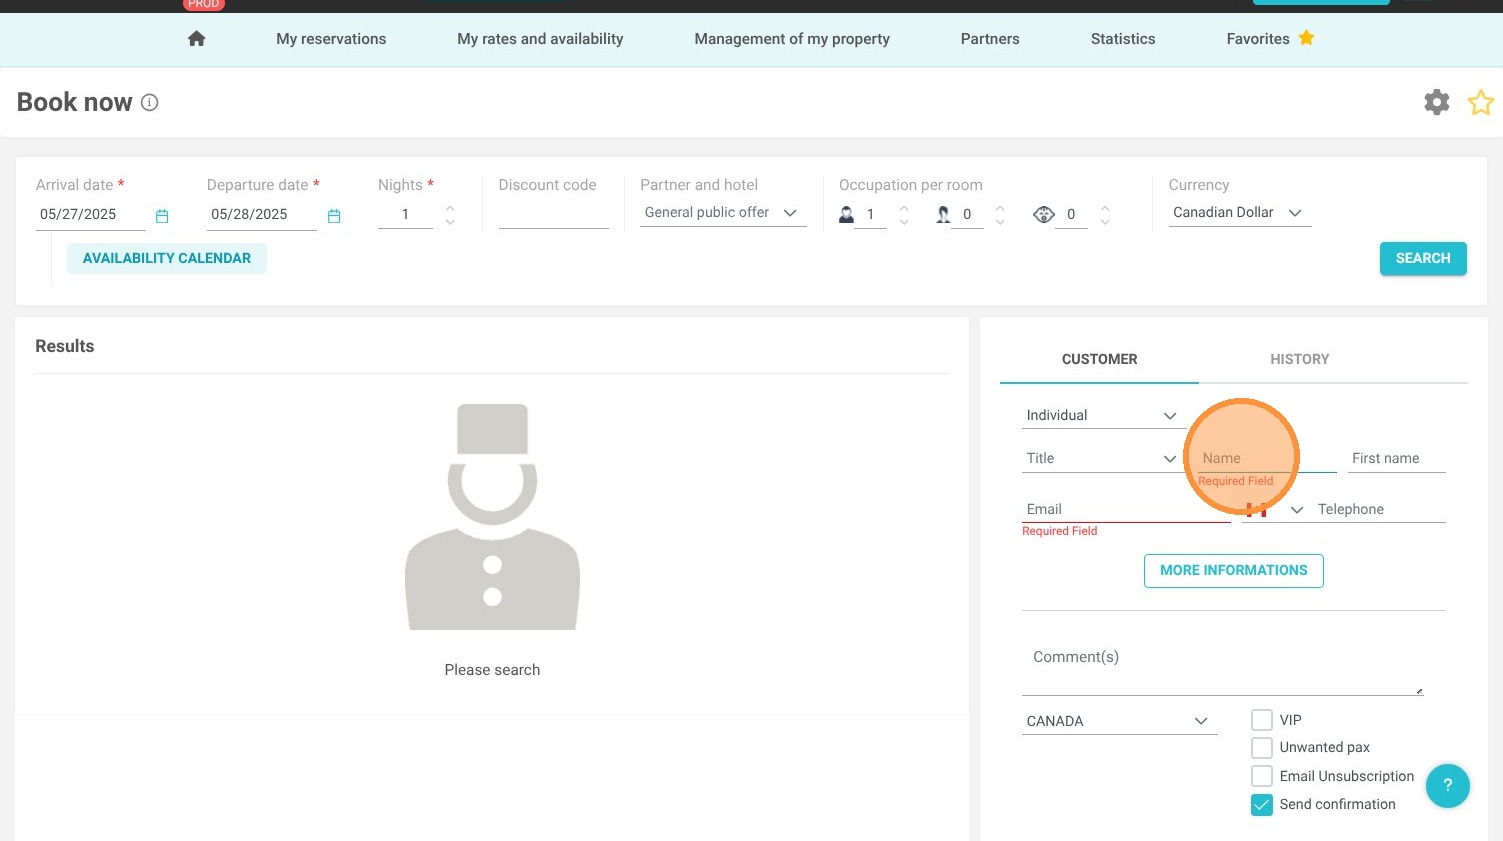
Start a New Reservation: Navigate to "Make a reservation" and input the guest's contact information along with their requested rooms.
-
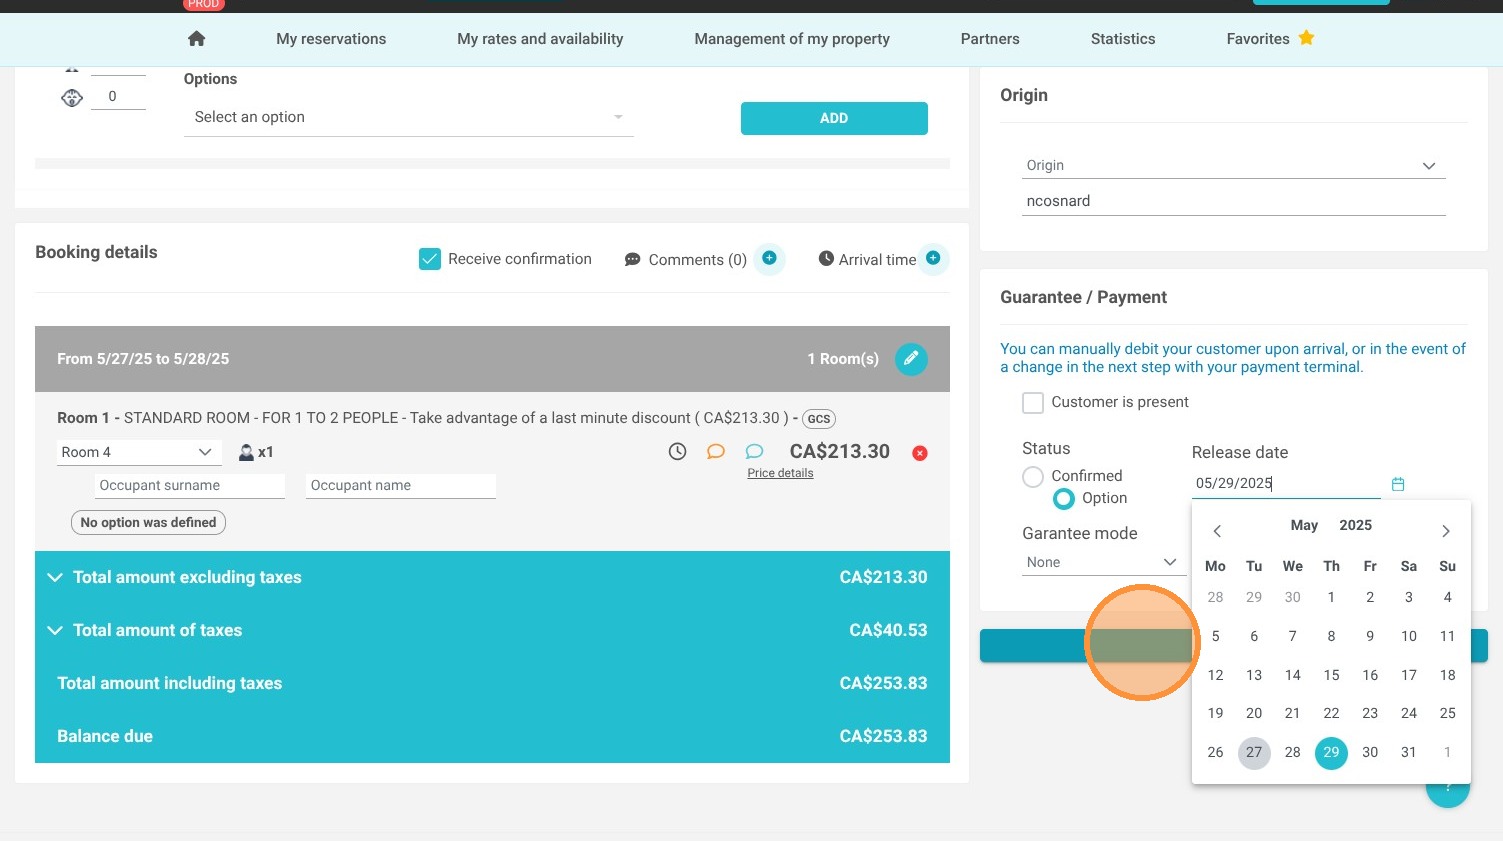
Select the Option Status: Instead of a standard confirmation, change the booking status field to "Option" to initiate a hold.
-
Set a Release Date: Choose an expiration date for the tentative booking, which ensures the system will notify you if the guest hasn't responded in time.
-
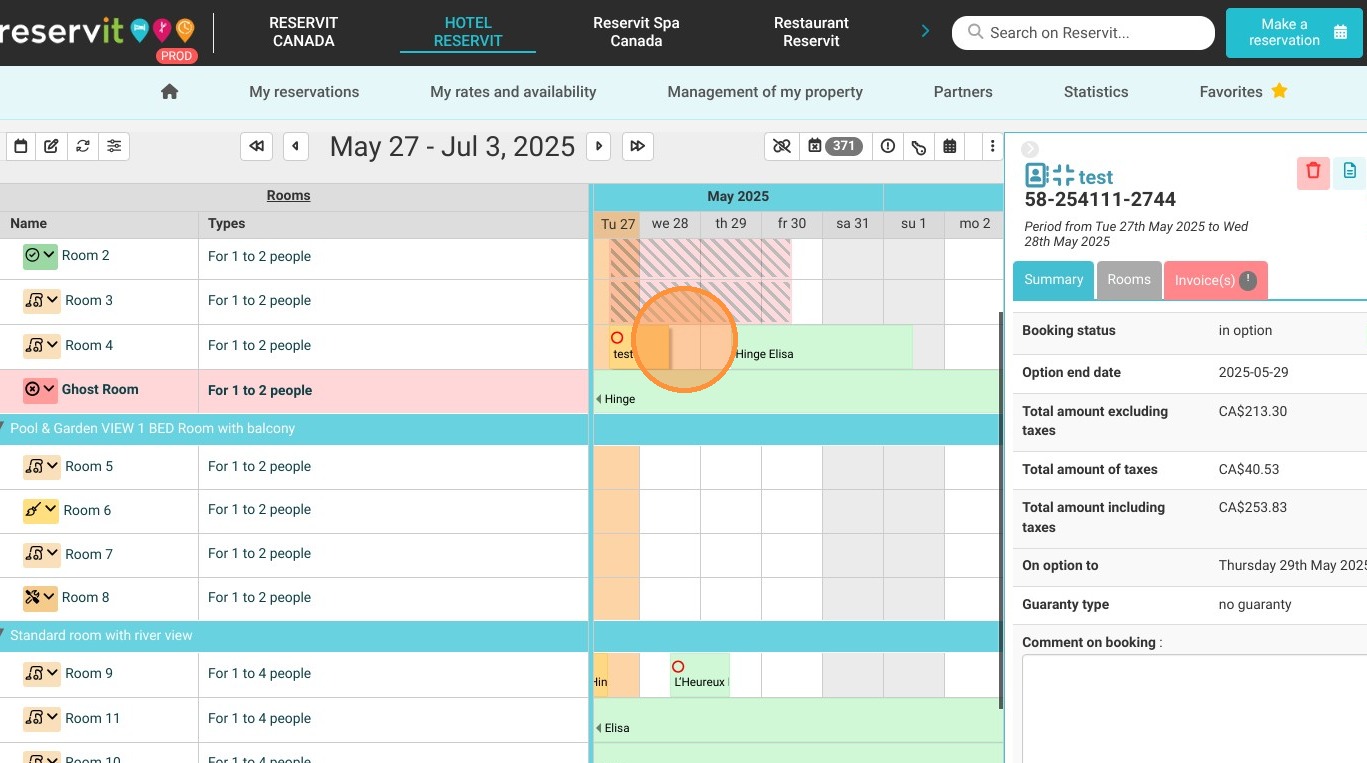
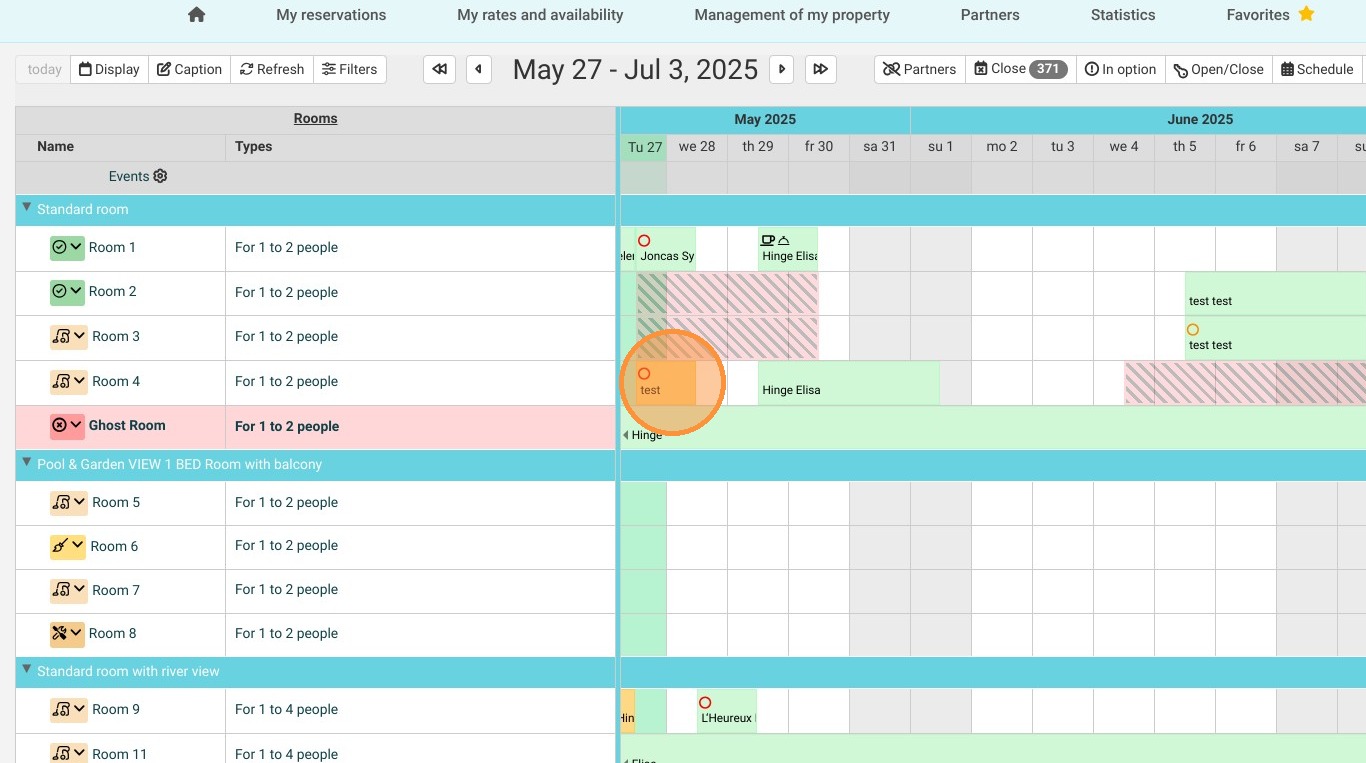
Save the Tentative Hold: Click "Confirm" to generate the hold. It will appear in orange on your reservation calendar so you can quickly identify it as a pending option.
-
Finalize and Confirm: Once the guest is ready to secure the room, click on the orange booking and change its status to "Confirm" (turning it green) to officially lock in the reservation.
Why follow this guide? Following this guide will optimize your room inventory management by allowing you to securely hold rooms for potential guests without the risk of forgetting to release them. Utilizing the automated release date feature saves administrative time, prevents accidental double-bookings, and ensures you never miss a sales opportunity.
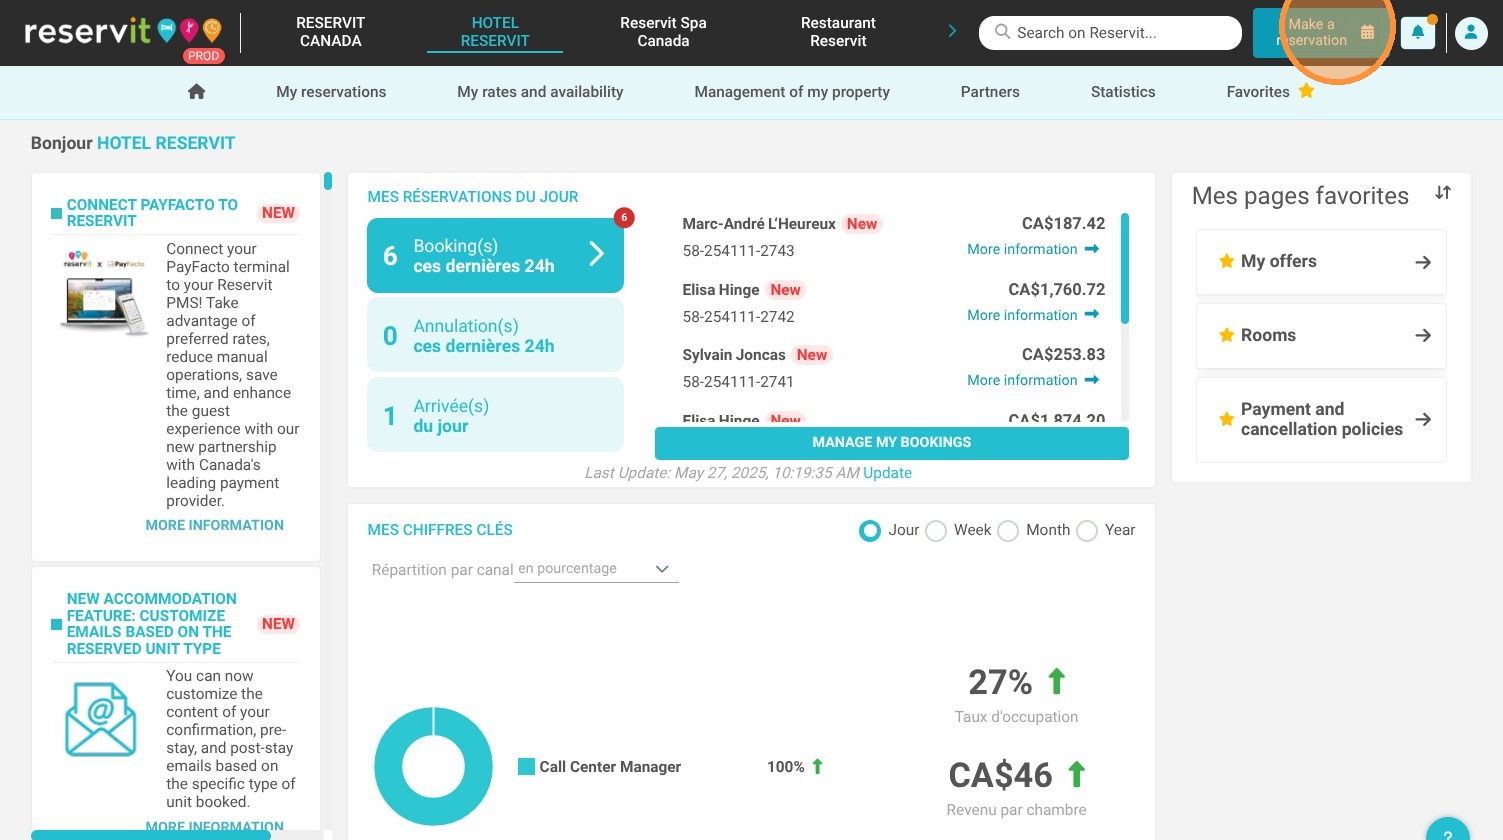
1. Click "Make a reservation"
2. Enter the guest's information and room(s) requested
3. To set the booking as an OPTION, click on “Option” under the status field.
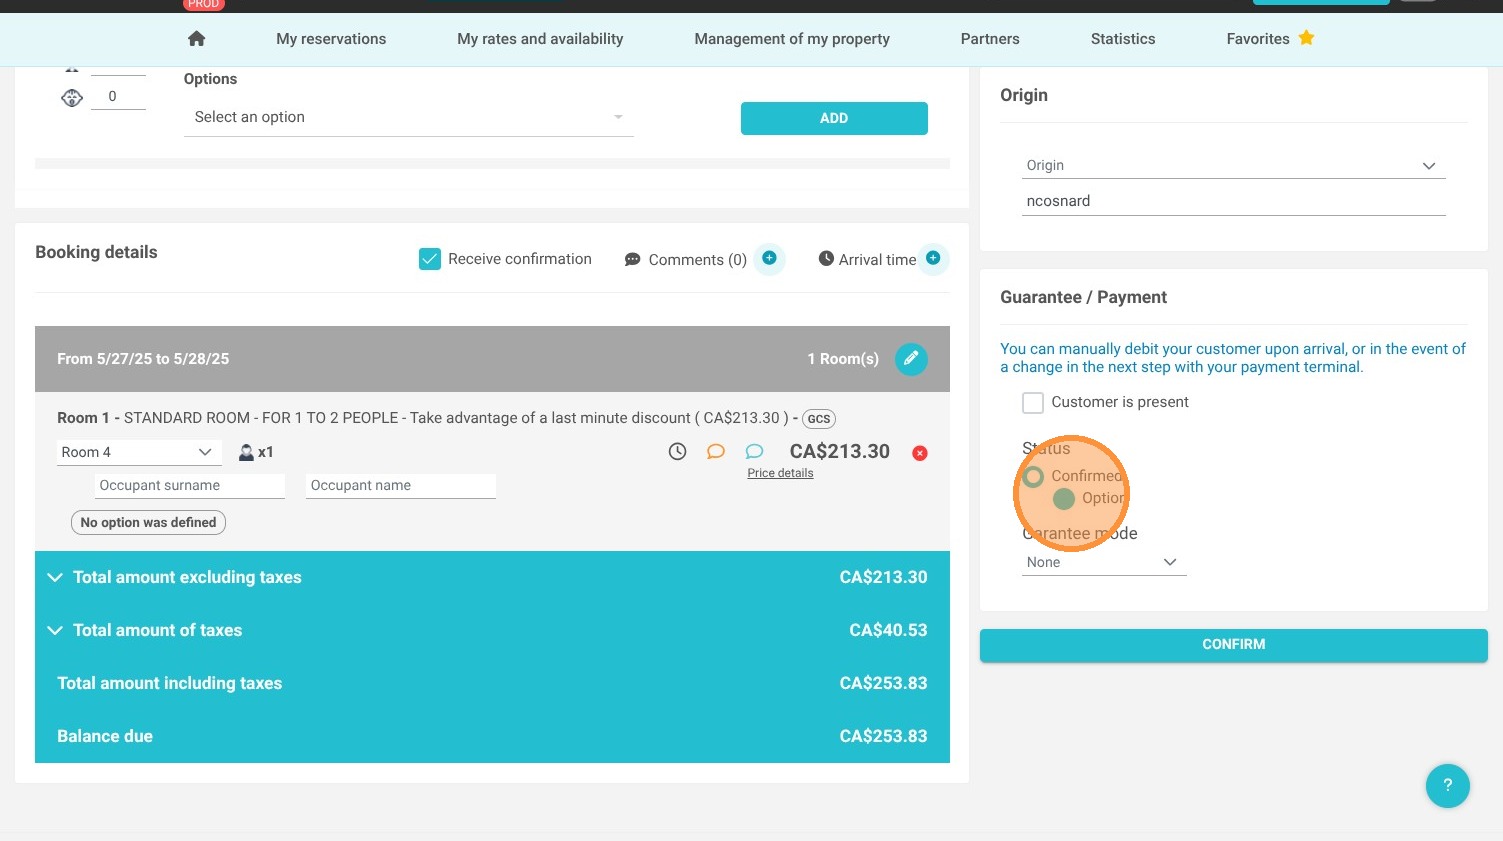
4. You can set a release date. If the guest doesn’t get back to you by then, you will be notified that the option has expired.

5. Click “Confirm” to create the booking.
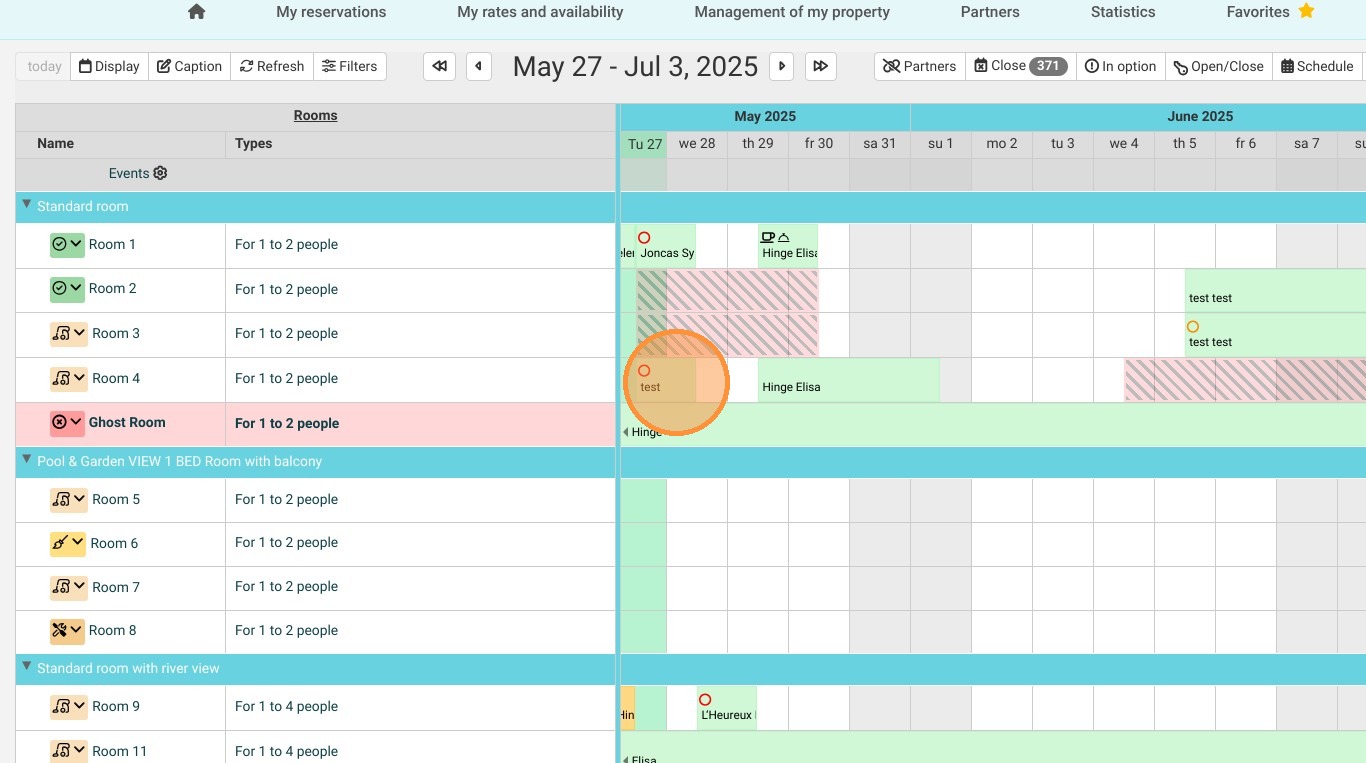
6. The booking appears in ORANGE on the reservation calendar.
7. If you want to CONFIRM the booking, click on it.
8. Click “CONFIRM” to change the booking status.
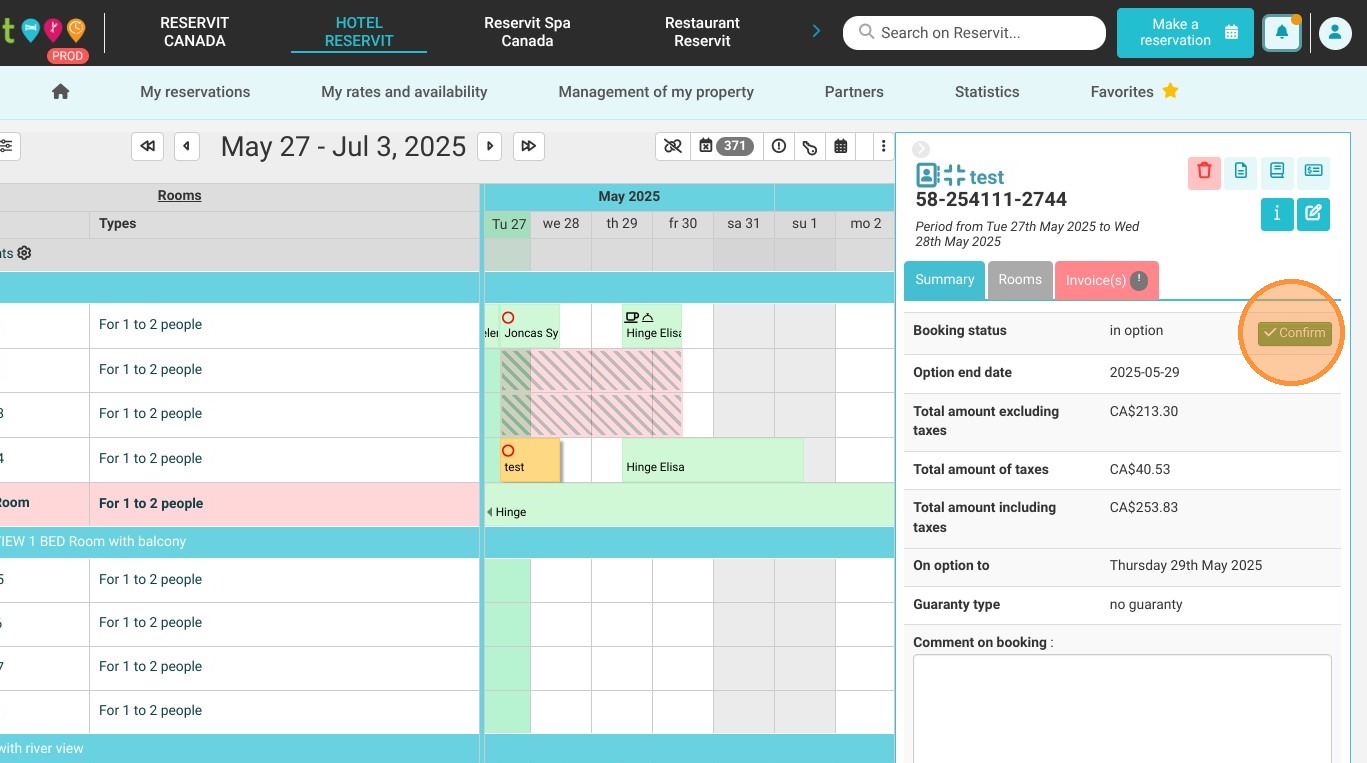
9. The booking has turned GREEN, which means it is now confirmed.