Article Summary: This practical guide assists you in managing customer refunds by showing you how to generate a credit note directly from your Reservit interface. You will learn how to transform an existing invoice into a credit document and trigger a monetary refund via your integrated payment terminal. This tutorial ensures strict accounting accuracy and a seamless customer experience during reservation cancellations or modifications.
The 5 Key Steps to Refunding an Invoice with a Credit Note:
-
Billing Access: Select the relevant reservation and access the billing account via the document list.
-
Credit Note Creation: Open the original invoice and click on "Create a Credit Note" to initialize the accounting document.
-
Document Validation: Choose the refund type, preview the document to verify the details, and then validate the official generation of the credit note.
-
Refund Configuration: Click on "Add a refund," select the payment method, and check the "Access Terminal" option for a credit card refund.
-
Transaction Finalization: Validate the virtual terminal steps to confirm the transfer of funds and permanently link the refund to the credit note.
Why follow this guide? Mastering this procedure allows you to avoid accounting discrepancies between your issued invoices and your actual cash flow. By automating the refund through Reservit's integrated terminal, you save valuable time while ensuring maximum security for your customers' banking data.
1. Select the reservation in question.
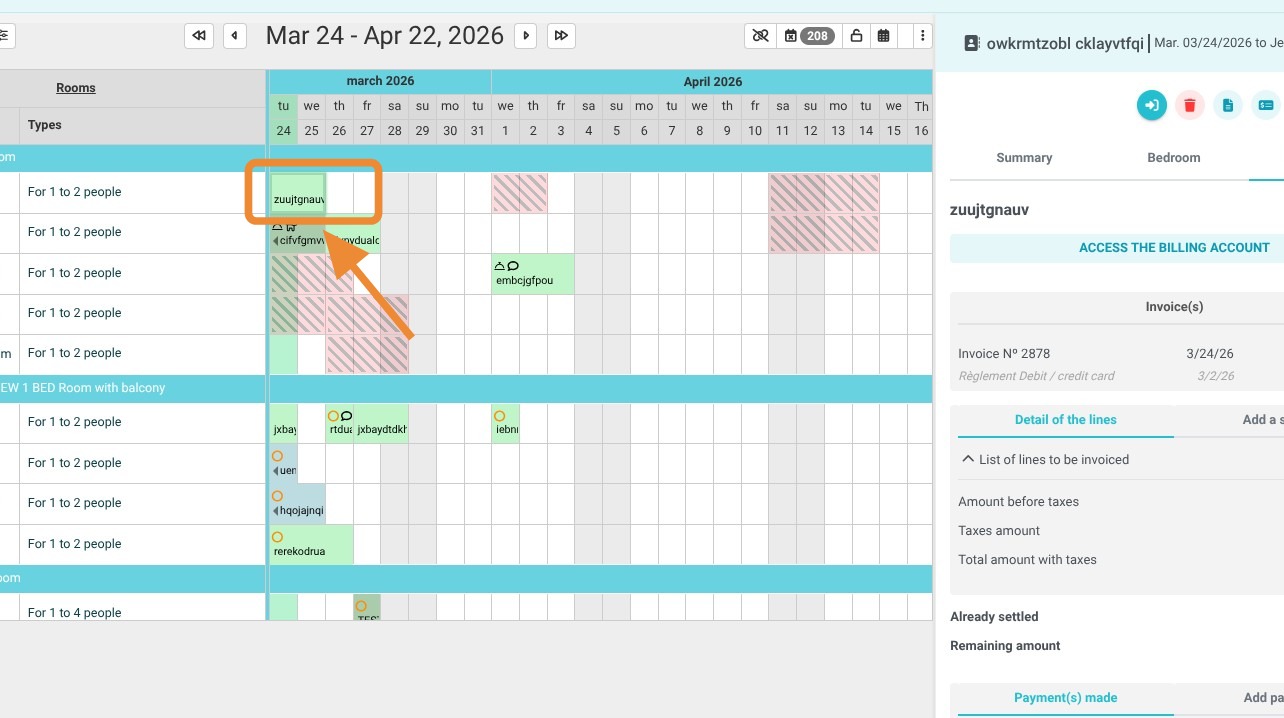
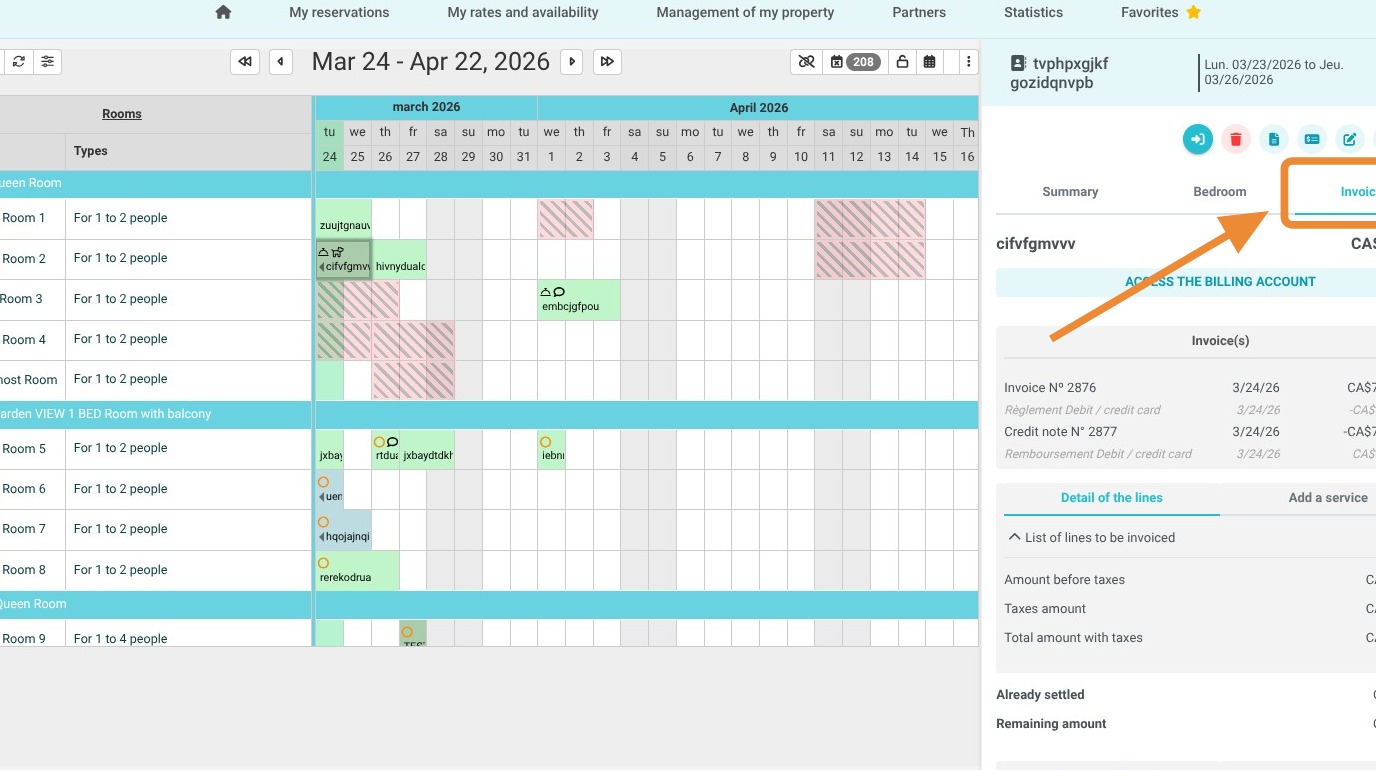
2. Click on "Invoice(s)".
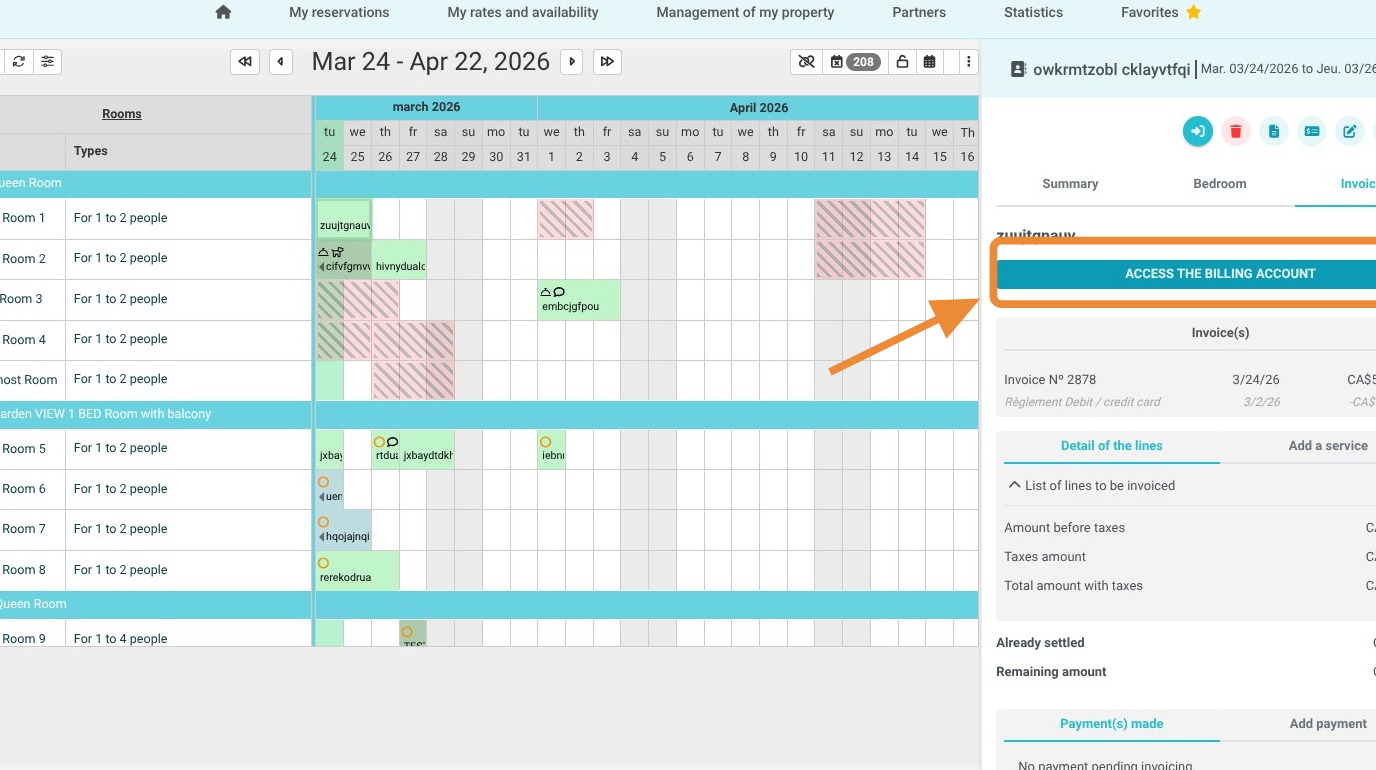
3. Then click on "Access billing account".
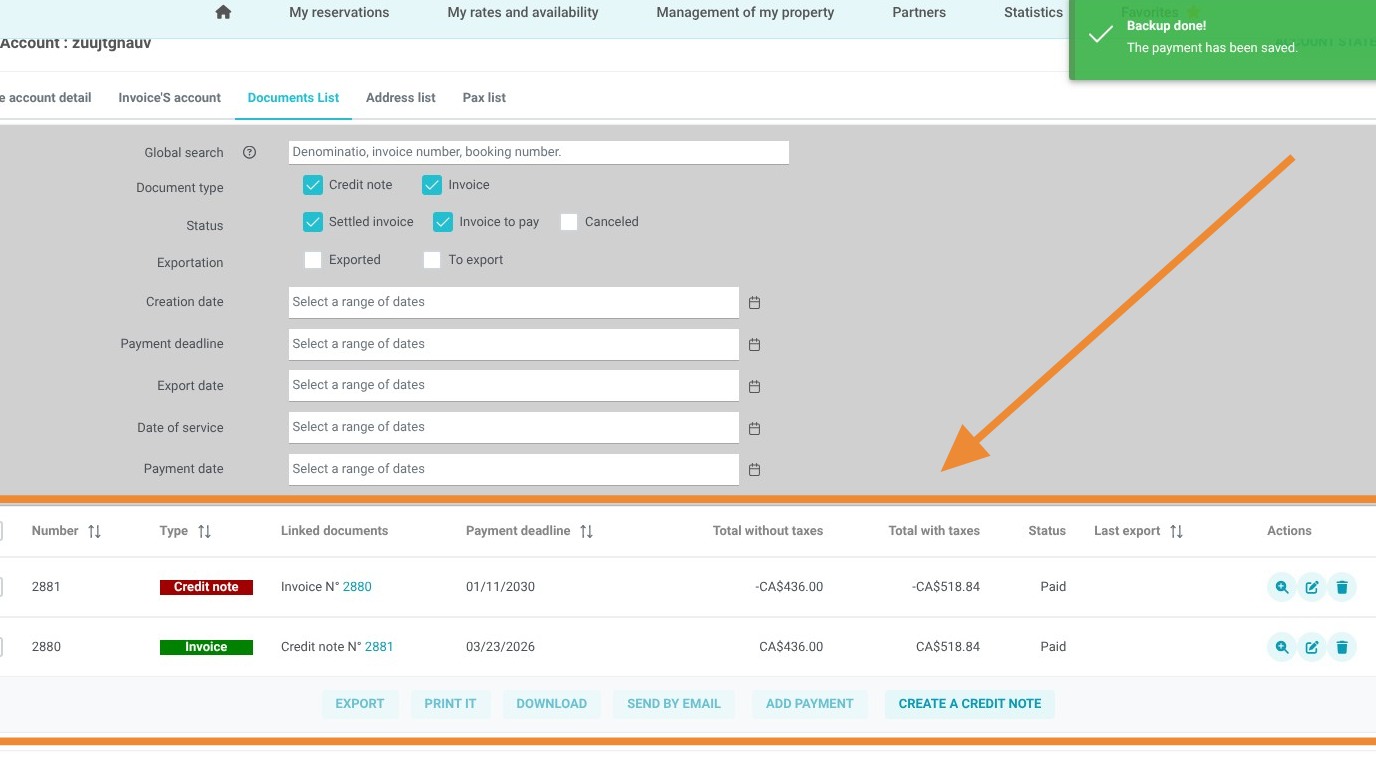
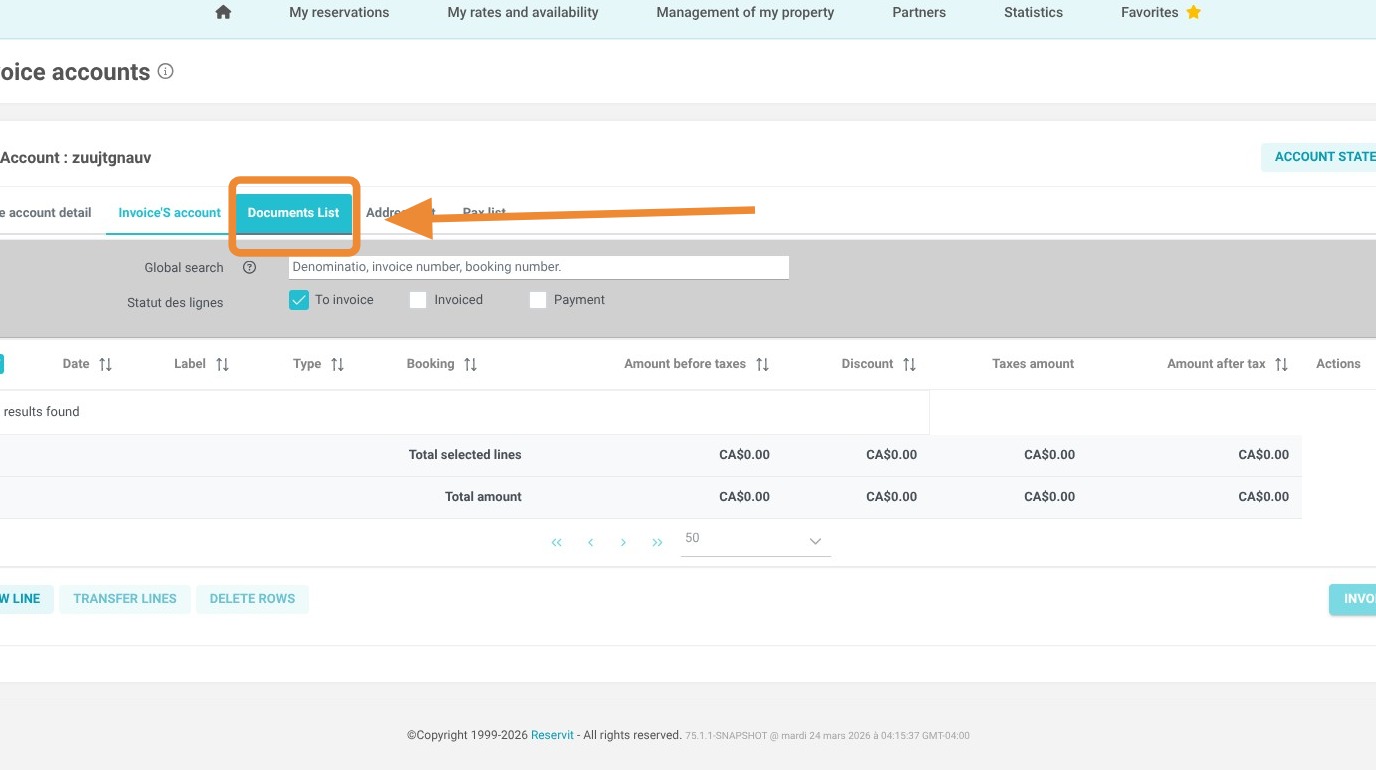
4. Click on "Document list".
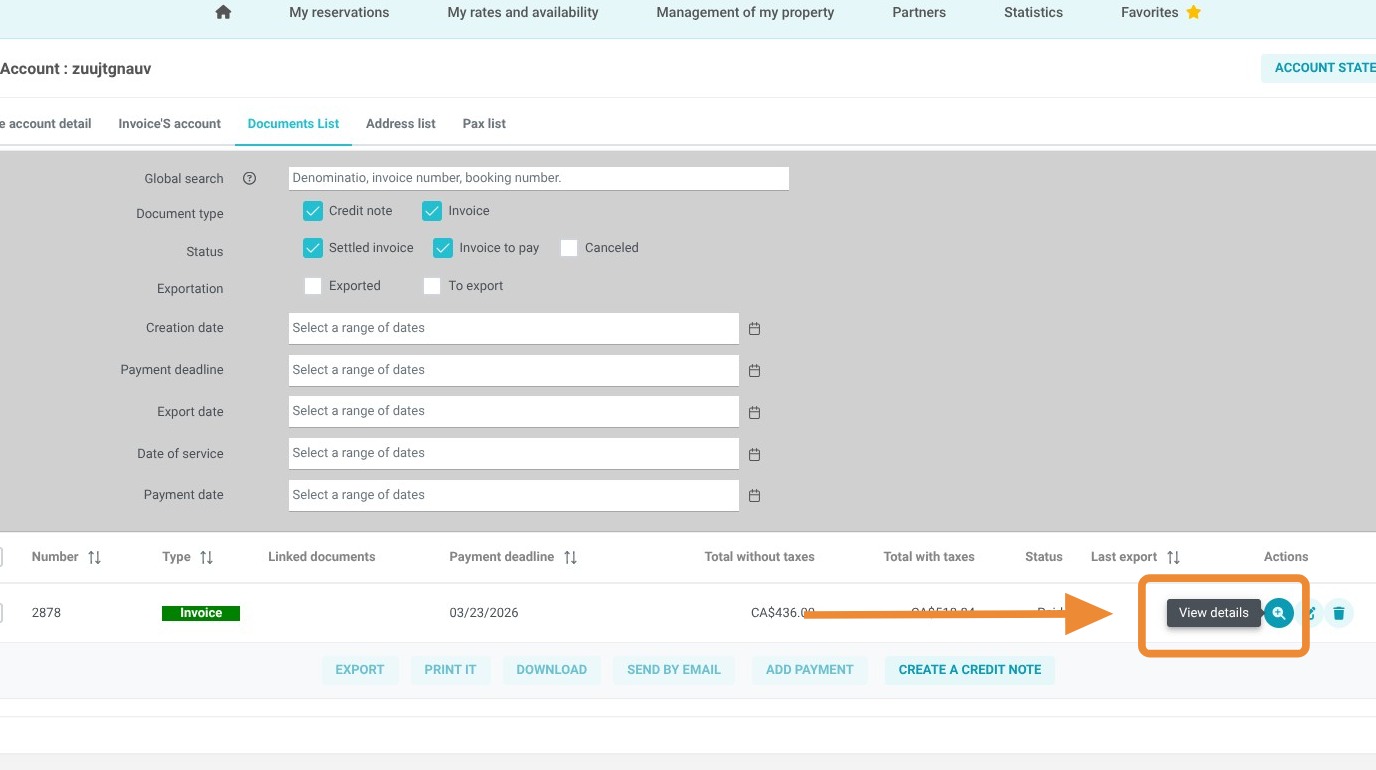
5. Select the corresponding invoice by clicking on the magnifying glass
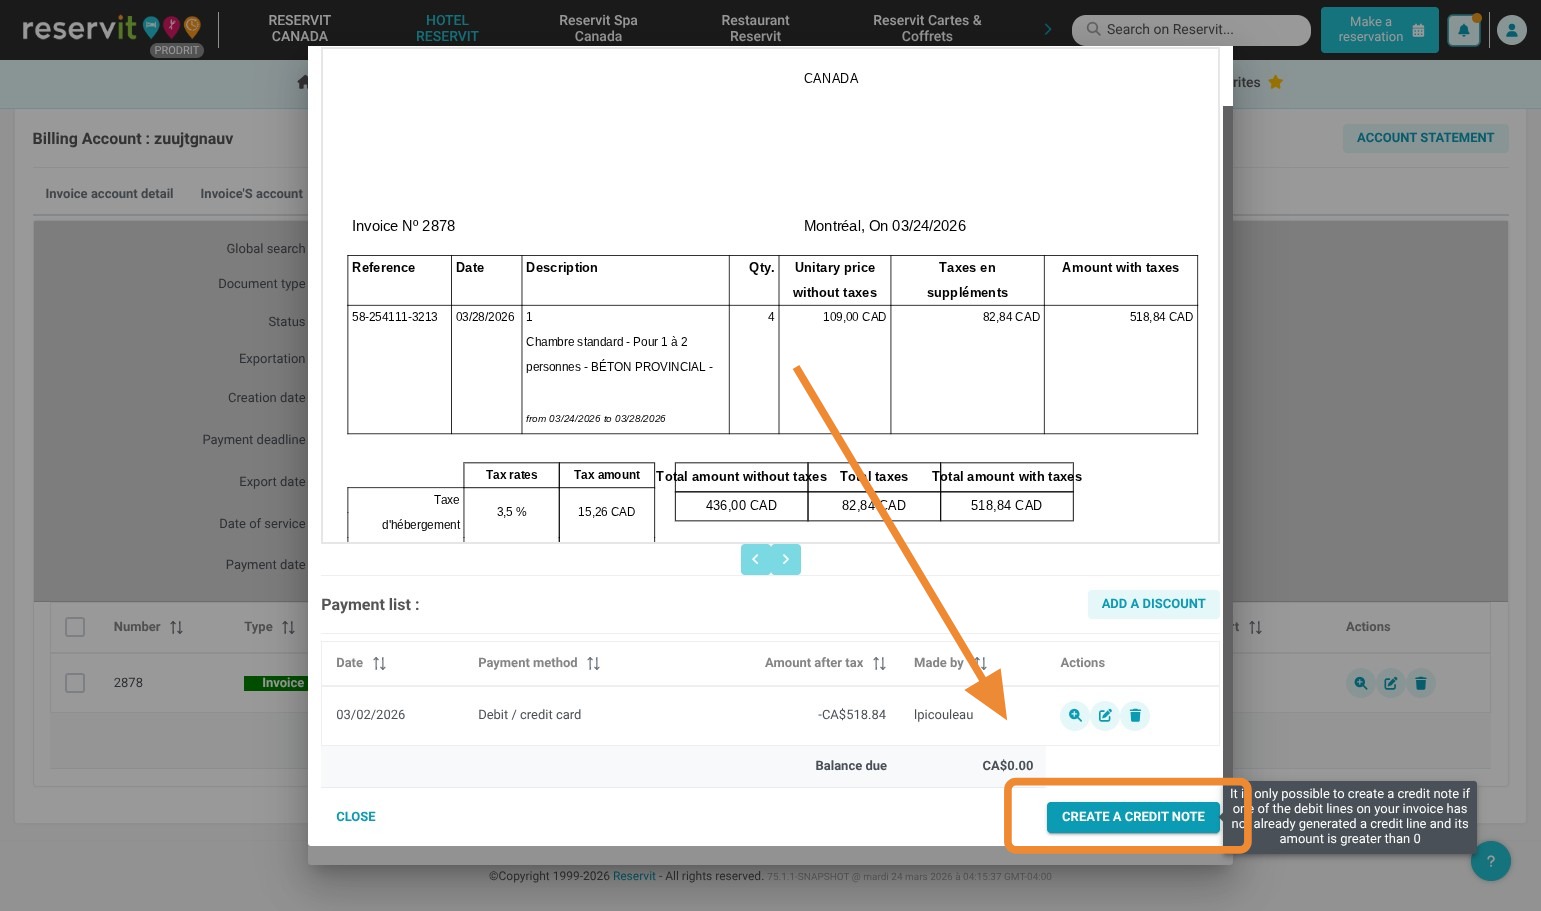
6. At the bottom of the invoice preview, click on "Create a Credit Note" (terminology may vary depending on your geographic region).
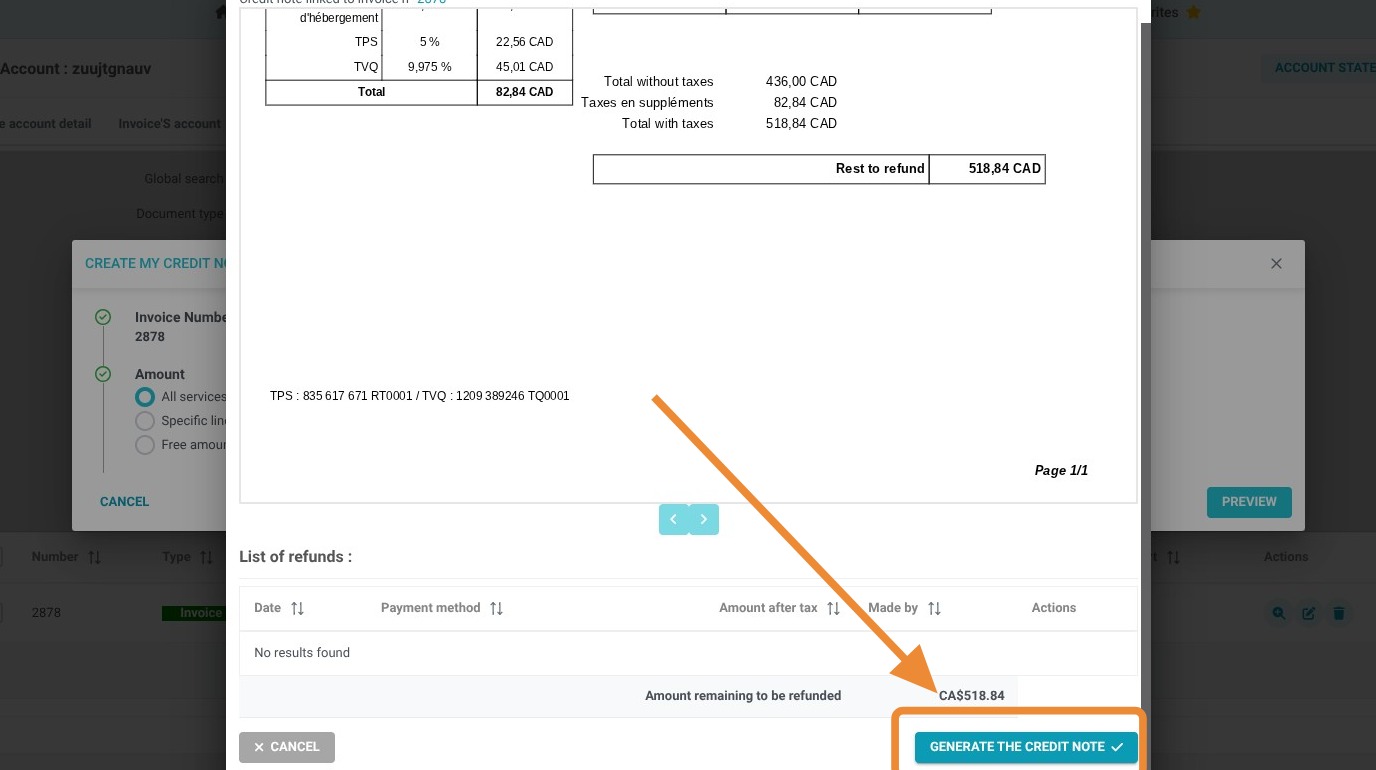
7. Select the type of refund you wish to apply. Click on "Preview" to validate that the accounting document you are about to issue is correct.
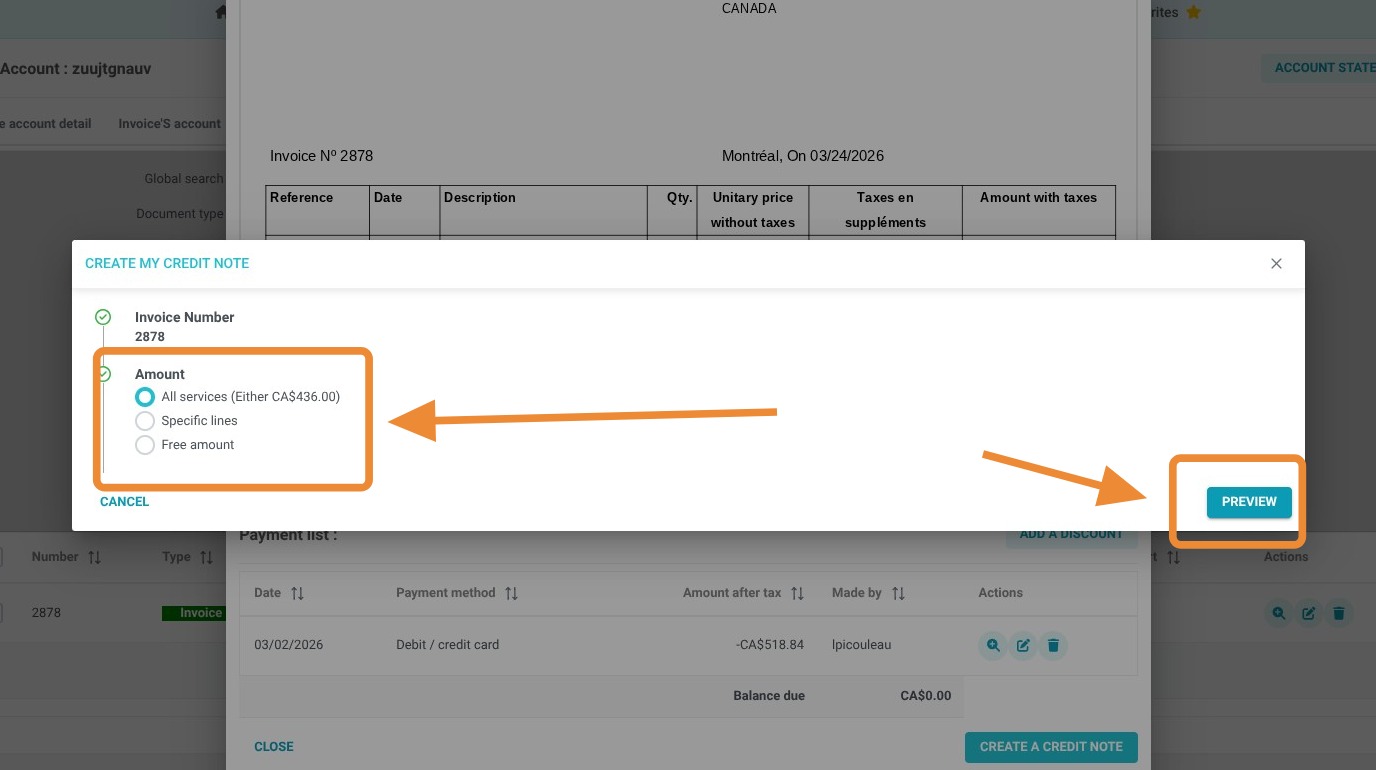
8. If the document is correct, click on "Generate Credit Note"
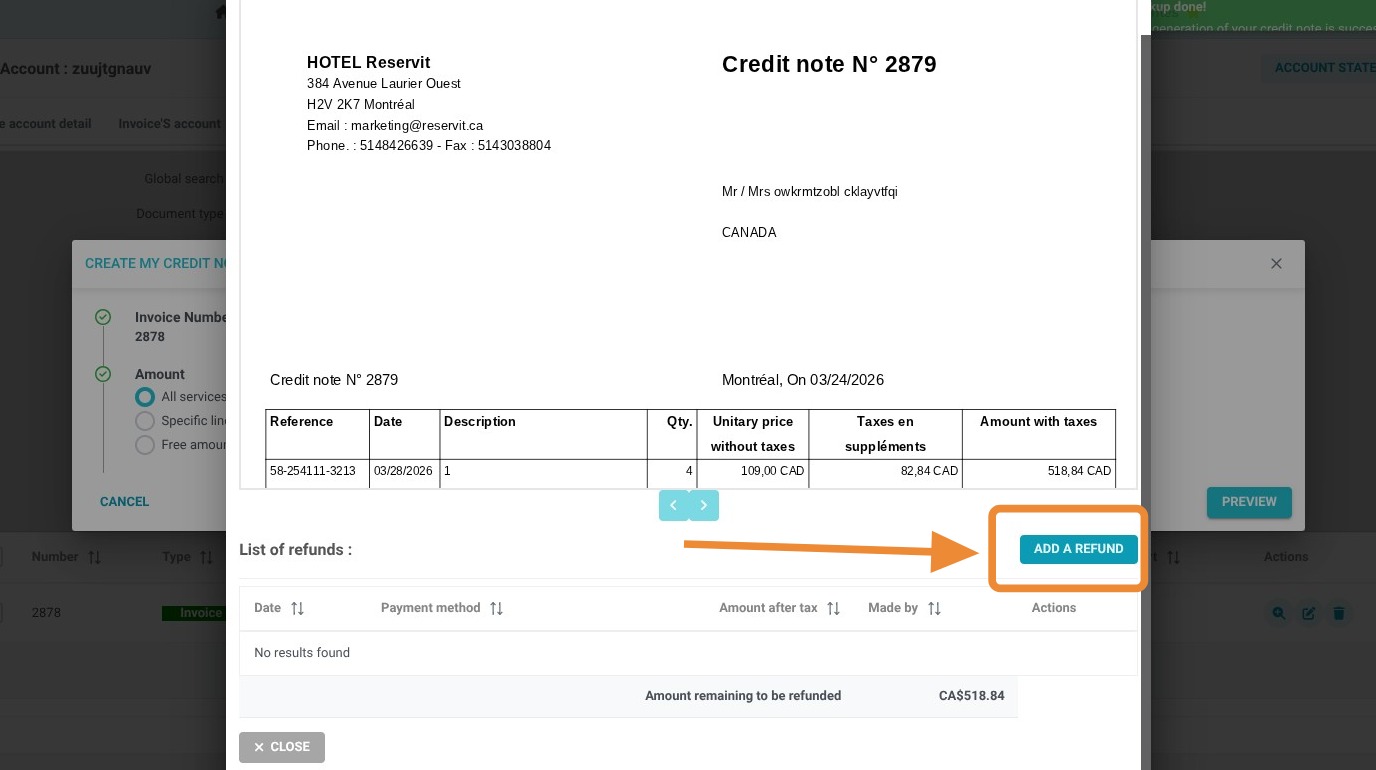
9. Now that the credit note is issued, we will process the related refund. Click on "Add a refund"
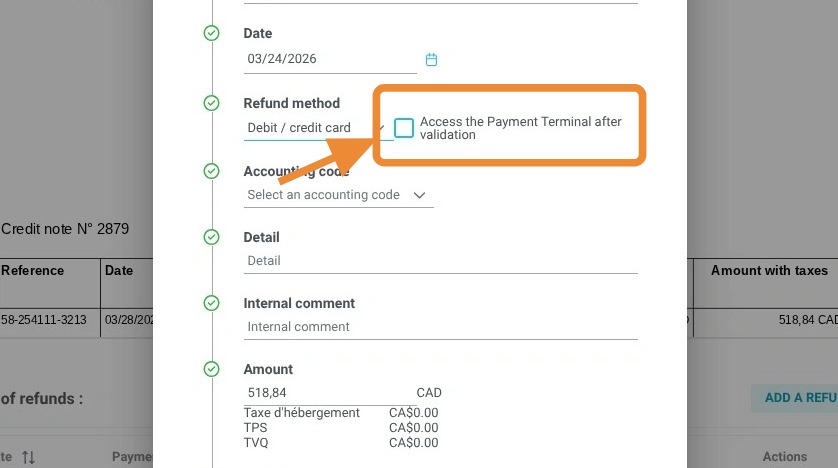
10. Choose your "Refund method".
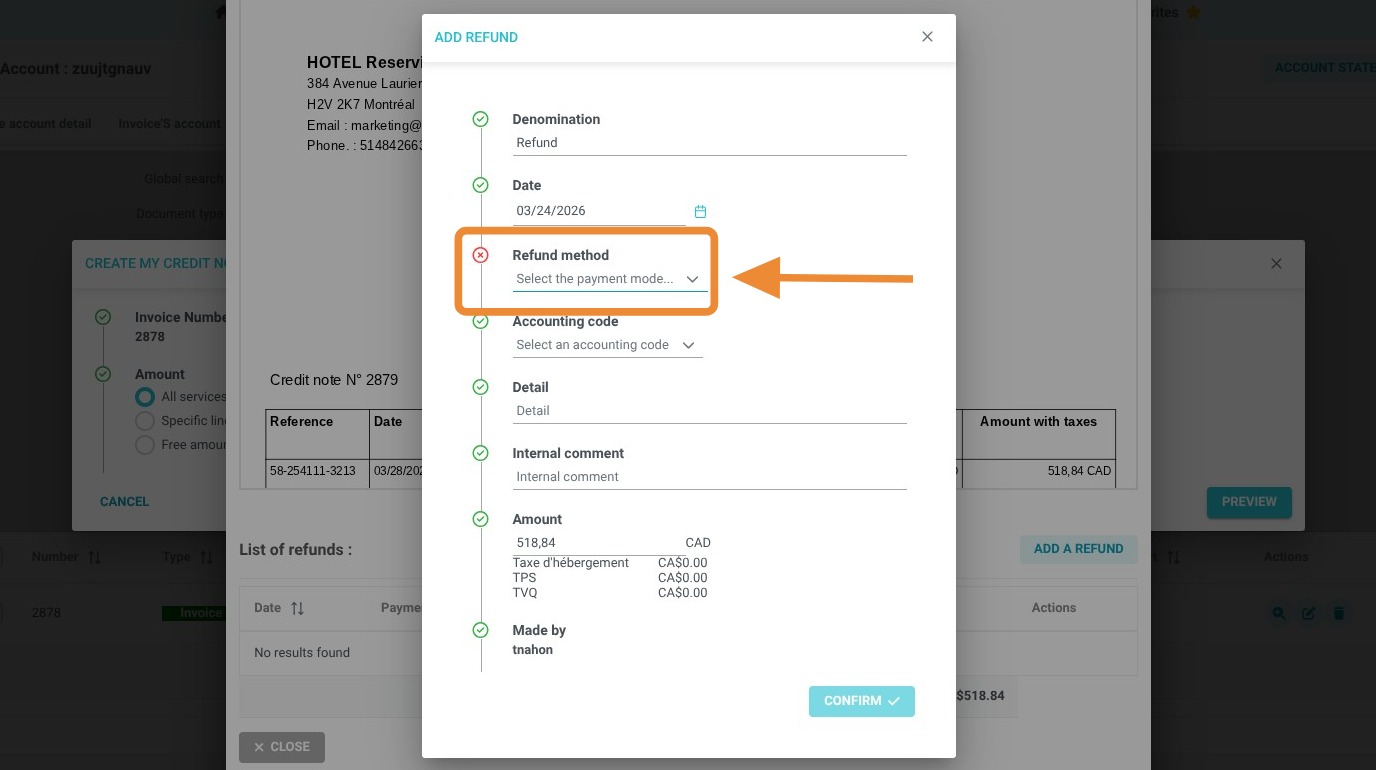
Tip: If you are processing a refund to the credit card used during the original transaction via Reservit, do not forget to check the "Access Terminal" box.
11. Click on "Confirm".
-
If you are refunding the amount outside of Reservit, skip to step 15.
-
If you are refunding through Reservit, proceed to the next step.

12. The virtual terminal will then open. Validate the refund information and click "Save"
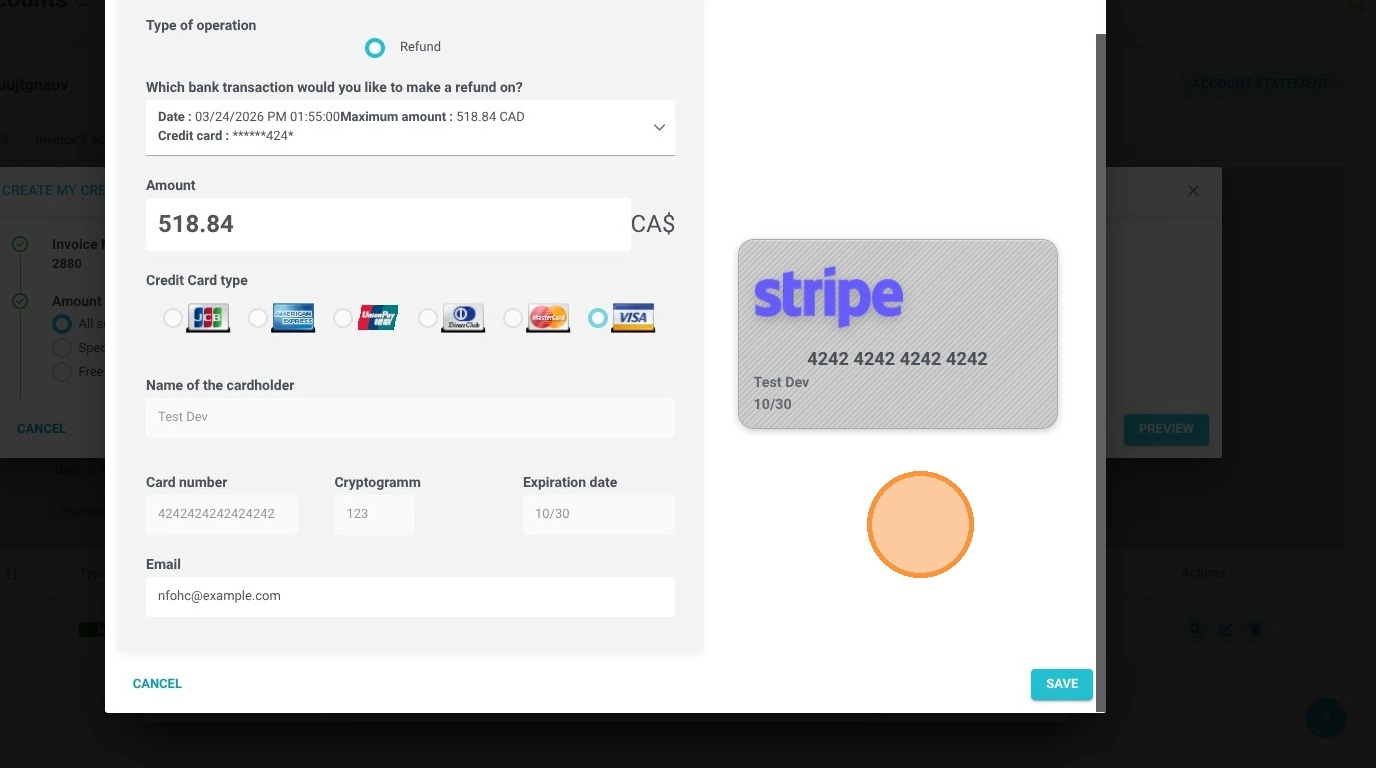
Warning! You are not authorized to refund a different card than the one used during the initial payment. If the original card is expired, the card issuer will handle routing the refund to the customer's new account; you can proceed with the transaction in all cases.
13. You can now view the issued credit note linked to both the original invoice and the processed refund.