

Article summary: This tutorial shows you how to place a booking on one or more tables of your table layout, from the Reservit Restaurant homepage. You will learn how to open the assignment panel, find the right table with rooms, search and filters, combine several tables for a group, and change tables when needed.
The 4 key steps to assign a table:
-
Open the assignment panel: Click the right-hand box of the booking card, on the Access to Table Layout page.
-
Find the table: Choose the room, search for a table by name or filter by its characteristics.
-
Validate: Select one or more tables, check the SUMMARY, then click TO VALIDATE.
-
Change the assignment: Open the panel again, change the selection and confirm.
Why follow this guide? Assigning tables before the service lets you prepare the room, see at a glance which tables are still free and keep track of the remaining seats.
Assigning a table is not mandatory: a booking without a table remains confirmed.
When a booking is created, a table may be assigned automatically. Check it on the layout and change it if needed (see "Change tables").
Open the assignment panel
1. On the Access to Table Layout page, choose the date and the service.
2. Find the booking in the list on the left. A booking without a table shows a pink box with a chair icon; a booking already placed shows the name of its table on a blue background.
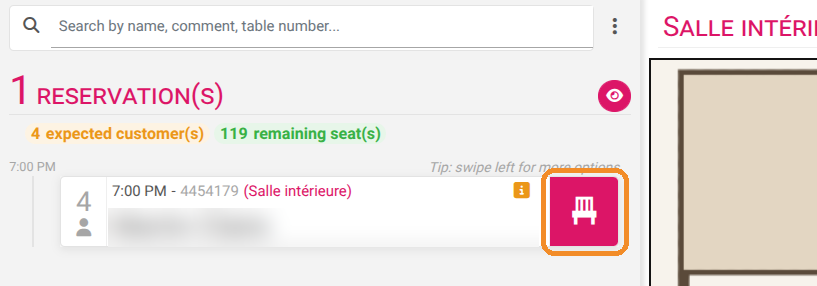
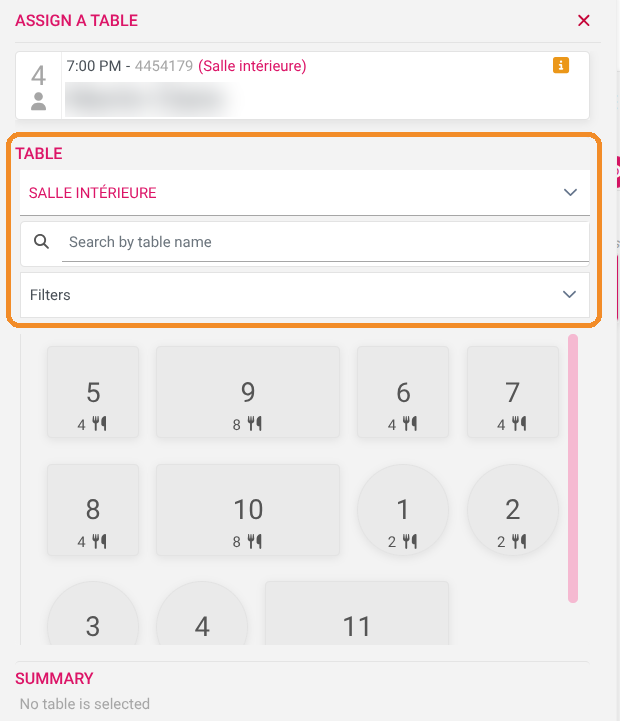
3. Click this box: the ASSIGN A TABLE panel opens on the left, with a reminder of the booking.
Find the right table
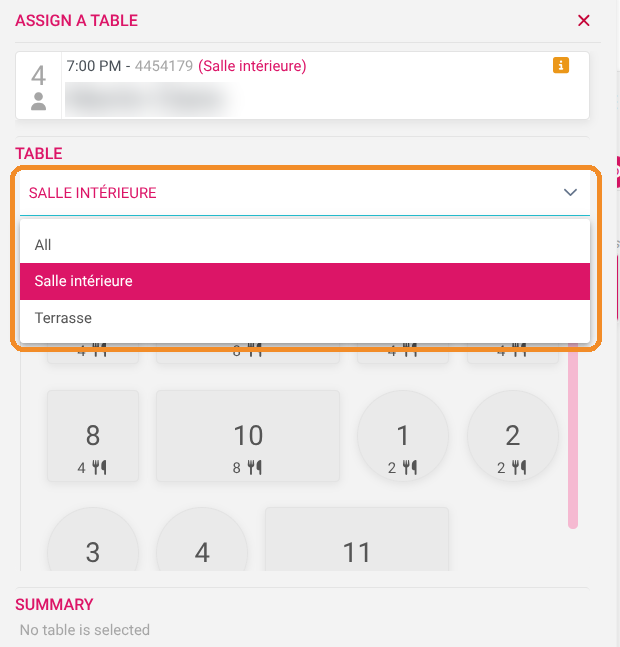
4. Under TABLE, choose the room in the list, or All to see the tables of every room. The room entered when the booking was taken is already selected.
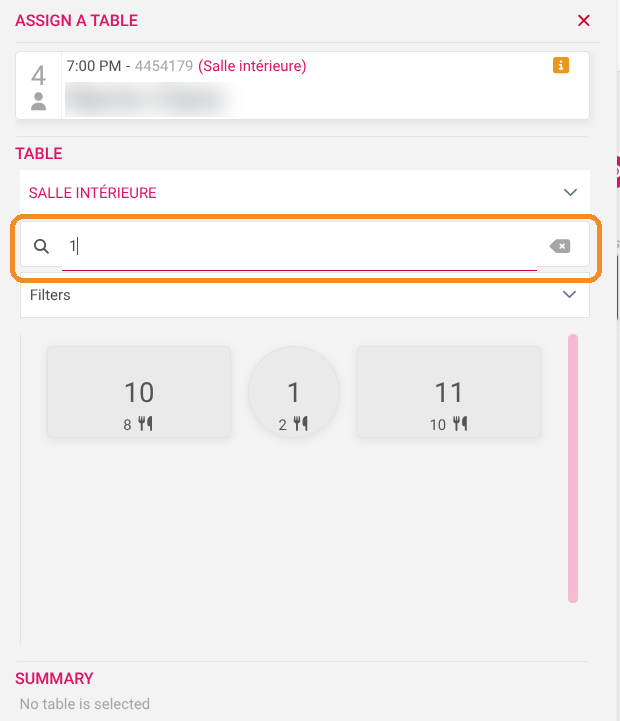
5. To save time, type the table name in Search by table name.
6. To keep only suitable tables, open Filters and tick one or more characteristics (for example Quiet or Reduced mobility access). Only the tables that have all the ticked characteristics remain displayed. Click the cross on a filter to remove it.
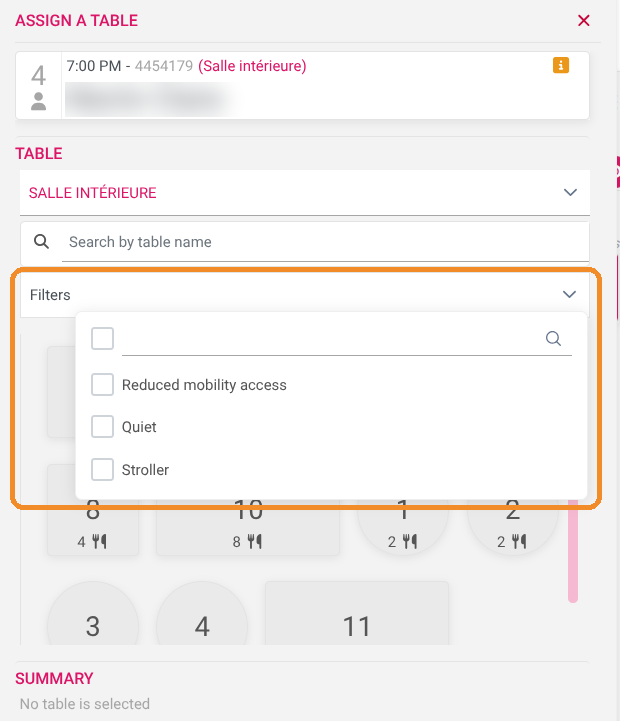
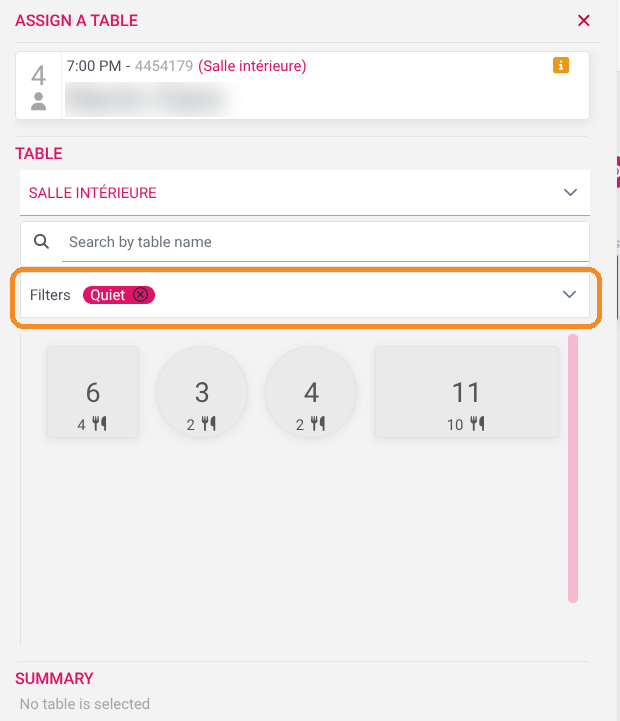
The filters offered are the table characteristics you enabled in Managing my activity > Property Setup > MY CHARACTERISTICS, then assigned to your tables in My tables.
Select one or more tables
7. Click a table: it turns pink with a check mark and appears in the SUMMARY.
8. For a group, click other tables in the same room. Click a table again to remove it.
9. Click TO VALIDATE.
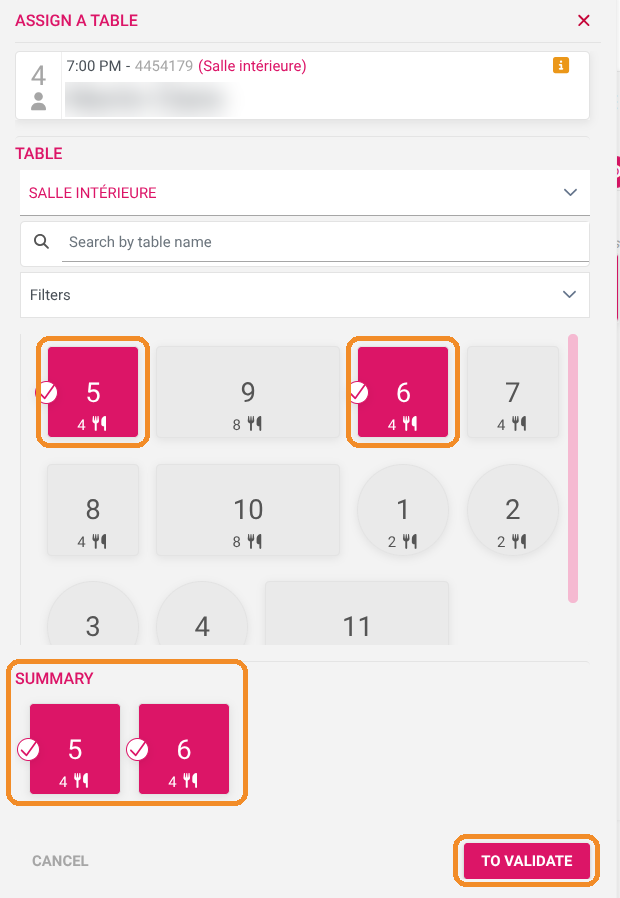
Choose all the tables of a booking in the same room. If you mix tables from two rooms, the booking is left without a table.
Choose a table (or a set of tables) large enough for the number of guests in the booking: otherwise an error message is displayed and the assignment is not saved.
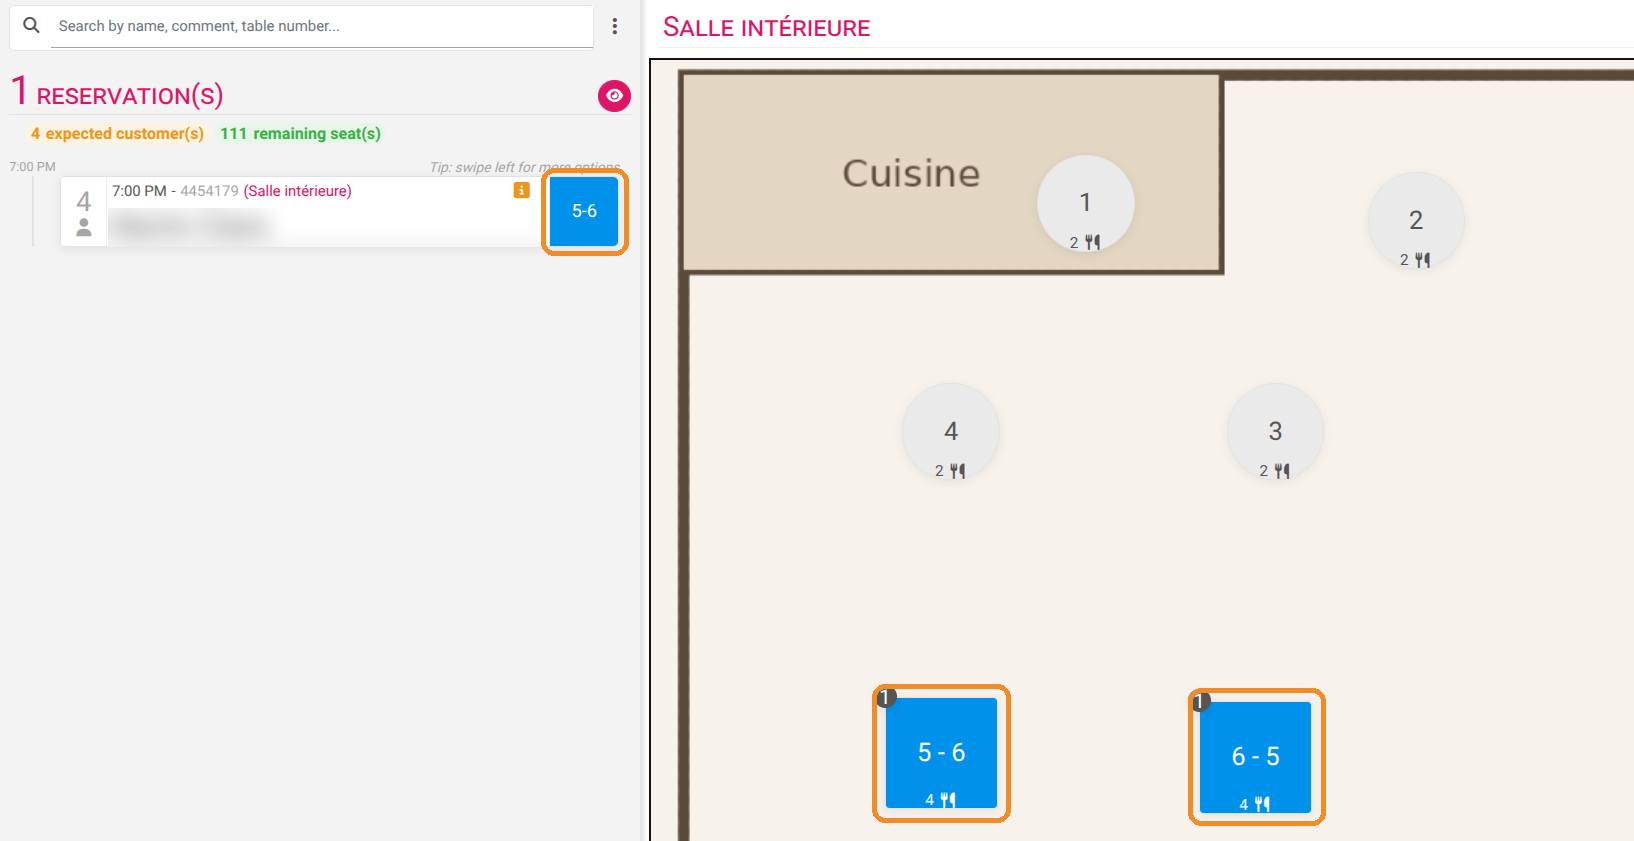
10. The table appears in the booking card and in blue on the layout, with a badge showing the number of bookings on this table. The number of remaining seat(s) goes down.
Change tables
11. Click the table box in the booking card: the ASSIGN A TABLE panel opens with the current tables already ticked.
12. Untick the tables to remove, tick the new ones, then click TO VALIDATE.
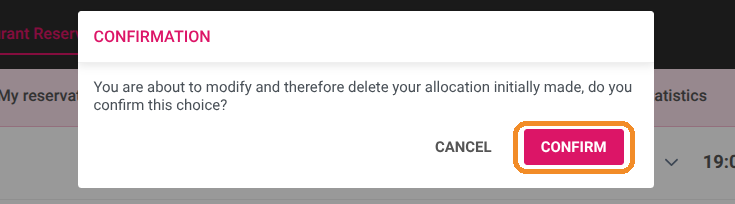
13. A message asks you to confirm that the initial assignment will be deleted: click CONFIRM.
The same table can receive several bookings during the same service (for example one at 6:00 PM and one at 8:30 PM). The badge on the layout shows how many bookings are placed on it.