Help for use
Breadcrumbs

How to Create New User Access for Multi-Properties in Reservit (Manage Account Permissions)

Article summary: This guide provides a step-by-step walkthrough on how to securely create new user accounts for your multi-property Reservit system. You will learn how to configure user details, set login durations, and assign targeted page permissions to your staff or partners. Mastering this user management feature ensures that your team has the exact tools they need while maintaining strict security over your sensitive property data.

The 4 key steps to create multi-property user access:

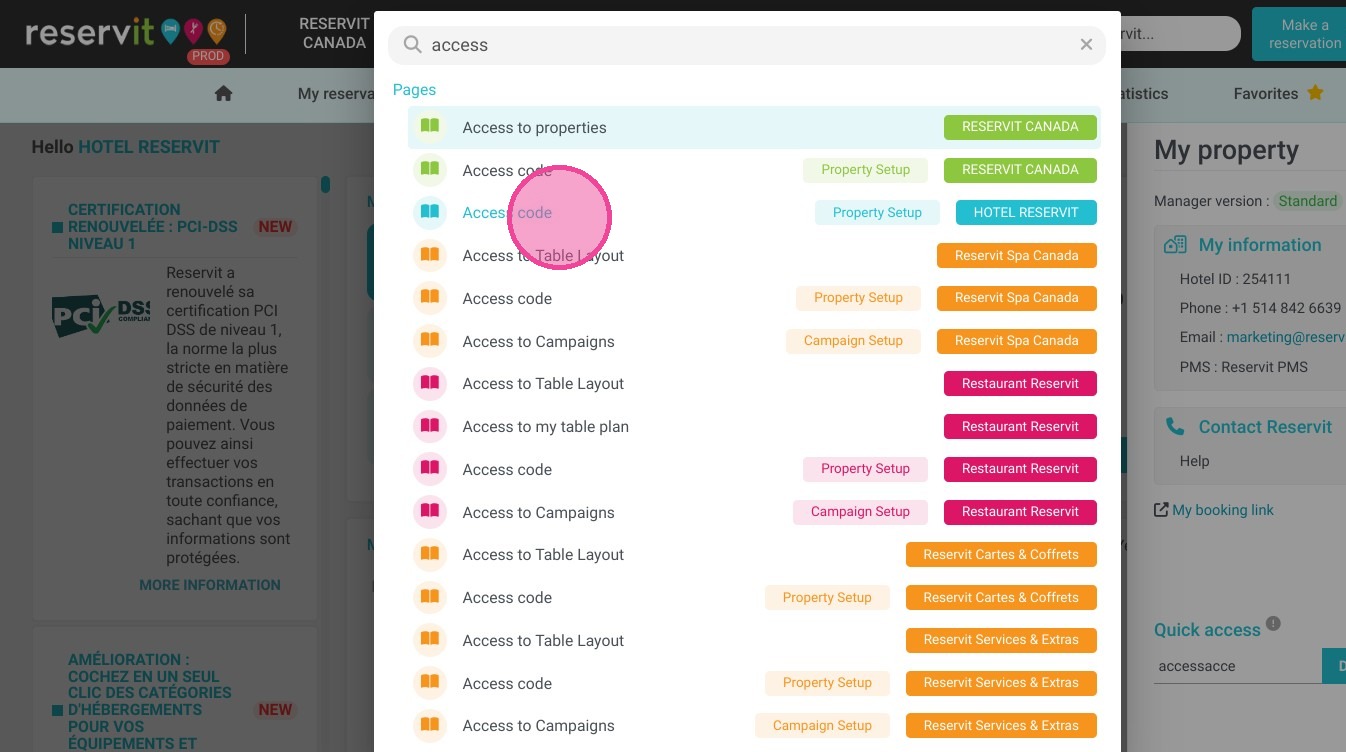
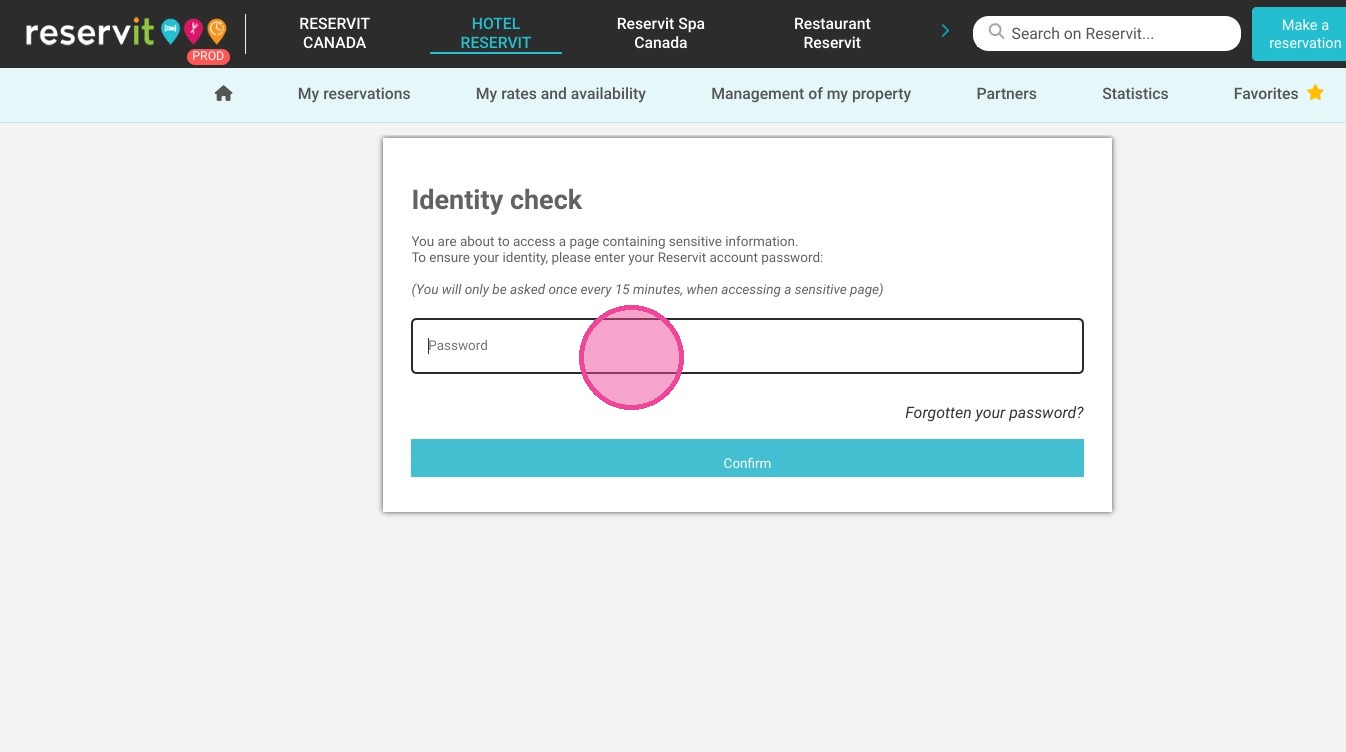
  • Access the security portal: Search for "access code" in the main search bar and verify your administrator password to enter the user management dashboard.

  • Initiate user creation: Click "Create Now!" and input the new user's essential details, including their designated ID, full name, and email address.

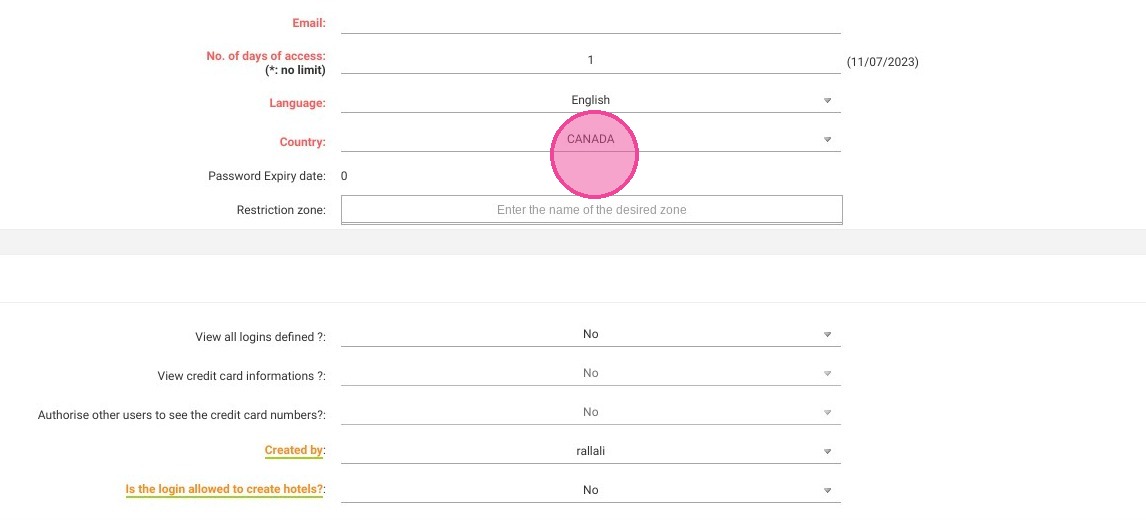
  • Configure account settings: Define the duration of their login privileges (enter a specific number of days or use "*" for unlimited access) and establish their preferred language and country.

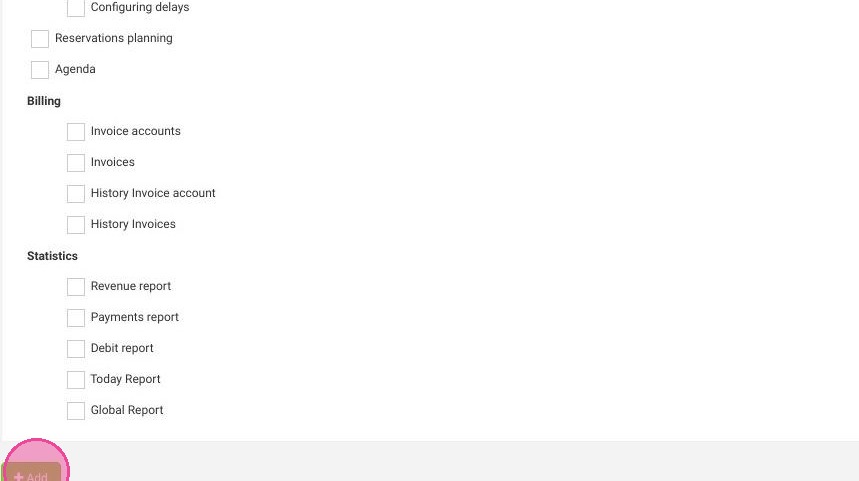
  • Assign permissions and save: Carefully select the specific pages and features the new user is permitted to access, then click "Add" to finalize the setup and automatically prompt the user to create their own password.

Why follow this guide? Following this precise protocol ensures you maintain total administrative control over your multi-property software permissions, safeguarding your business data while efficiently and securely onboarding new staff members.

1. Go to the ''Search Reservit'' and Click on ''access code''

https://colony-recorder.s3.amazonaws.com/files/2024-12-26/d0f4c1c9-7e5f-4e32-9d65-8082d37f71ad/ascreenshot_4b5dd8fdad58462581948ec1eafef49b_text_export.jpeg

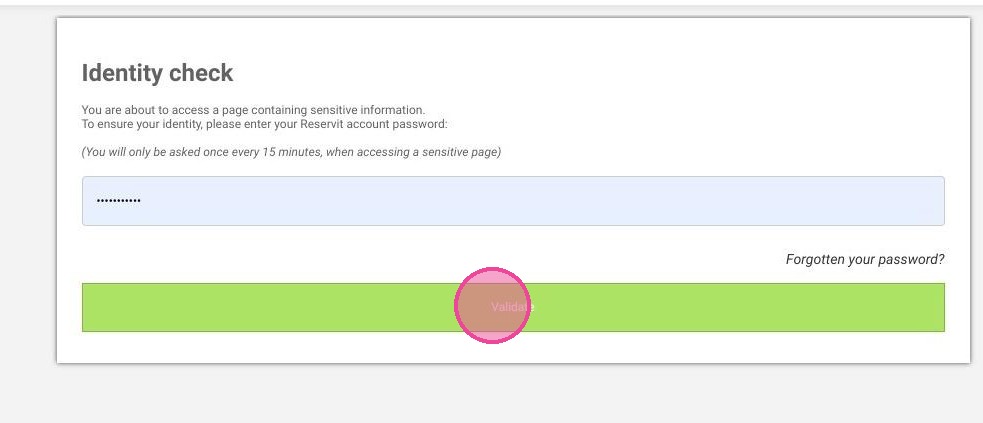
2. Enter your "Password" to access

https://colony-recorder.s3.amazonaws.com/files/2024-12-26/da964e5f-cda1-452c-bc5d-e485f5bd51ea/ascreenshot_e3afe8e2d5f74491a21917ba079b2d15_text_export.jpeg

3. Then confirm it.

https://colony-recorder.s3.amazonaws.com/files/2024-12-26/b2773cf2-936e-42ed-9ece-a9d66eb589bf/user_cropped_screenshot_cd2b91d1514d44069adf6b390cd8920c_text_export.jpeg

4. Click "Create Now!"
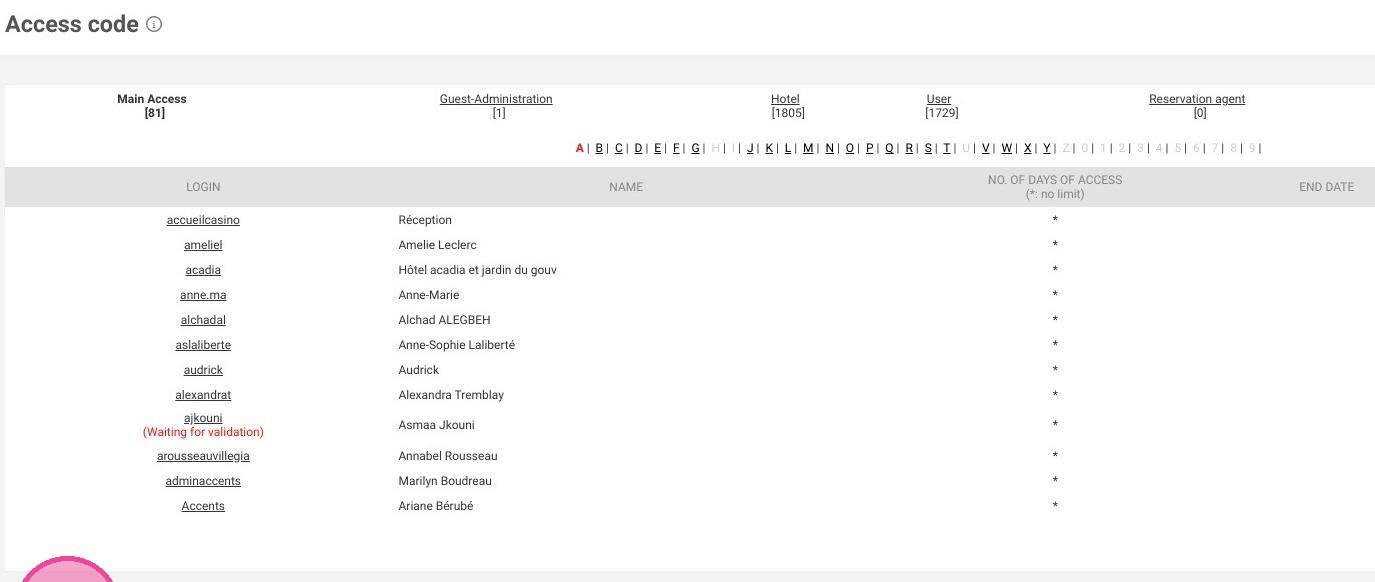
https://colony-recorder.s3.amazonaws.com/files/2024-12-26/c7cfe5b6-35da-4e1f-8377-2e0e19034ba0/user_cropped_screenshot_6057d30569794a1d864ba82ed1579878_text_export.jpeg

5. Choose an ID.

https://colony-recorder.s3.amazonaws.com/files/2023-07-10/ca87291a-e0fa-4f11-b6c3-a113c5e89366/ascreenshot_897a64e047f041d0b9cbe0ffd12fa65e_text_export.jpeg

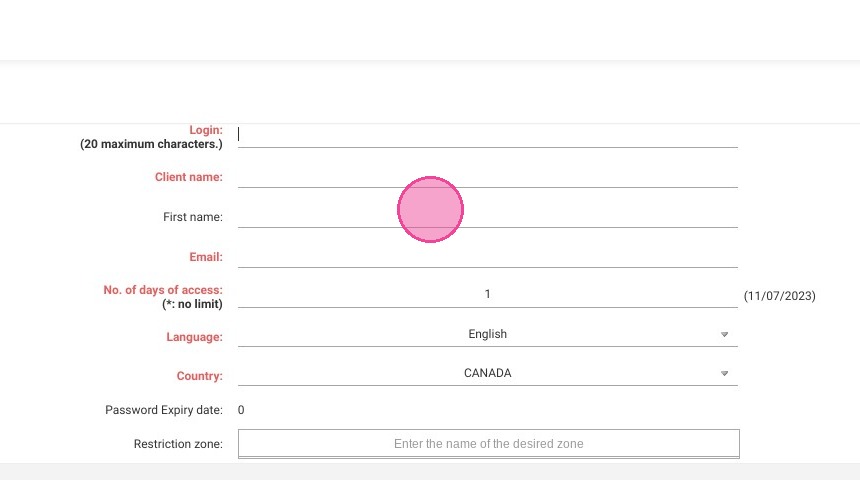
6. Enter the client's name.

https://colony-recorder.s3.amazonaws.com/files/2024-12-26/b5be54d4-157e-4941-9c43-63d8336f4460/user_cropped_screenshot_d4bb14d6187f4550ad9a867ea3f4faa6_text_export.jpeg

7. Enter the client's email so they can create their own password.

https://colony-recorder.s3.amazonaws.com/files/2023-07-10/64a4bdaf-9bd6-4ed7-b638-22146775b98d/user_cropped_screenshot_5af790852a0b48eab588fd133199a56a_text_export.jpeg

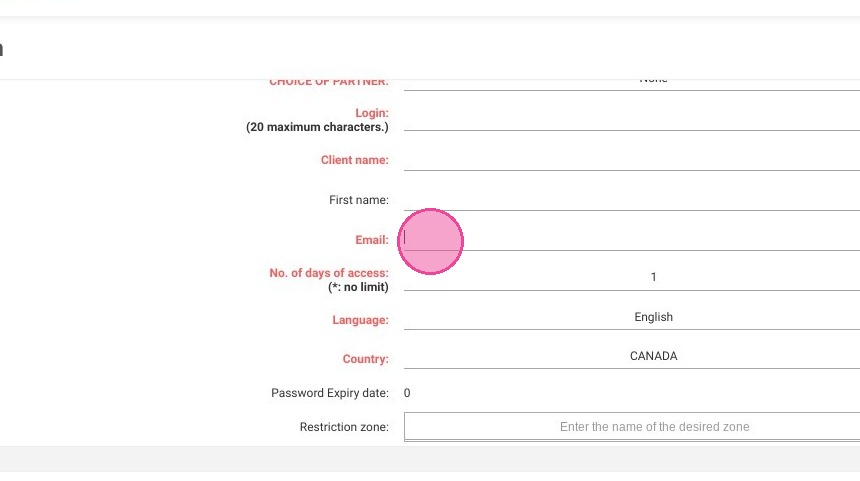
8. Add a number of days of access or tap "*" to be unlimited.

https://colony-recorder.s3.amazonaws.com/files/2023-07-10/6cbee9cf-17fc-4429-8dd4-0398f2c11d1c/user_cropped_screenshot_f9f406093ad94f23a7d952ce1b2fcfa0_text_export.jpeg

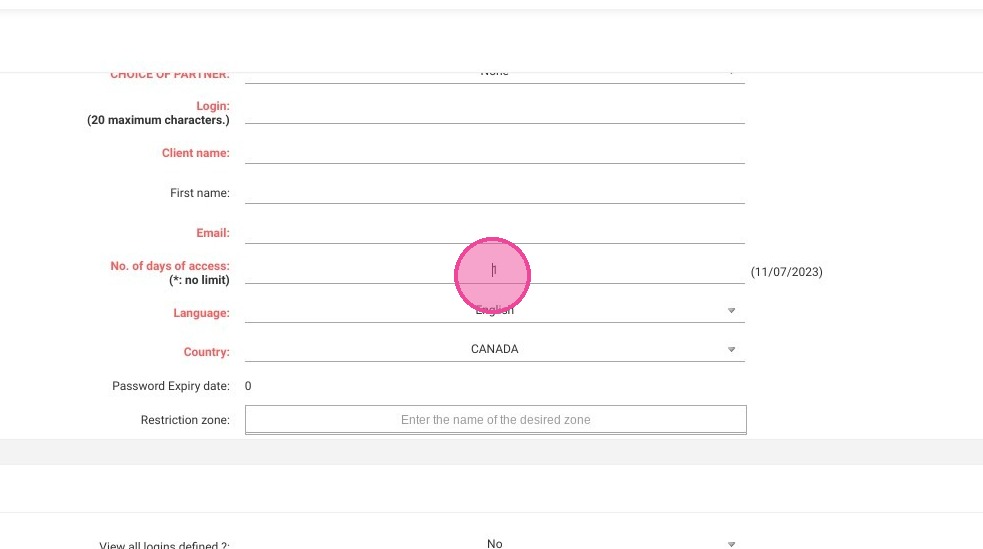
9. Select the language.

https://colony-recorder.s3.amazonaws.com/files/2023-07-10/e95e4f44-7c7a-4707-ba37-504a4c4bc509/user_cropped_screenshot_ba494e7aa2ac48489937b1e3abe63598_text_export.jpeg

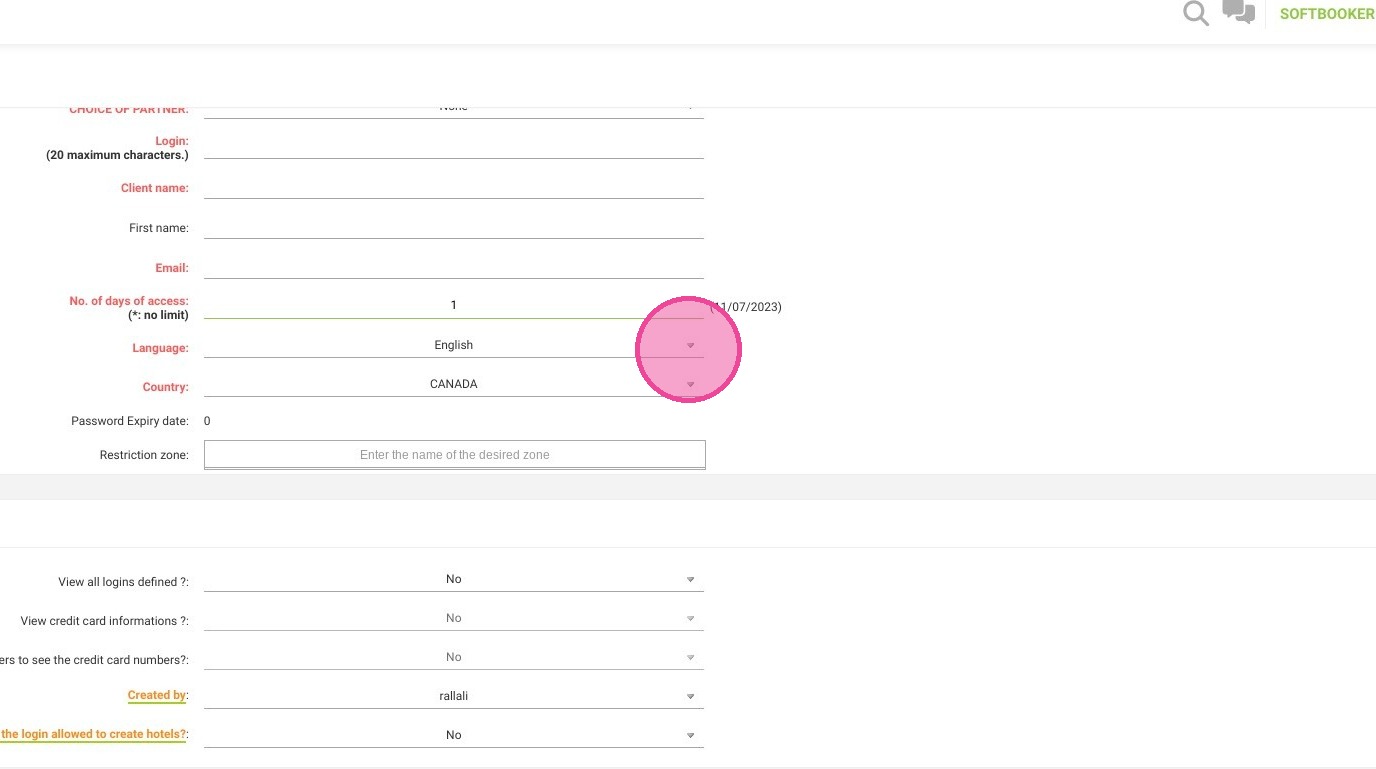
10. Select the country.

https://colony-recorder.s3.amazonaws.com/files/2023-07-10/285b3f0b-c294-4023-b009-40077f7c4d83/user_cropped_screenshot_218c9edfb1ad48c79d03f50f39272b2d_text_export.jpeg

11. After clicking on "Add" at the bottom. You'll have to select the accessible pages for the customers.

https://colony-recorder.s3.amazonaws.com/files/2023-07-10/166b36fa-c2ab-4ab8-a323-c0831b63278d/ascreenshot_609edbbccc394b0f9eba444b6c747e11_text_export.jpeg

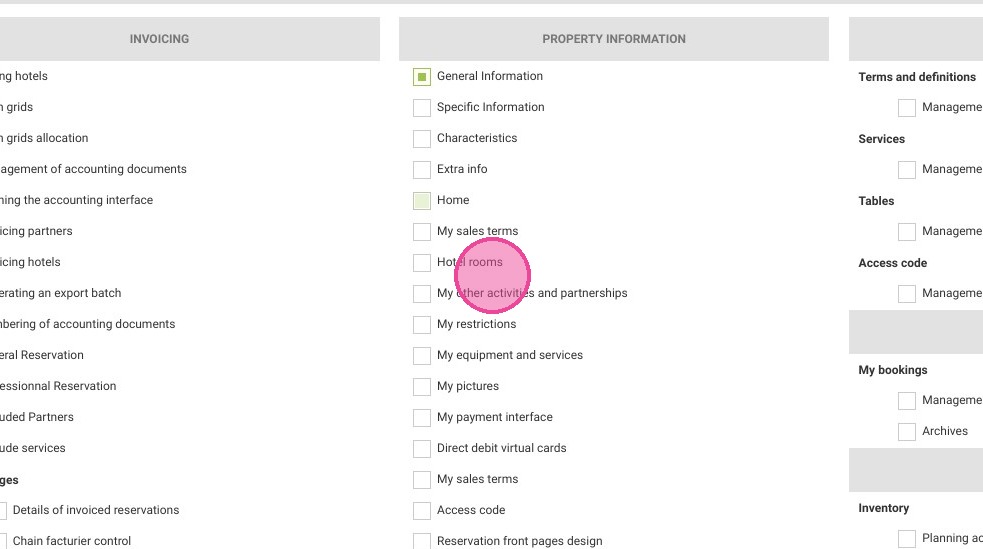
12. Click "Add" to save. The new access is now ready. The user has to create his own password.

https://colony-recorder.s3.amazonaws.com/files/2024-12-26/1cc910c9-f4ff-45b8-bd96-4d7d28cd6501/user_cropped_screenshot_63a5dda8878e4629b81b171e2570d93e_text_export.jpeg