

Article Summary: This practical tutorial walks you step by step through extracting your bookings from Reservit Accommodation into an Excel file, sent by email to the address linked to your login. You will learn how to set the period and the reference date (creation, arrival...), and how to keep all your bookings, whatever their channel (website, front desk, OTAs), or only those from your distributors (OTAs). You can also use the same extraction to get your future bookings, prepare a rooming list or find your cancelled bookings: see "Other Uses of the Extraction".
The 5 Key Steps to Export Your OTA Bookings in Reservit:
-
Open the extraction tool: Go to "Statistics" > "Exports" > "Extraction of bookings", then enter the security code sent to you by email.
-
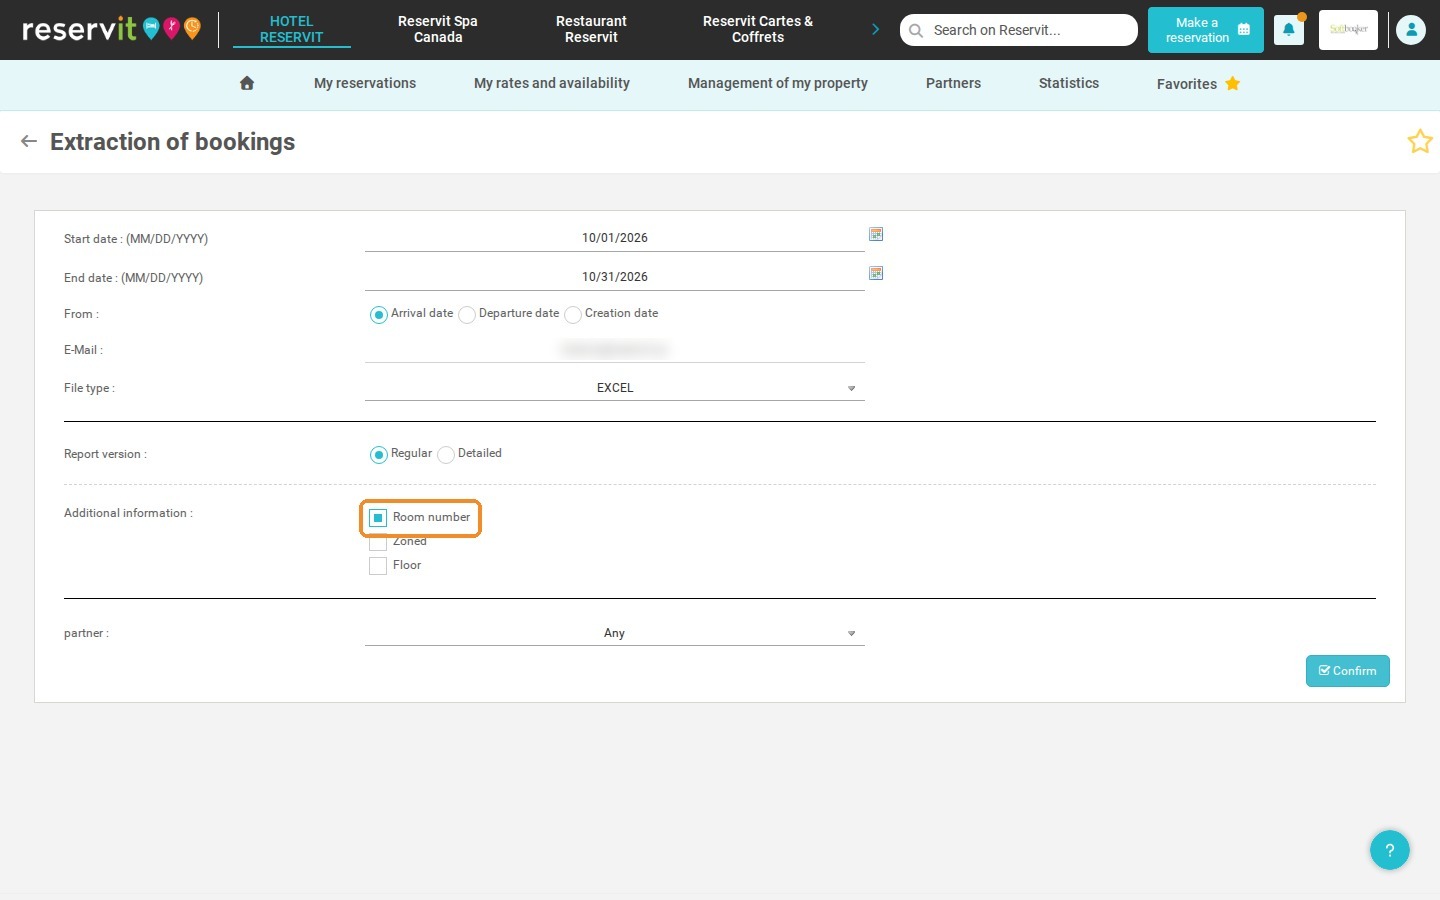
Set the period: Choose the start date and end date (untick "Room number" if you use Reservit PMS).
-
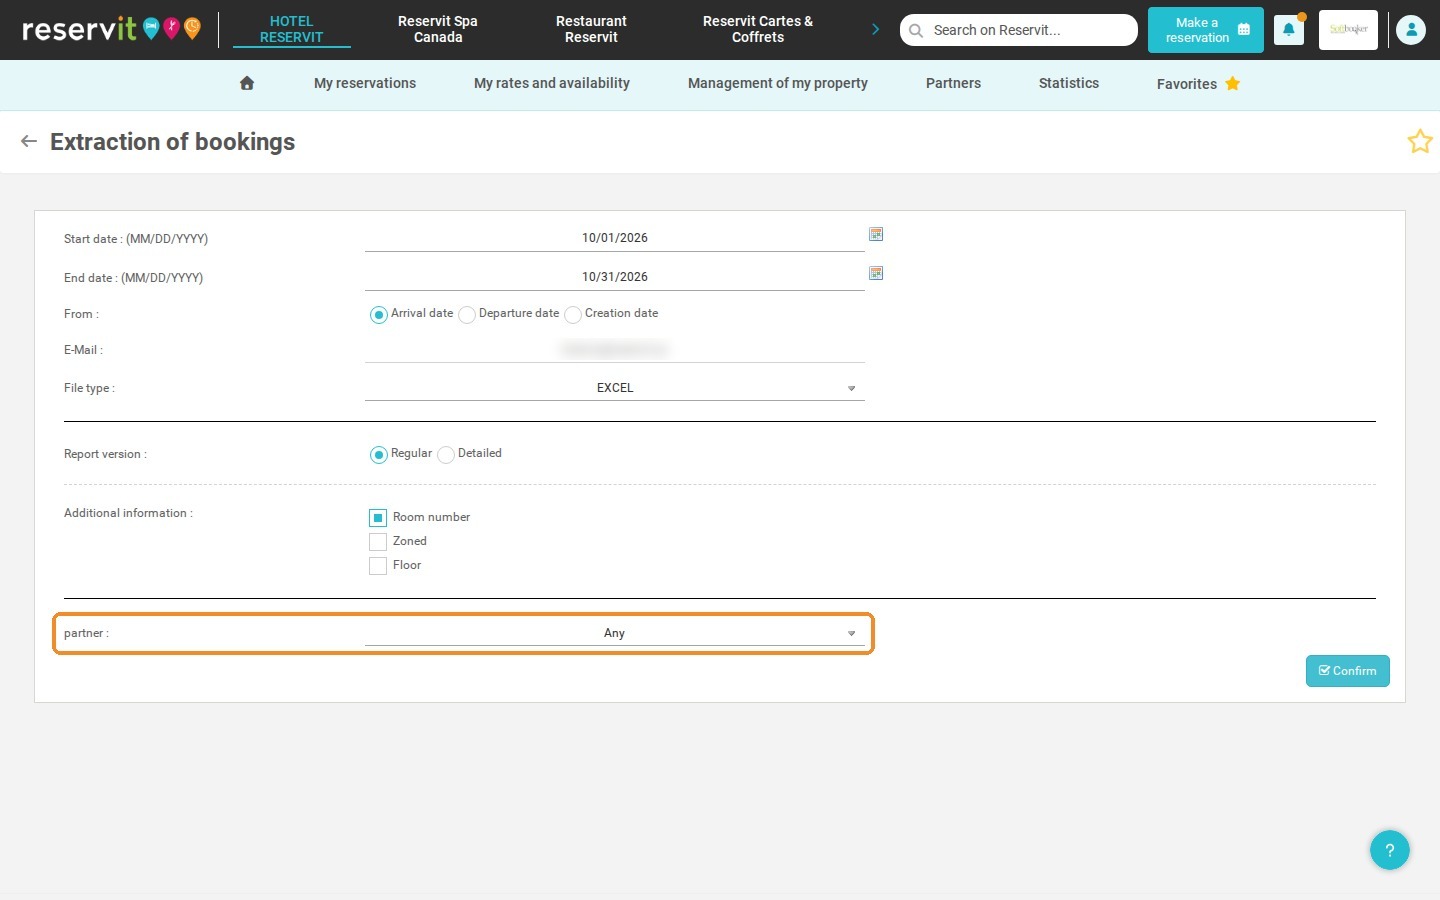
Select your partner channels: In the "partner" list, choose "Partner booking only", then click "Confirm": the Excel file is sent to you by email.
-
Sort the exported data: In the Excel file, apply a sort to display only confirmed bookings.
-
Analyze specific distributors: Use Excel filters to focus on the partners you want to study.
Why Follow This Guide? This guide saves you valuable time by automating the collection of your booking data and removing the errors that come with manual entry. It gives you what you need to steer your distribution strategy and make your financial analyses more reliable.
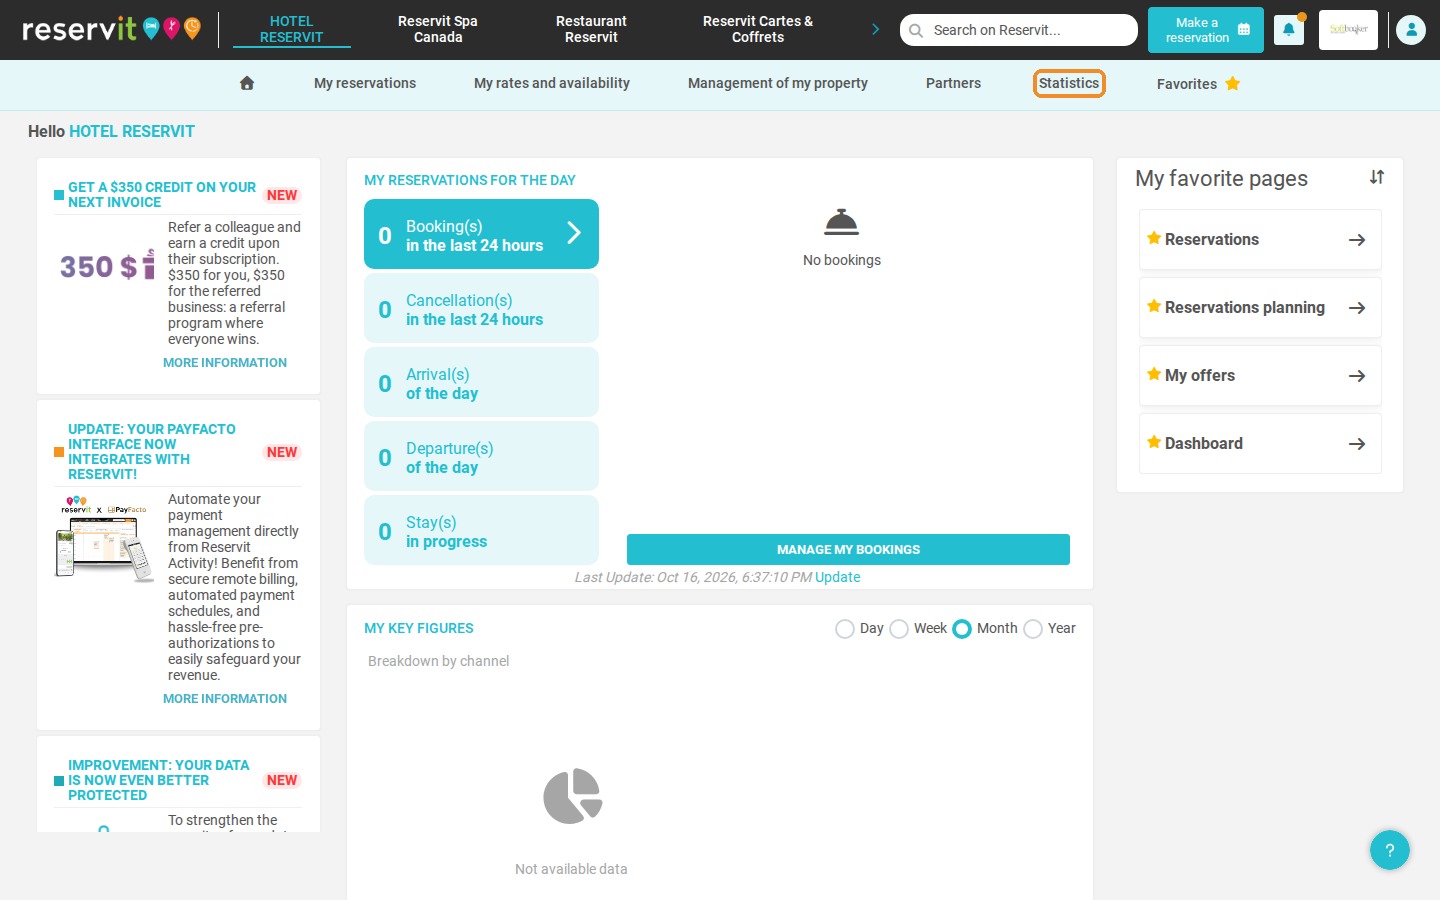
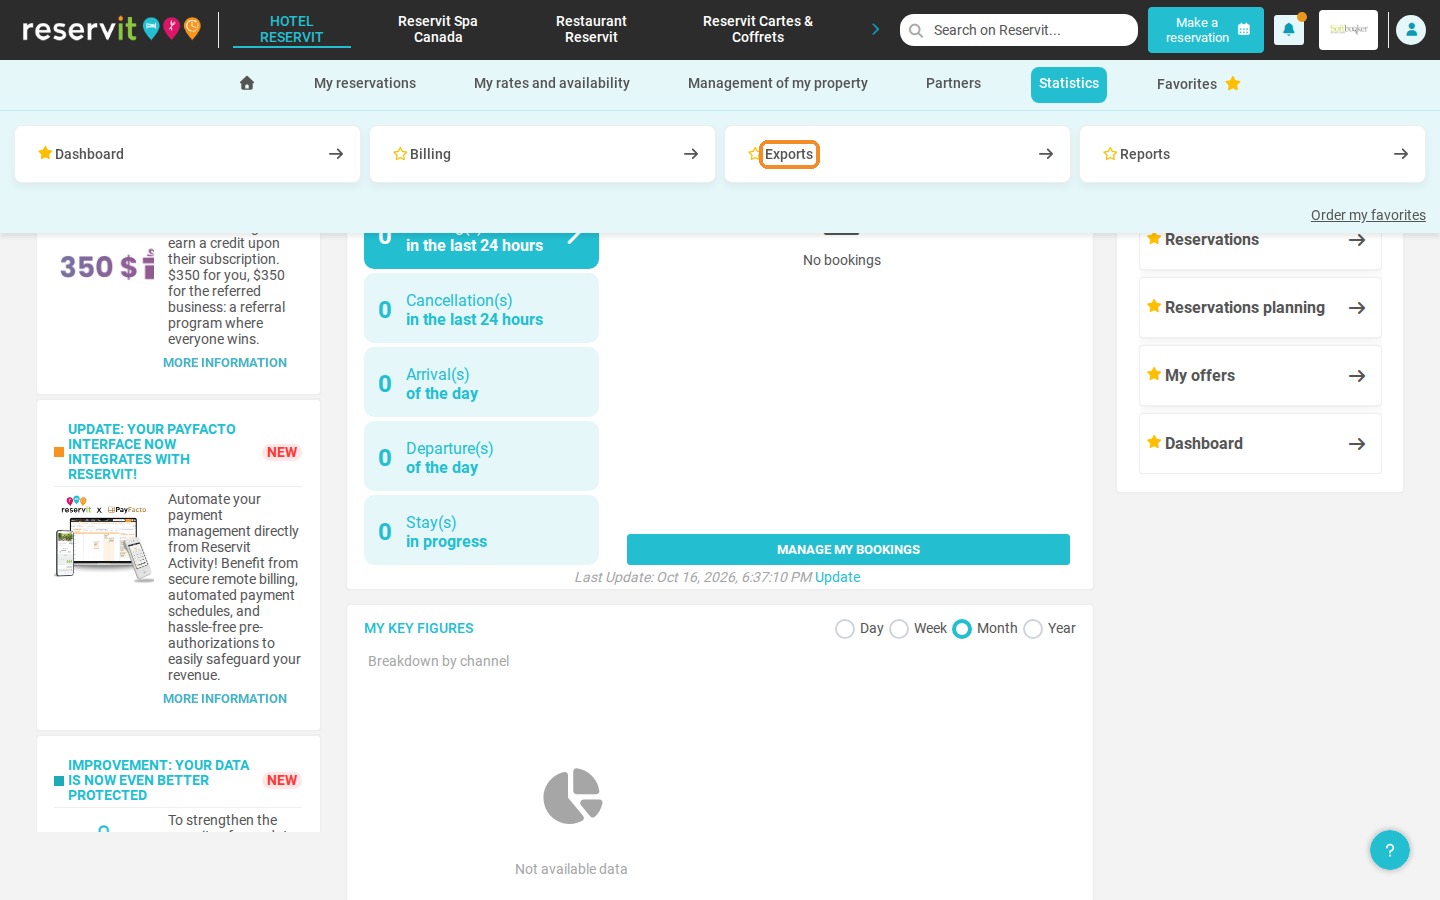
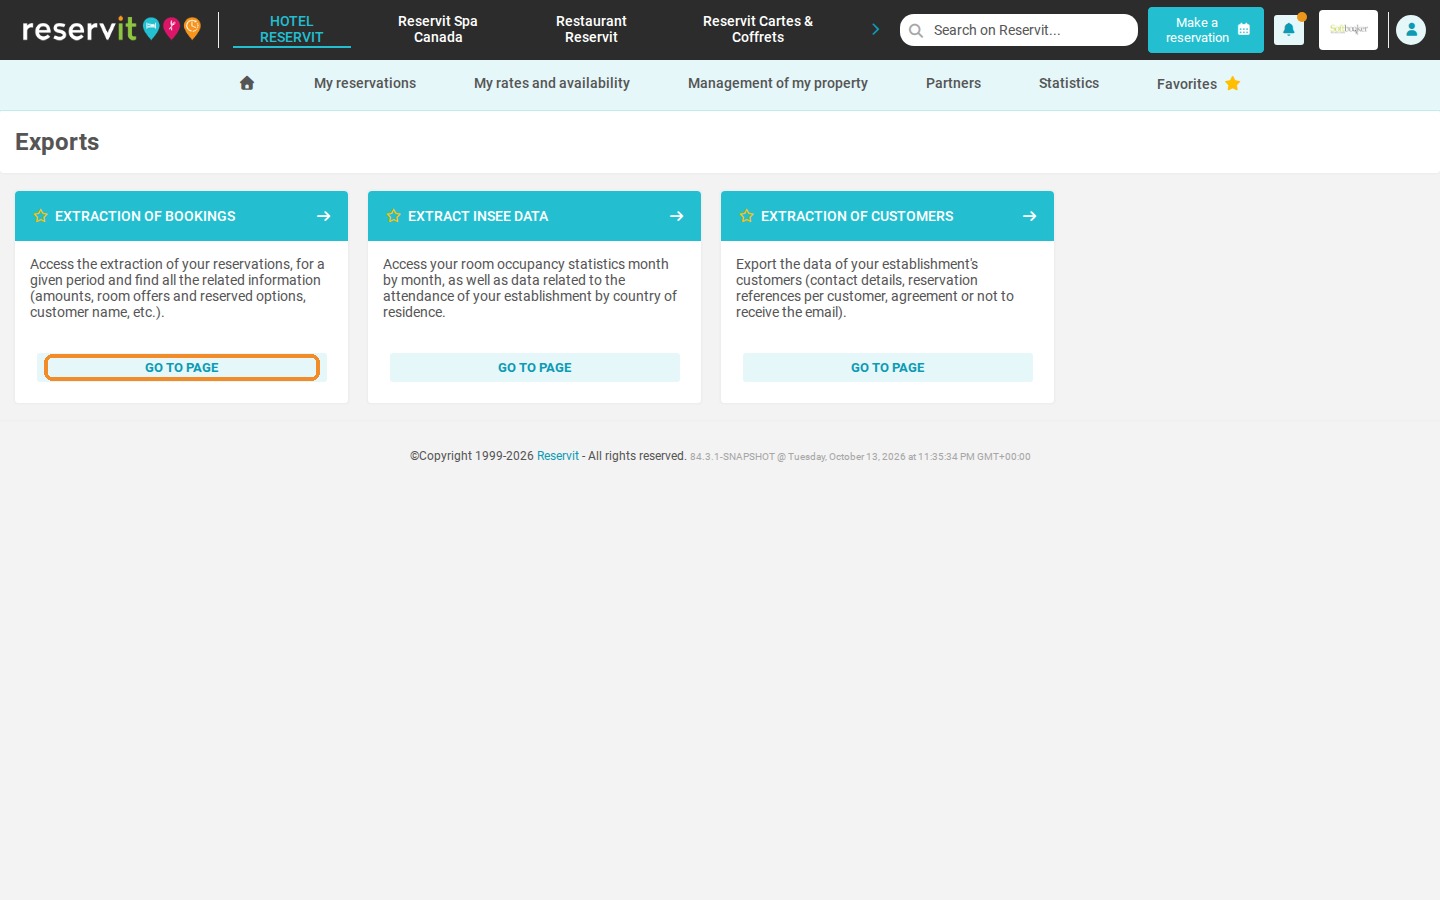
1. Click "Statistics" > "Exports", then click "Go to page" on the "Extraction of bookings" tile. For security reasons, a code is sent to your email address: enter it and click "Confirm" to open the extraction form.
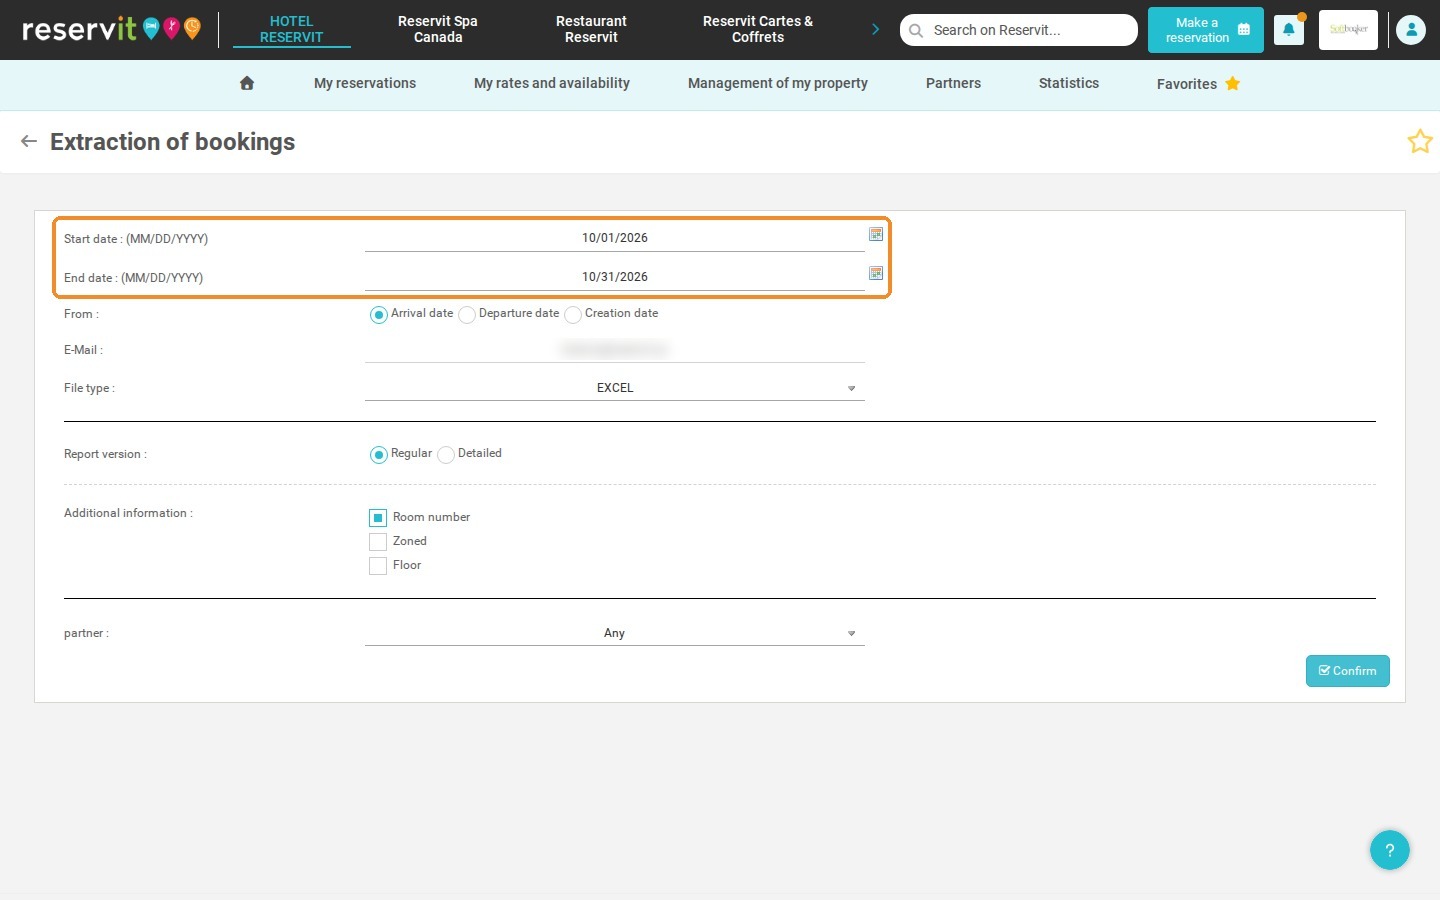
2. Choose the start date and end date of the period.
3. Warning: if you use Reservit PMS, untick the "Room number" box: otherwise, the file contains one line per room and the number of lines no longer matches the number of bookings.
4. In the "partner" list, choose "Partner booking only". Click "Confirm". The Excel file is not downloaded directly: it is sent to you by email, only to the address linked to your login.
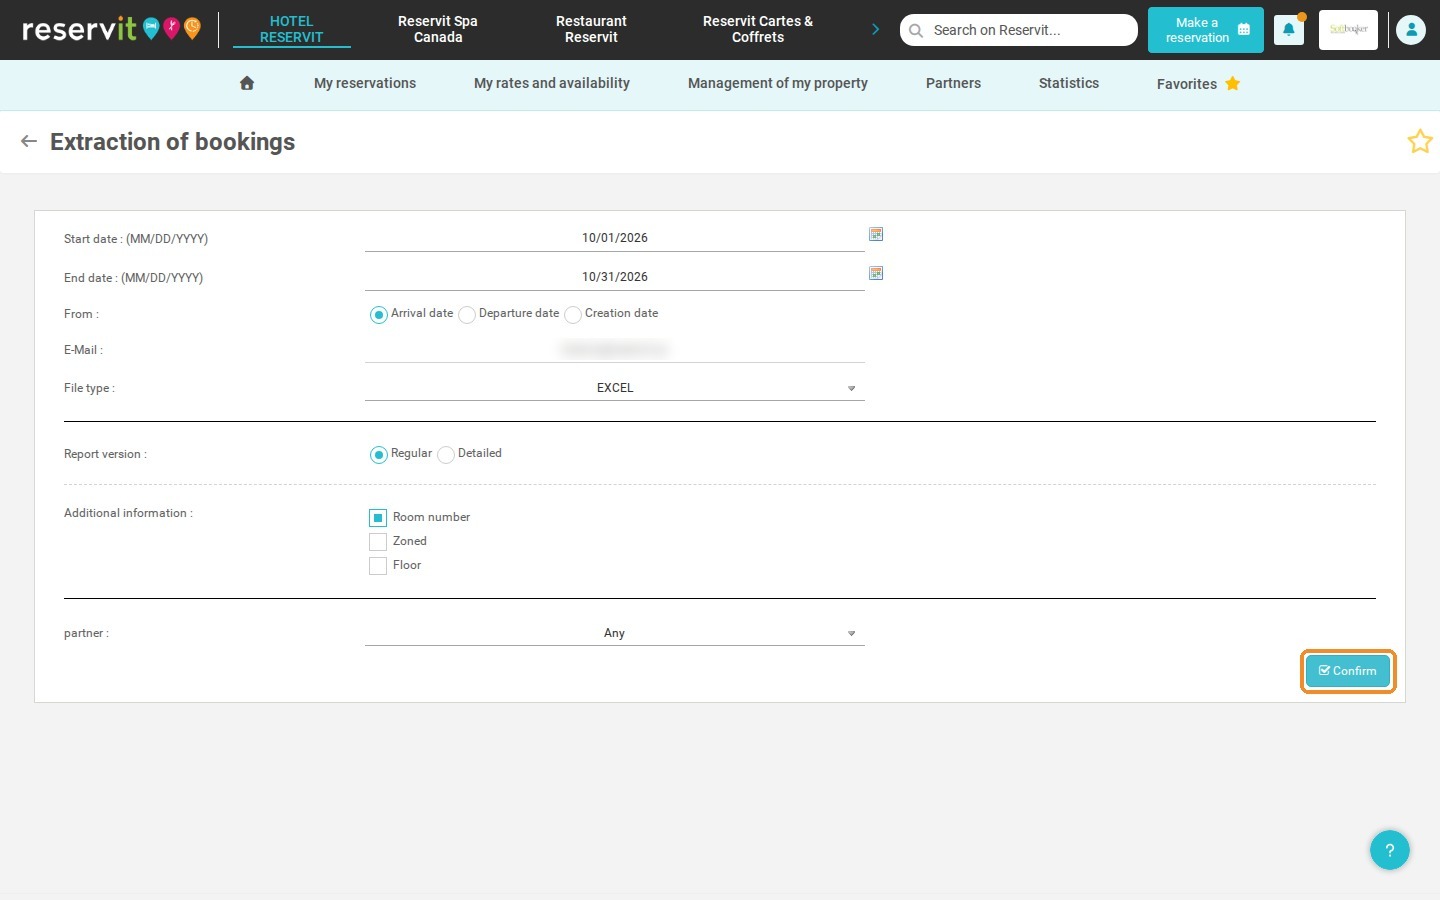
Good to know: the "E-Mail" field of the form is pre-filled with the address of your login and cannot be changed. To send the file to another address, log in with the login of the person who needs to receive it.
5. In the Excel file, apply a sort to display only confirmed bookings.
6. If needed, apply a filter to display only certain partners.
Warning: The extraction does not offer a calculation by date of stay: each booking is counted in full, according to the date chosen for the period. The number of bookings or the amounts may therefore differ from those of the dashboard.
Other Uses of the Extraction
You can also use the same extraction to prepare a rooming list or to find your cancelled bookings. The form has no status filter: all the bookings of the period (confirmed, pending, cancelled) are in the file, and you keep the ones you need in Excel.
Get all your future bookings
1. In "From", choose "Arrival date".
2. Enter today's date as the start date, and as the end date the furthest date you are interested in (for example the end of next year).
3. In the "partner" list, keep "Any" to get all bookings, whatever the channel. Click "Confirm".
4. In the file you receive by email, keep only confirmed bookings.
Good to know: for the list of your customers and their contact details, use the Extraction of customers: see How to Extract and Export Your Customer Database on Reservit Accommodation.
Prepare a rooming list (list of arrivals)
1. In "From", choose "Arrival date", then enter the arrival period (for example the coming day or week).
2. Tick "Room number" if you use Reservit PMS: the file then shows the assigned room, with one line per room.
3. In the "partner" list, keep "Any" to get all bookings, whatever the channel. Click "Confirm".
4. In the file you receive by email, keep only confirmed bookings, then sort by arrival date.
Good to know: with Reservit PMS, you can also print the list of arrivals directly from the planning: see How to Print an Arrivals List (Rooming List) in Reservit PMS.
Find your cancelled bookings
1. In "From", choose the date that matches your question:
-
"Creation date": bookings made during the period;
-
"Arrival date": stays that were due to start during the period.
2. In the "partner" list, keep "Any" (or choose "Partner booking only" for cancellations coming from OTAs). Click "Confirm".
3. In the file you receive by email, filter the status column to keep only cancelled bookings.
Warning: the extraction does not let you choose the cancellation date. To count the cancellations made on a given day or period, use the Global Report (Reservit PMS), which counts them on their cancellation date: see How to Filter the Global Report by Invoice Date in Reservit PMS.
Learn more: Understanding the dates in your statistics - Why are my figures different from one screen to another?