Help for use

How to Configure Guest Registration Forms and Customize Check-in Document Rules in Reservit PMS

Article Summary: Learn how to easily set up and customize guest registration forms within Reservit PMS to streamline your front-desk arrival workflow. This comprehensive tutorial will guide you through activating the forms, choosing mandatory data fields, inserting your local terms of use, and selecting print layouts. By tailoring these legal intake sheets to your property's exact operational needs, you will gather essential guest details efficiently while maintaining regulatory compliance.

The 5 Key Steps to Configure and Customize Guest Registration Forms:

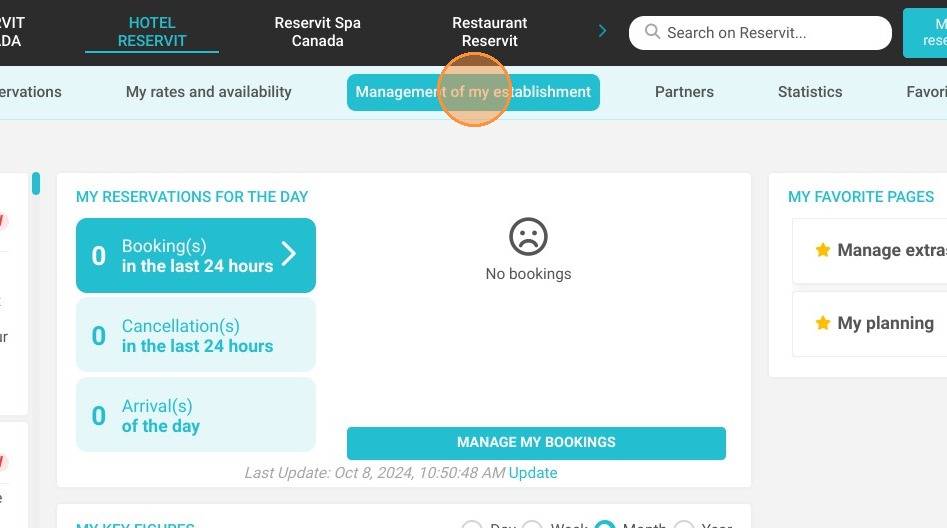
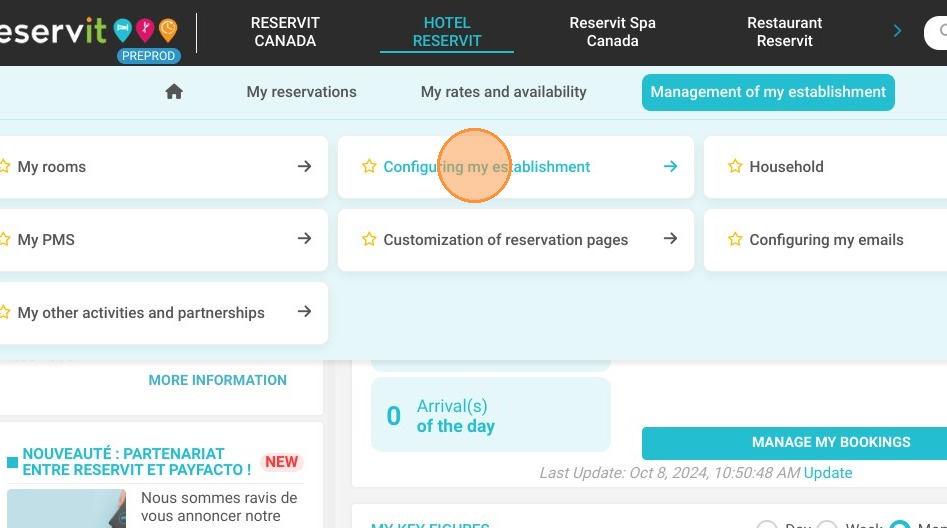
  • Navigate to the form settings: Go to "Management of my establishment," click on "Configuring my establishment," select "Reservit PMS Configuration," and open the "Registration form" menu.

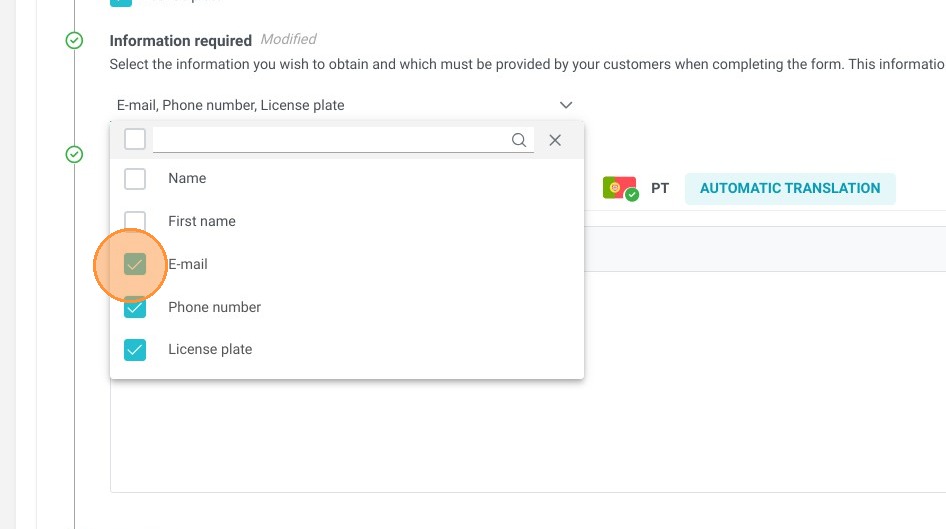
  • Activate and define mandatory data: Toggle the activation field to "Yes," fill out the core profile fields, and select which specific guest data requirements must remain mandatory during registration.

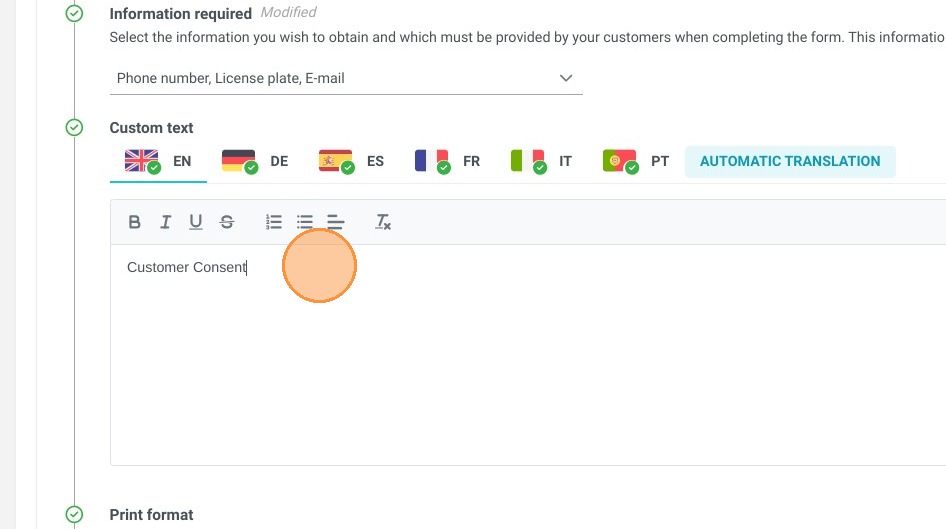
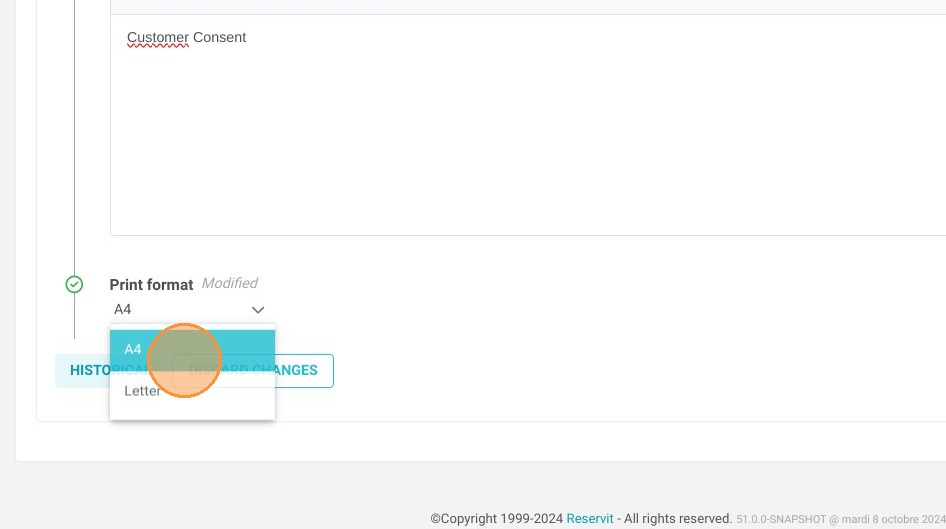
  • Insert legal policies and layouts: Input your property's terms of use or stay rules directly into the layout editor, then select your preferred document print dimensions (US Letter or A4).

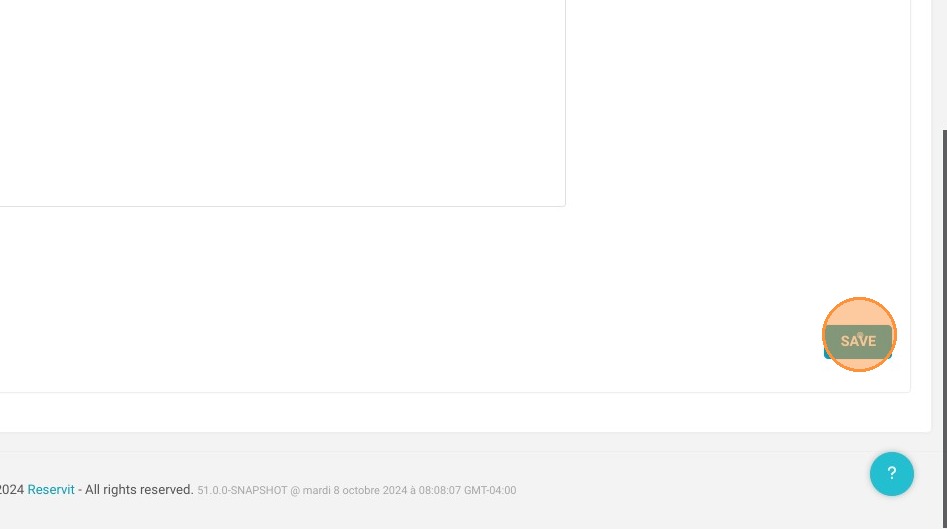
  • Save your changes: Click the "SAVE" button to commit your custom formatting choices and lock in your updated intake templates.

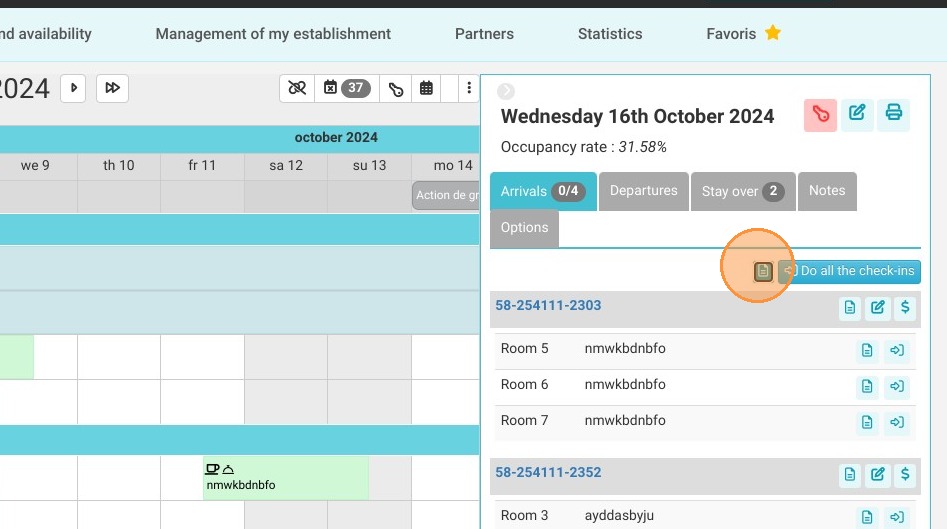
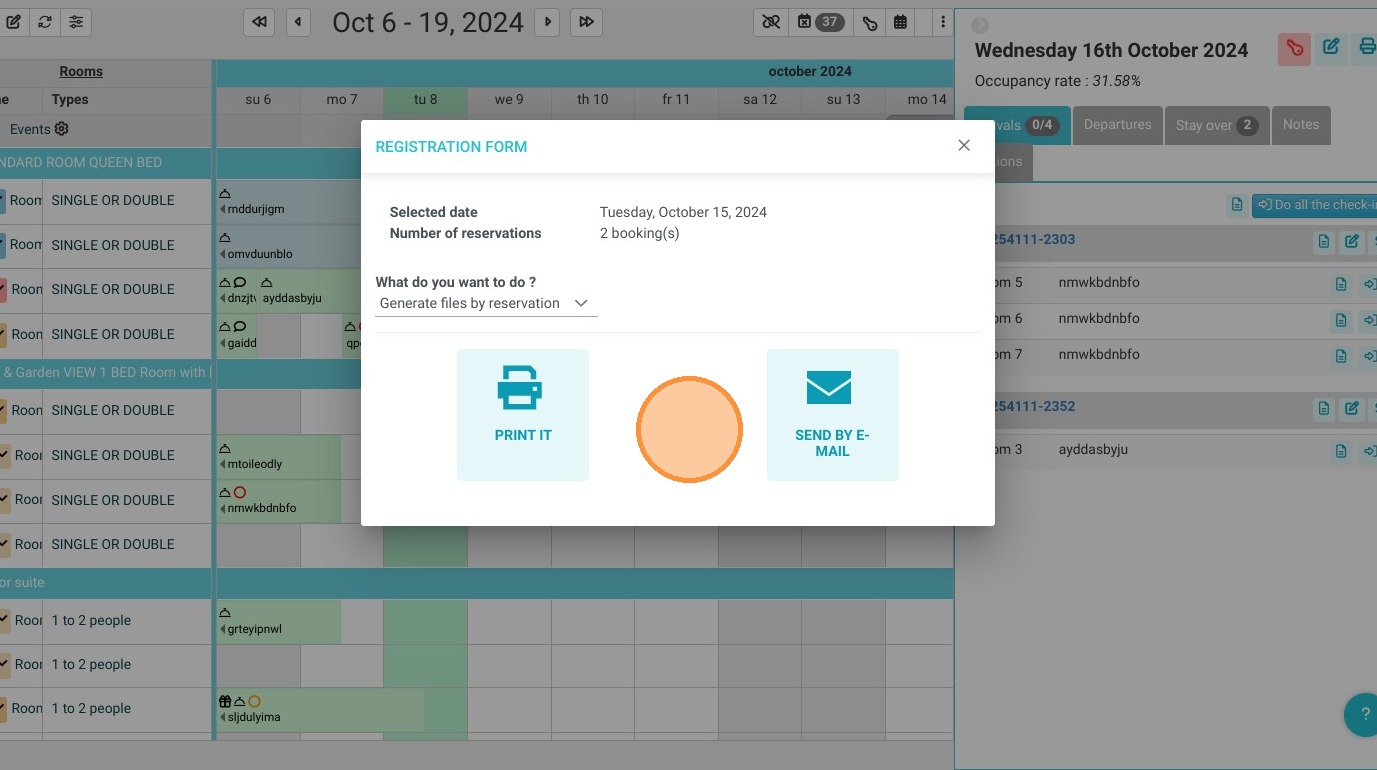
  • Access and print forms via the calendar: Head over to your main reservation grid, select a date with check-ins, and choose to preview or print intake forms either individually or in bulk for all arrivals that day.

Why Follow This Guide? Following this guide helps your reception team accelerate guest processing times during peak check-in hours, avoiding administrative mistakes or missing profile data. It provides an optimized approach to managing internal registration documentation, reducing desk friction for travelers while safeguarding your property's legal compliance.

1. Click "Management of my establishment"

https://colony-recorder.s3.amazonaws.com/files/2024-10-08/98b3191a-05e8-4ecb-8be4-8eed79de7f78/ascreenshot_39f8e5282719478eb31577184b2c93bf_text_export.jpeg

2. Click "Configuring my establishment"

https://colony-recorder.s3.amazonaws.com/files/2024-10-08/5d6a624b-9c83-424c-9ea7-9b67288d5555/ascreenshot_1d35ea8b51b3412ab5a0130e7bfbb26d_text_export.jpeg

3. Click "Reservit PMS Configuration"

https://colony-recorder.s3.amazonaws.com/files/2024-10-08/66d83ccc-2b0a-4459-adf6-2b3ae642cb25/ascreenshot_5a069ca2395e4db1b296f08aeedb0eff_text_export.jpeg

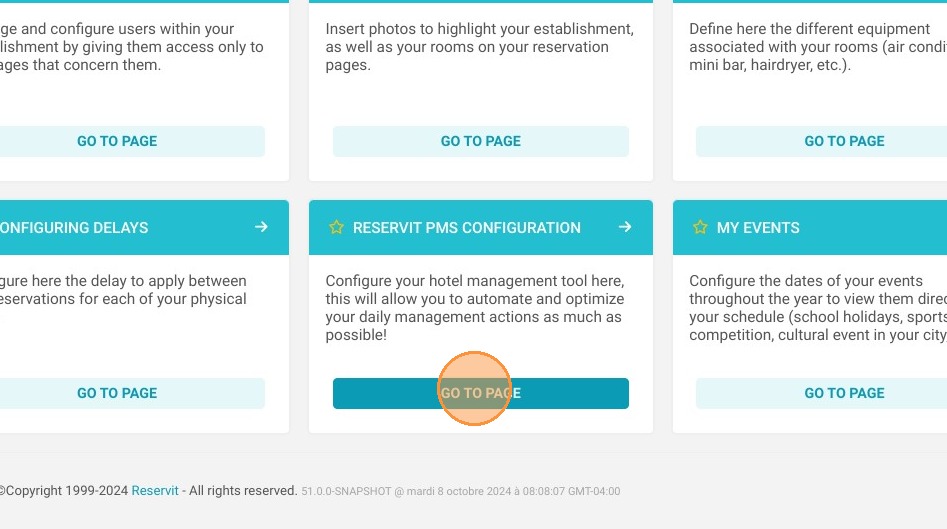
4. Click "Registration form"

https://colony-recorder.s3.amazonaws.com/files/2024-10-08/98e65f7a-462c-452c-baa5-70a22fc026bb/ascreenshot_243b928c4b81413e90d2bdbed2db1fe5_text_export.jpeg

5. To activate it, it is necessary to set the field to 'Yes.

https://colony-recorder.s3.amazonaws.com/files/2024-10-08/2e02c224-423e-428d-9faf-42969ff60087/ascreenshot_fc4c26f3b64548e494cdd60c6cf10884_text_export.jpeg

6. Fill in the following fields.

https://colony-recorder.s3.amazonaws.com/files/2024-10-08/0e887dc7-dbbc-4ff5-a724-ac6e06f193e8/ascreenshot_1f08f58dd07541d29e5afef9a5b30a03_text_export.jpeg
https://colony-recorder.s3.amazonaws.com/files/2024-10-08/32aa7b1b-ba2b-412d-b470-cd3af08ecedf/ascreenshot_9a774fab1ef94b37bdd285323490f8fd_text_export.jpeg
https://colony-recorder.s3.amazonaws.com/files/2024-10-08/8cfa93b0-93f0-49f0-b993-6cbb65ba0e05/ascreenshot_ac945b882afb45dfa56a39dc38bfc1e0_text_export.jpeg

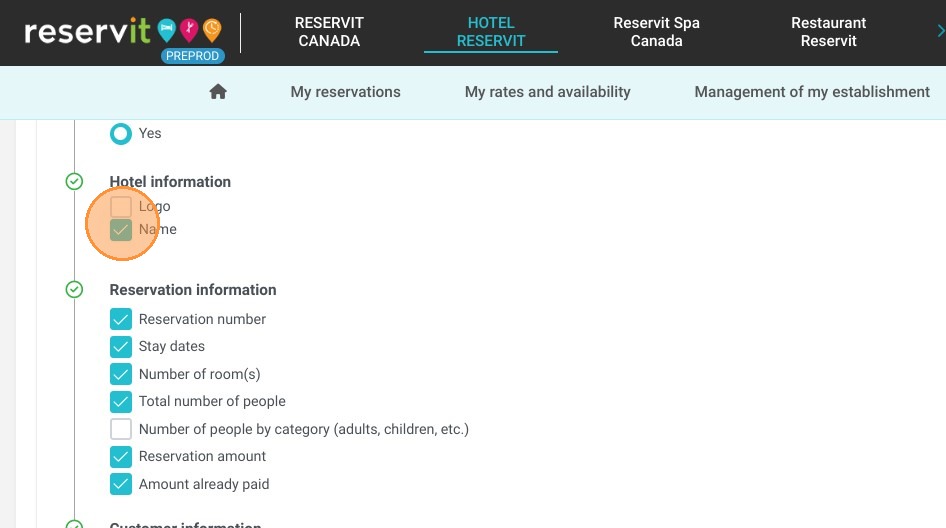
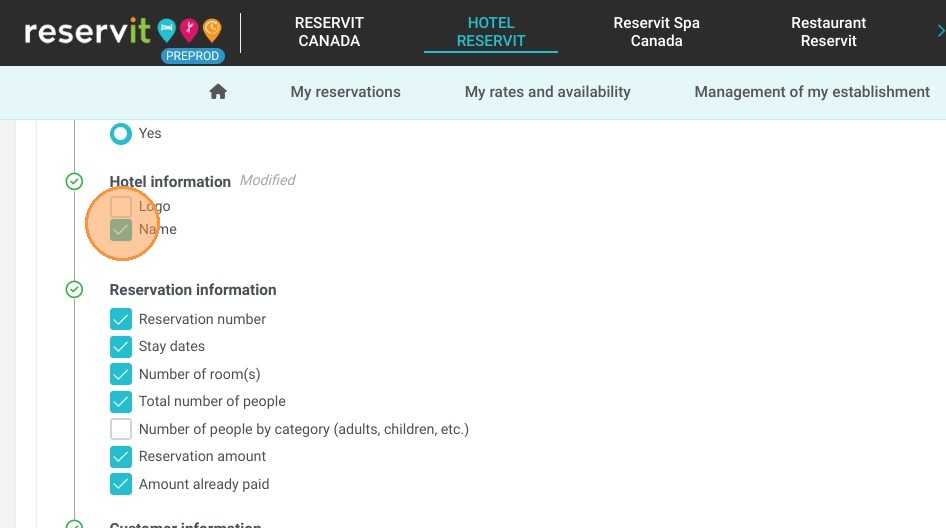
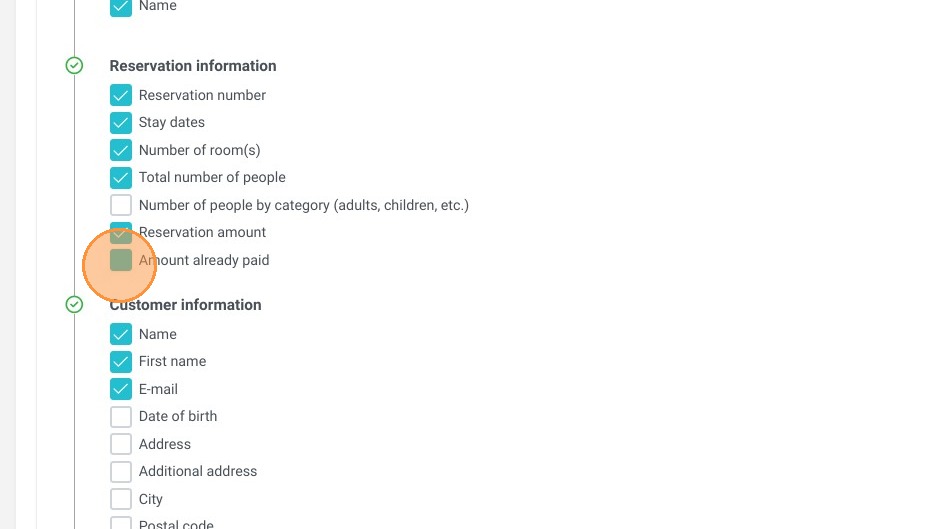
7. In this selection, you will have the option to make certain selected information mandatory.

https://colony-recorder.s3.amazonaws.com/files/2024-10-08/4e9efbc8-2d11-47b0-bc54-21f44f06fdfc/ascreenshot_e9d4b1fc09134d07b2b34d42b88a6f93_text_export.jpeg

8. It is possible to insert your terms of use.

https://colony-recorder.s3.amazonaws.com/files/2024-10-08/2065071a-d9a8-47f6-8890-6595fac64366/ascreenshot_cd5d704b74fe42068cc863a012255ac7_text_export.jpeg

9. For printing, the selectable formats are US Letter and A4.

https://colony-recorder.s3.amazonaws.com/files/2024-10-08/5d3379e5-54c2-4410-b581-c1da7fd40212/ascreenshot_36e9ff7747ec43b58bf59223b811152f_text_export.jpeg

10. Click "SAVE"

https://colony-recorder.s3.amazonaws.com/files/2024-10-08/0c42b7fd-323a-410c-a5ab-27fe127215be/ascreenshot_aac94dd326f641daa3d21f939a711214_text_export.jpeg

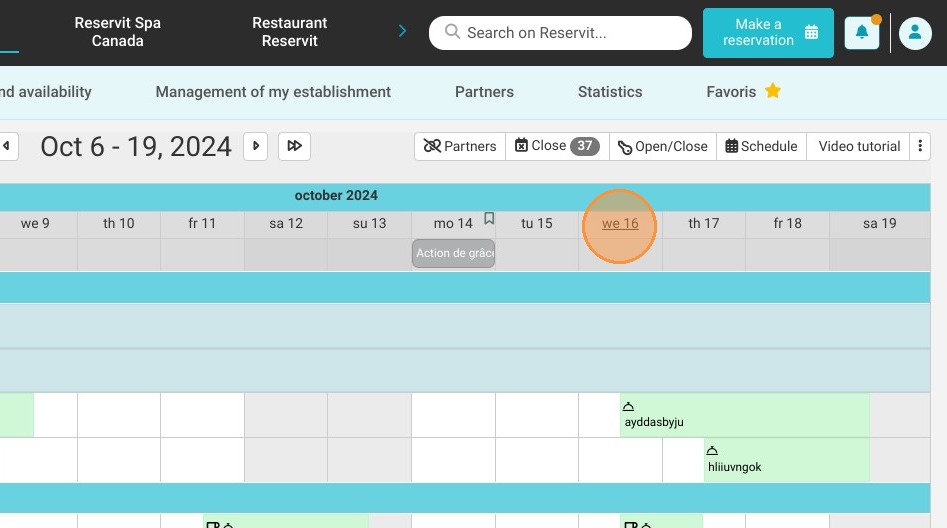
11. From your reservation calendar, you will have the option to print these forms.

For instance, if I navigate to Tuesday the 16th, the day with scheduled check-ins, I can view them

https://colony-recorder.s3.amazonaws.com/files/2024-10-08/3869814a-82d8-463c-ad51-674128514a0d/ascreenshot_cb366cf181134614a506a53f6a99d612_text_export.jpeg
https://colony-recorder.s3.amazonaws.com/files/2024-10-08/51f4d667-0c93-4555-9375-301fb938e6a7/ascreenshot_67bb9395507f4c5eba8c74c9a4685f8d_text_export.jpeg
https://colony-recorder.s3.amazonaws.com/files/2024-10-08/1f2b56c6-3dc3-41d5-8f9d-59aac0b9a7c1/ascreenshot_e090e29a26e541759c5620b1745fdd13_text_export.jpeg

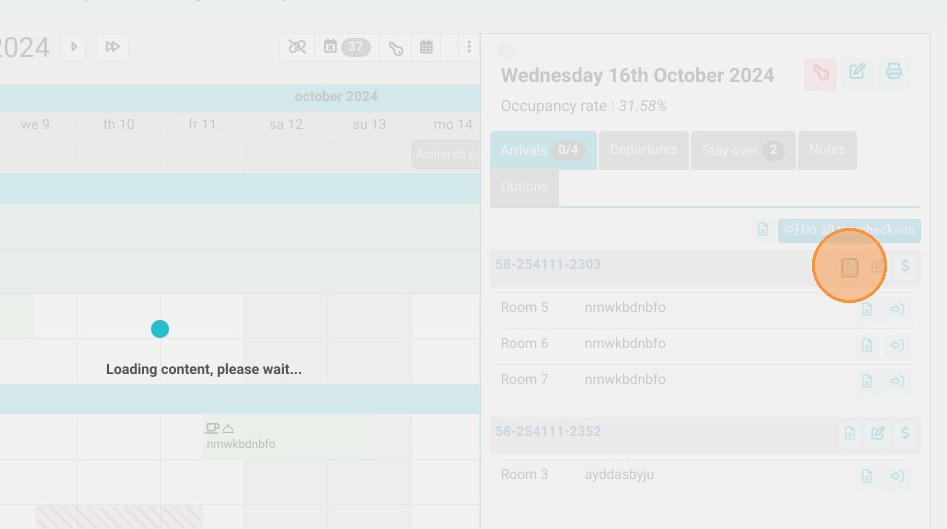
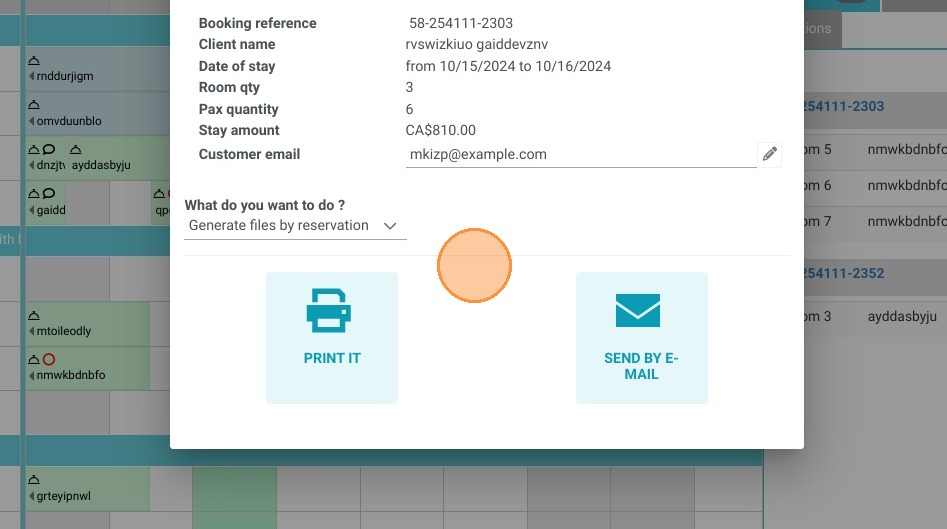
12. I can also view all the forms for the day.

https://colony-recorder.s3.amazonaws.com/files/2024-10-08/e1696ef3-d7e6-4882-974f-691d93ab9f09/ascreenshot_1ea0a03f6a234f9e9c09b2d7dd0f413c_text_export.jpeg
https://colony-recorder.s3.amazonaws.com/files/2024-10-08/18018e7a-7696-494d-bad5-575cc722bea3/ascreenshot_a1579927d4a14e048b5c9abf00592d04_text_export.jpeg