

Article Summary: Learn how to easily generate credit notes and process guest refunds directly within your Reservit PMS to correct finalized invoices. This step-by-step tutorial walks you through reversing transactional line items, mapping correct accounting codes, and tracking financial updates in your payment reports. By mastering this refund workflow, you maintain flawless accounting compliance while delivering quick, professional customer service.
The 5 Key Steps to Create a Credit Note and Issue Refunds:
-
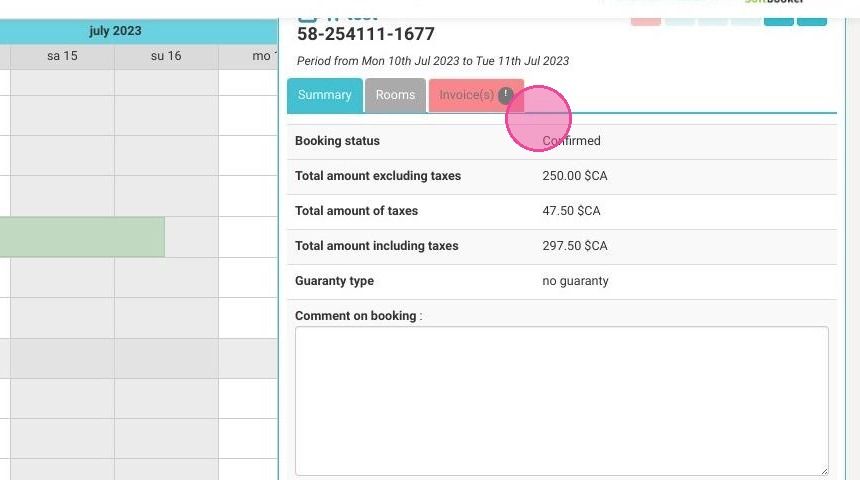
Locate the billing profile: Go to "Reservations planning," open the specific booking, click on the "Invoice(s)" tab, and select "Access to billing."
-
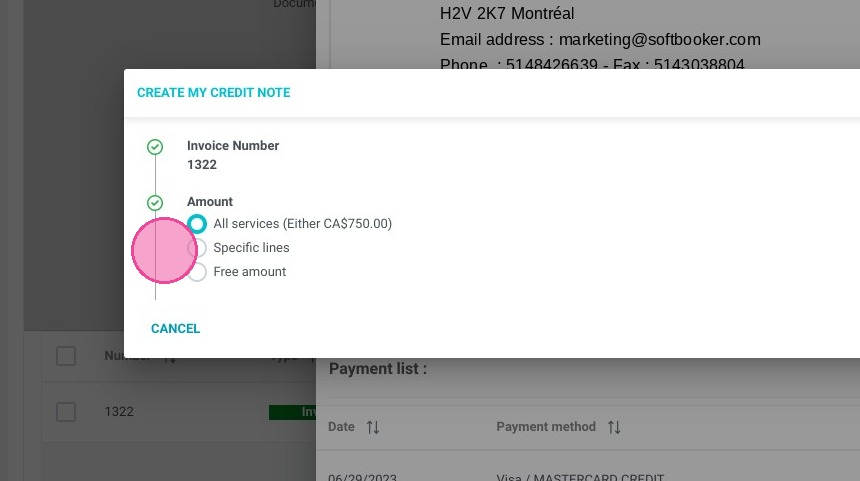
Initiate the credit note: Click on "Documents List," view the details of the specific invoice you need to adjust, and click the "CREATE A CREDIT NOTE" button.
-
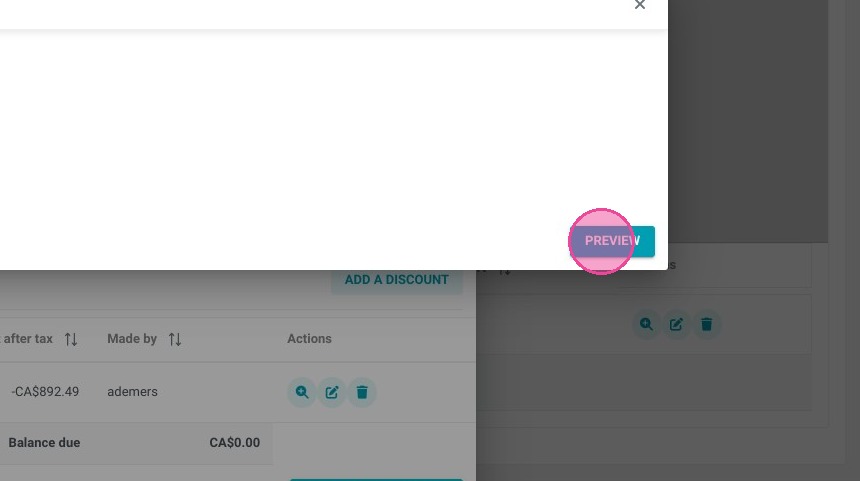
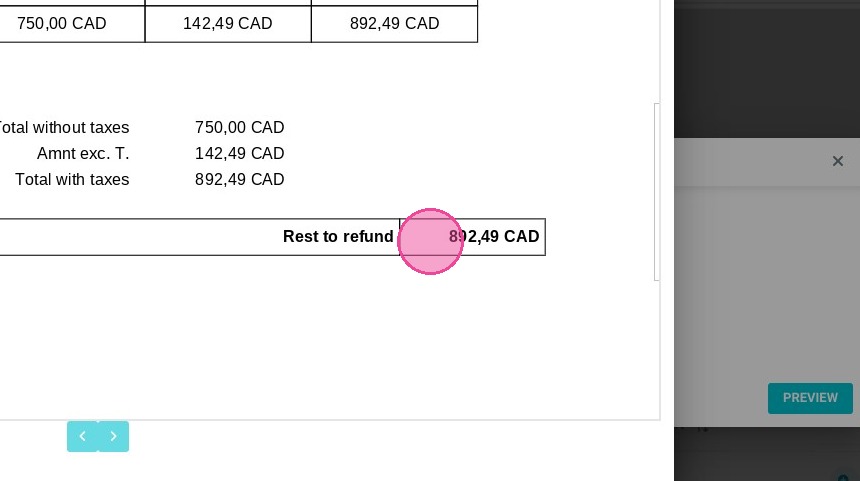
Preview the refund amount: Select the appropriate category type for the transaction reversal and click "PREVIEW" to verify the exact balance due to the customer.
-
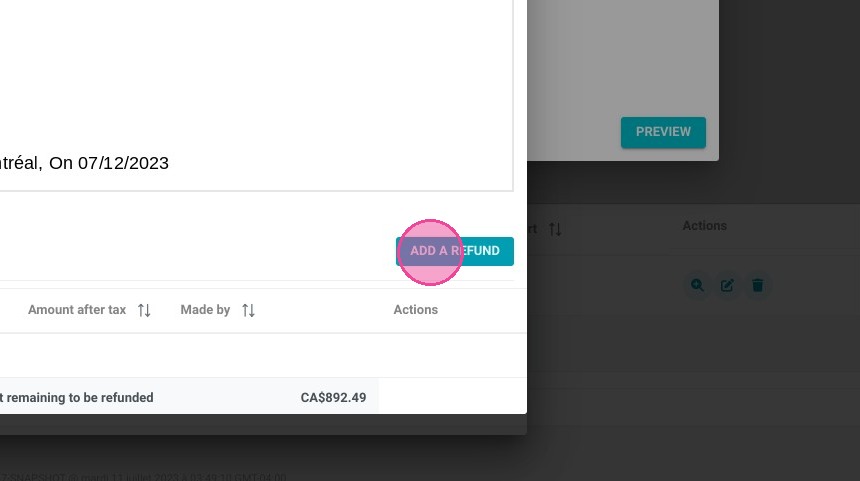
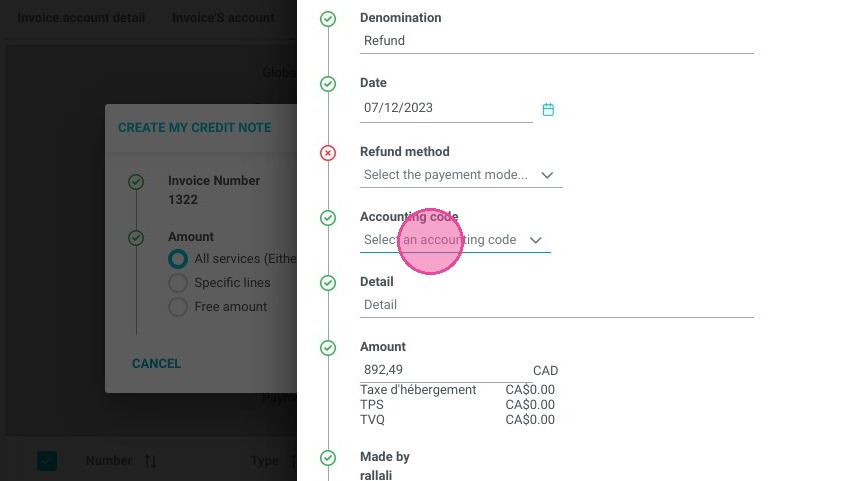
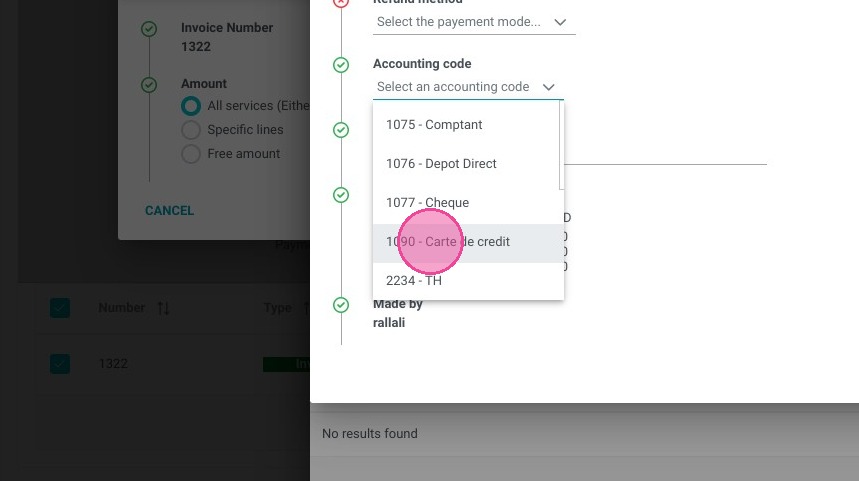
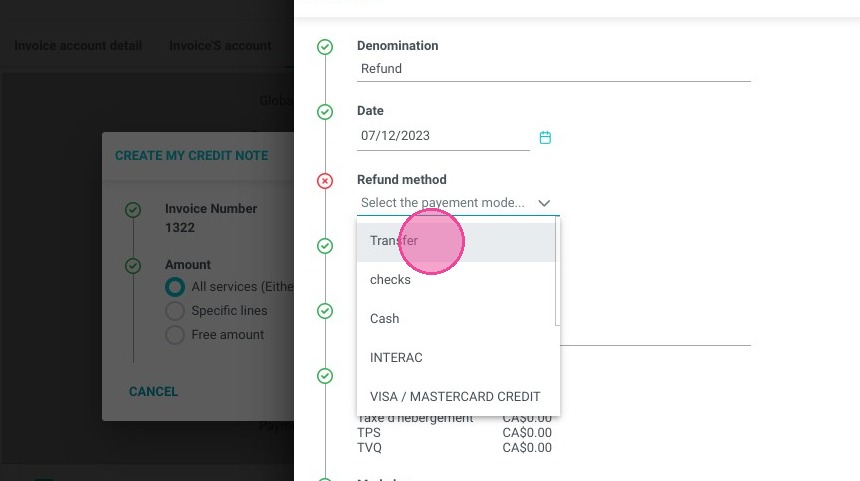
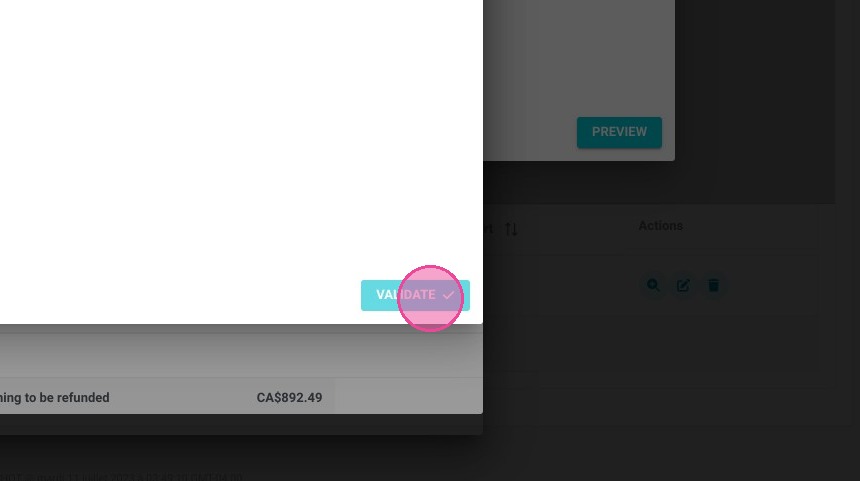
Log the refund details: Click "ADD A REFUND," assign the correct internal accounting ledger code, choose the processing payment method, and click "VALIDATE."
-
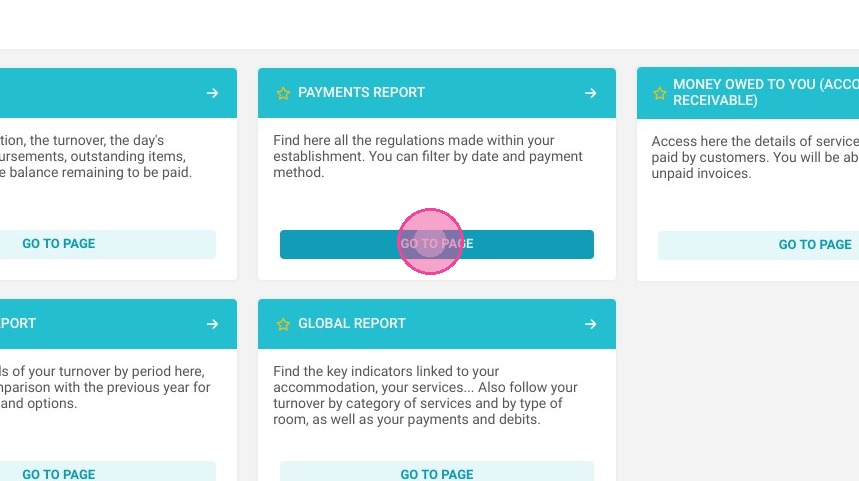
Verify in your financial reports: Close out the billing windows to see the invoice status switch to "Paid," then navigate to "Statistics" > "Billing" > "Payment Report" at any time to audit the credit note logs.
Why Follow This Guide? Following this guide ensures your property's accounting ledger remains perfectly balanced and audit-ready, completely eliminating manual mathematical discrepancies when reversing closed transactions. It provides your front-desk and accounting teams with a secure, foolproof workflow to handle room cancellations or booking adjustments with absolute confidence.
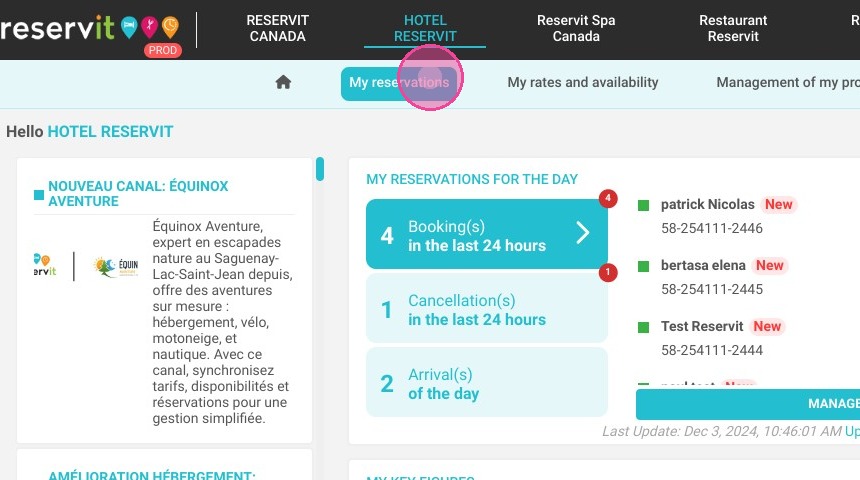
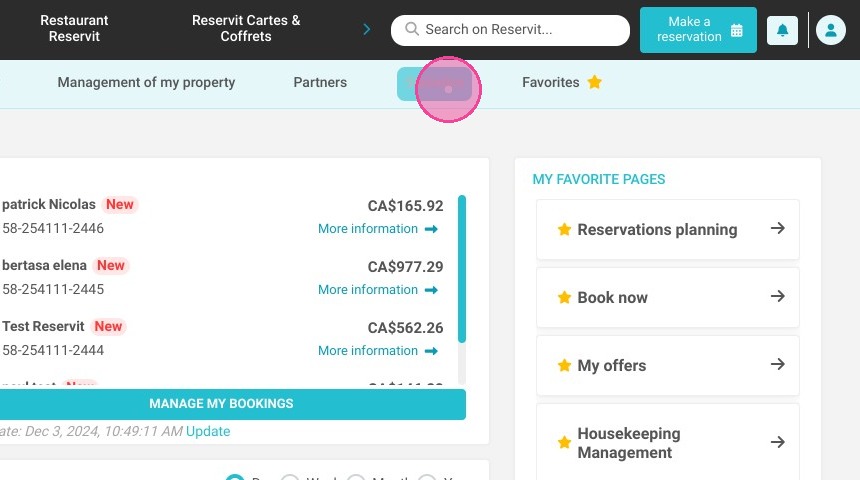
1. Click "My reservations" then ''Reservations planning''
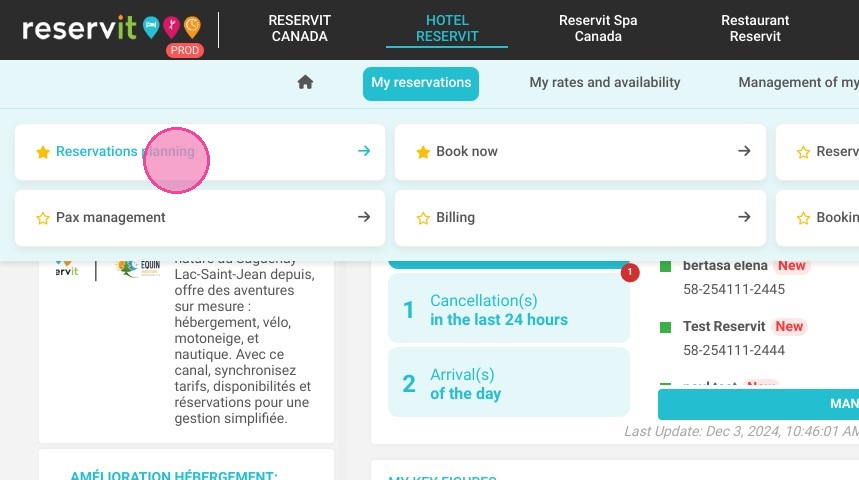
2. Select your reservation.
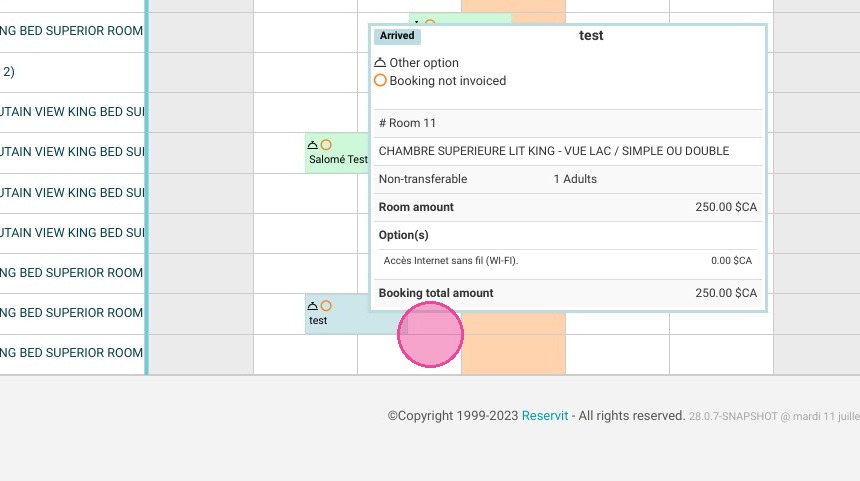
3. Click "Invoice(s) !"
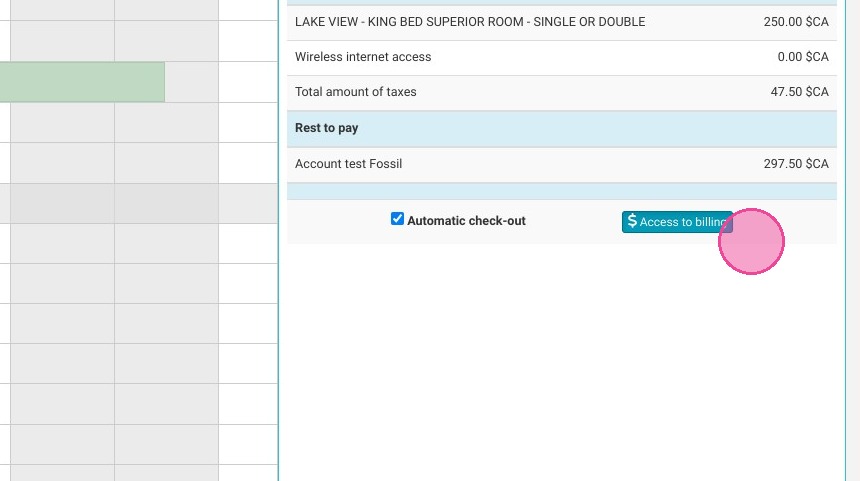
4. Click "Access to billing"
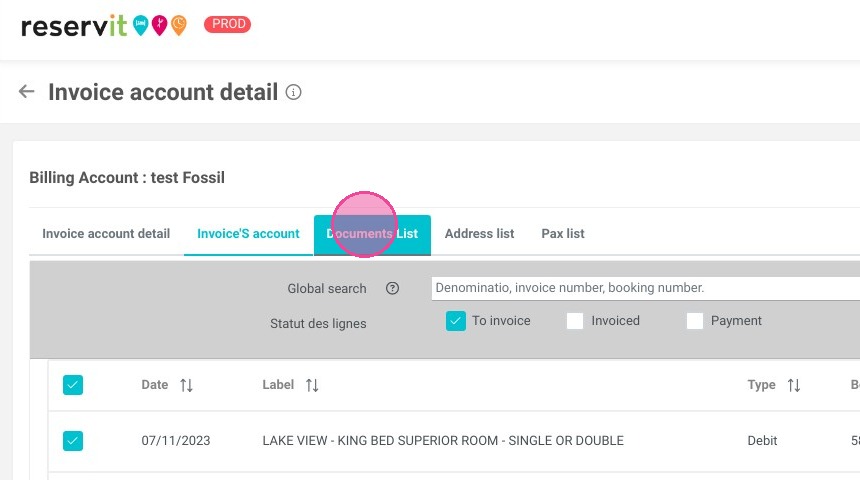
5. Click "Documents List"
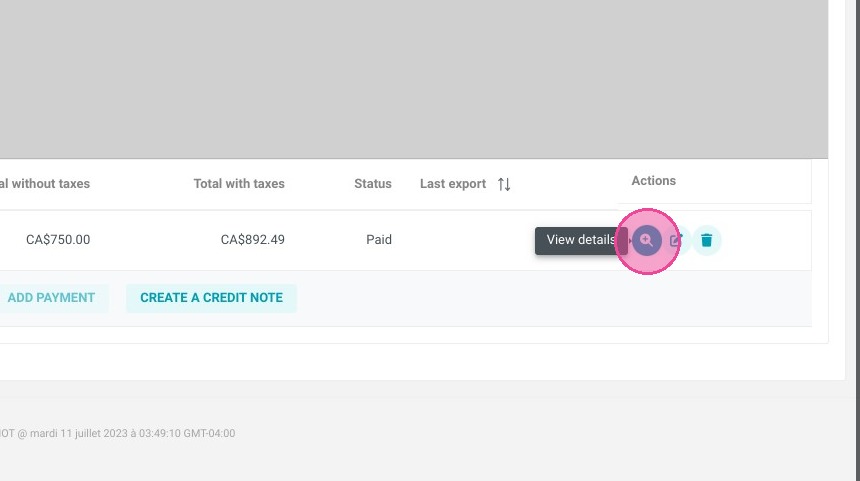
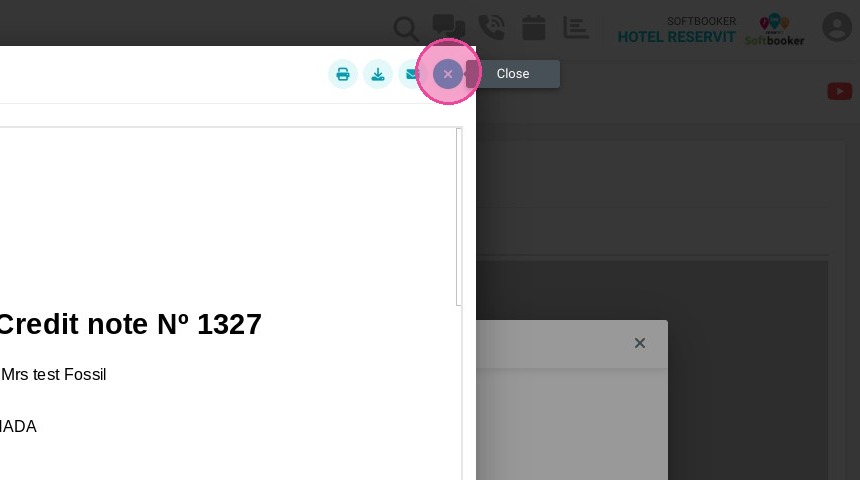
6. Click "View details"
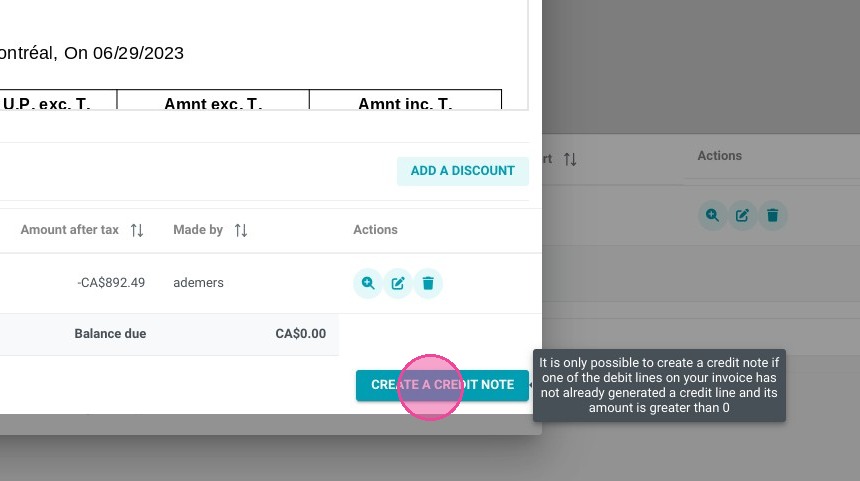
7. Click "CREATE A CREDIT NOTE"
8. Select the type of refund.
9. Click "PREVIEW"
10. You will see the "rest to refund" amount.
11. Click "ADD A REFUND"
12. Select the accounting code

13. Select the refund method.

14. Click "VALIDATE"
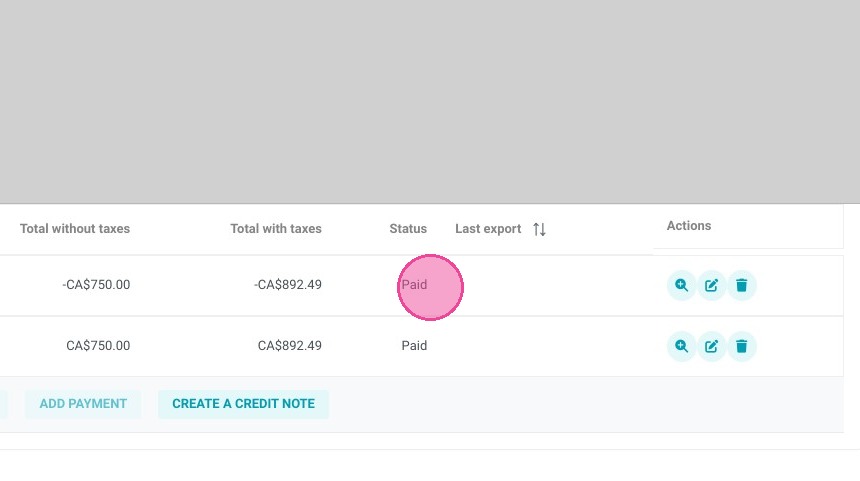
15. Close windows of the credit note and the invoice.
16. You can see that the status switched to "Paid".
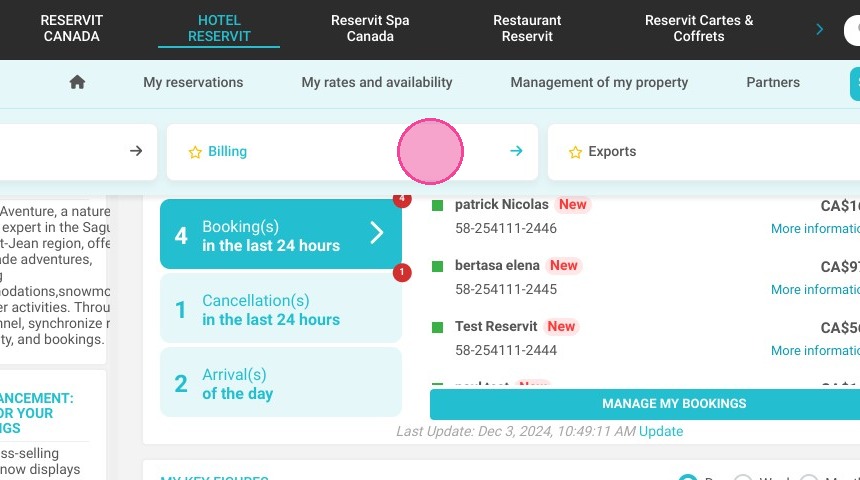
17. You can follow your credit note created in your payment report. Click "Statistics"
then ''Biiling'' and ''Payment Report''
18. Click on the credit note to see the details.
