Article summary: This tutorial walks you step by step through setting up the connection and activating your Stripe account for seamless synchronization with the Reservit Accommodation interface. You'll learn how to configure your business information and link your accounts to secure your transactions and automate the collection of your funds. This guide is essential to ensure a smooth payment experience for your guests while avoiding any account suspension.
The 4 key steps to integrating Stripe with Reservit
-
Create your account: Sign up on the Stripe dashboard using a valid email address and a secure password.
-
Activation and compliance: Enter your company's legal information (contact details, banking information, and tax ID numbers) to validate your profile.
-
Authentication: Log in to your Stripe dashboard and to the secure Reservit management interface at the same time (using two browser tabs).
-
Linking the accounts: Use the dedicated connection tool to officially pair your Stripe account with your booking software.
Why follow this guide? By following these steps carefully, you ensure that your property complies with current payment standards, avoiding transaction errors or blocked transfers. It's a valuable time-saver for your administrative workload and a security guarantee for your online bookings.
⚠️ Please follow this procedure carefully — it is essential for Stripe connectivity within Reservit. If you do not follow this procedure, you will not be able to benefit from the rates negotiated by Reservit.
For more information on how Stripe works in general, visit https://stripe.com . For any questions, write to support@stripe.com
⚠️ If you already have a Stripe account, skip ahead to the connection step.
Creating a Stripe account
-
Enter:
-
Your email address
-
Your full name
-
A password (to be confirmed in the third field): the password must be strong, with at least one uppercase letter, one number, and one special character.
-
Click Create account.
-
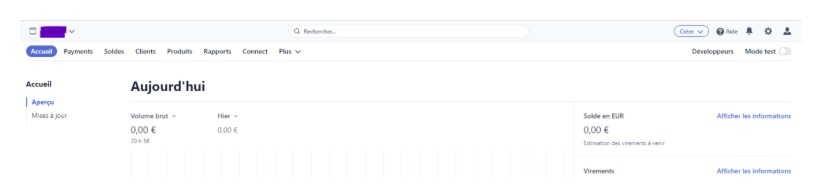
Once the account is created, you'll have access to Stripe's management tools. The first screen looks like this:
-
You now need to activate your account and provide Stripe with the information legally required by regulators for processing online payments and transferring collected funds.
If this information is not provided, your account may be suspended by Stripe a few weeks after it is created.
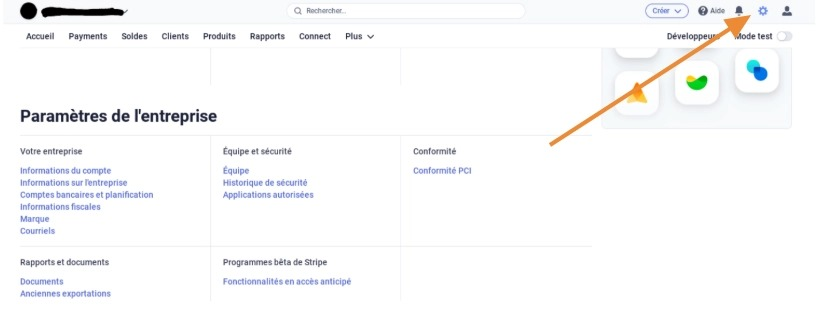
Click Settings (the gear icon in the top right). Scroll down the page and the view below should appear:
-
In the Business settings section, complete the information under Your business and save on each tab.
Here are the fields to complete:
-
Account information: enter your company's contact details (name, address, phone number, etc.).
-
Business information: the business name and phone number you choose will appear on your customers' bank statements.
-
Bank accounts and scheduling: your banking details, so that funds are deposited into your bank account, along with your statement descriptor information. You can connect either a CAD or a USD account.
-
Tax information: provide the requested details, such as your company's GST number and legal name (your first and last name).
You can also enter the details of your Stripe users and define their roles.
Go through each of the different sections so that nothing is overlooked. Once you have completed every section in Stripe, your Stripe account will be ready.
Connecting Stripe to Reservit
-
To enable connectivity between Stripe and Reservit, you first need to identify yourself by logging in to Stripe.
Go to https://dashboard.stripe.com/ and sign in with the credentials you just created. Leave this window open.
-
Once your Stripe account is activated, link this new Stripe account to your Reservit software. In a second browser tab, go to: https://securersl.reservit.com/manager/
-
Enter the username and the password provided in your Reservit x Stripe email.
10. Click the Connect my Stripe account button and sign in with the login and password you chose when creating your Stripe account.
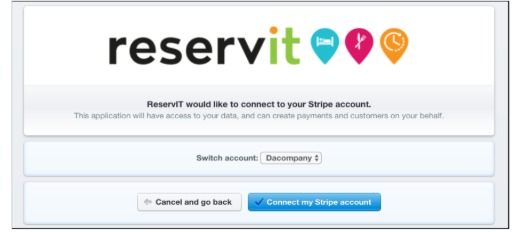
Note: If the activation step above has not been completed, this page will look different and will ask you to fill out the onboarding form before you can click Connect my Stripe account.
11. The green string of characters beginning with acct_ is your Stripe account's unique identifier.
Reservit Canada provides support only for connecting Stripe within your Reservit manager.
For anything related to using Stripe itself, please contact Stripe technical support by email only, at the following addresses:
-
International support (EN): support@stripe.com
-
French-language support: support-fr@stripe.com
An FAQ is also available at: https://support.stripe.com/
For sales inquiries, the email addresses for the global and French teams follow the same format: sales@stripe.com and sales-fr@stripe.com