How to Navigate the PMS Planning Board in Reservit Accommodation | Dashboard Overview
Article Summary: This definitive guide maps out the central navigation elements, tracking utilities, and view configurations built into the core Reservit PMS "Reservations planning" dashboard. By mastering this unified grid environment, property managers and front-desk staff can instantly track timelines, interpret color-coded status rules, isolate specific room criteria, and jump straight to crucial closeout actions from a single centralized hub.
The 4 Key Steps to Master Your Planning Board Layout
-
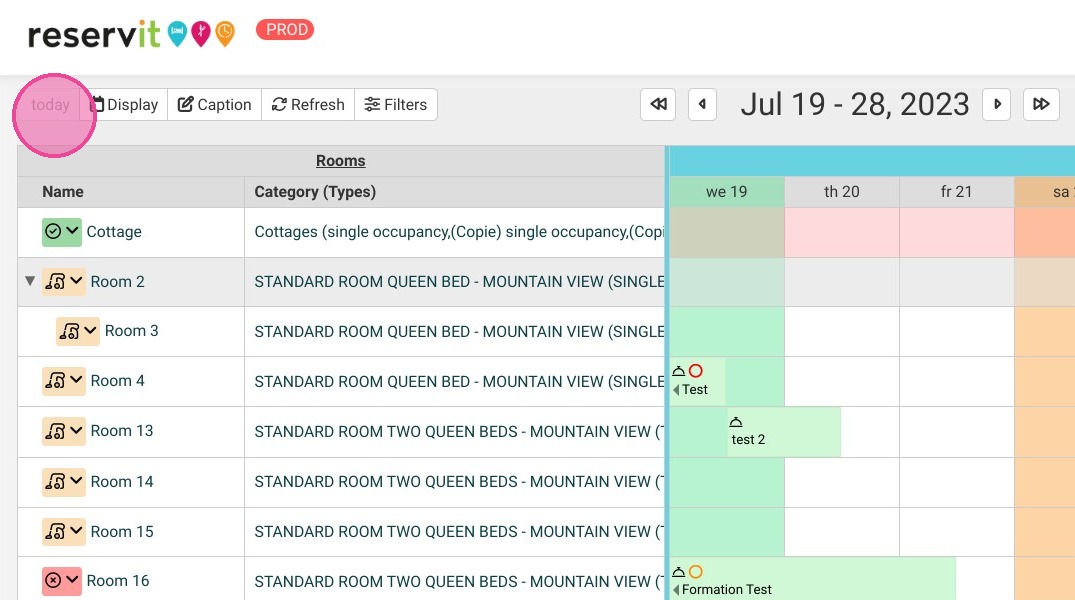
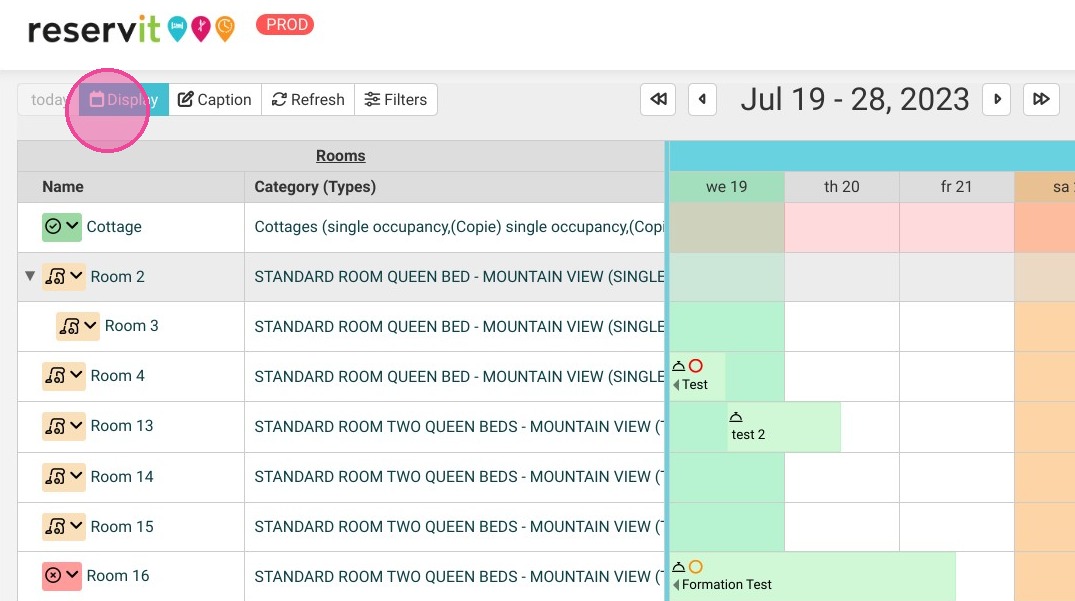
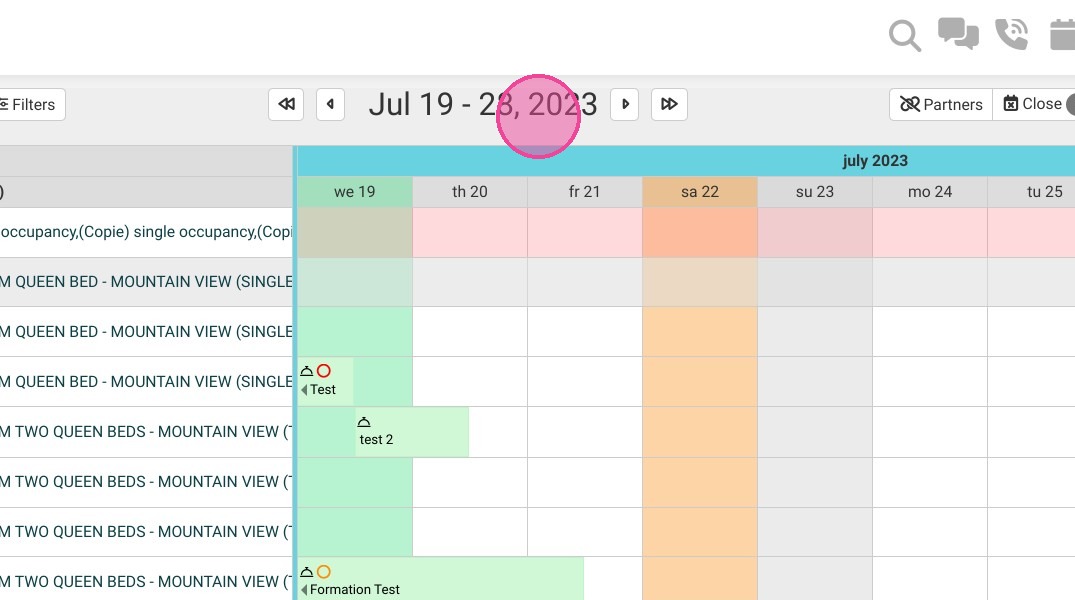
Control Timelines and View Scales: Use the "Today" button to snap your workspace calendar straight to the current day's matrix. Adjust your visible time horizons using the "Display" settings, and utilize the text header to confirm the active date range displayed on your screen.
-
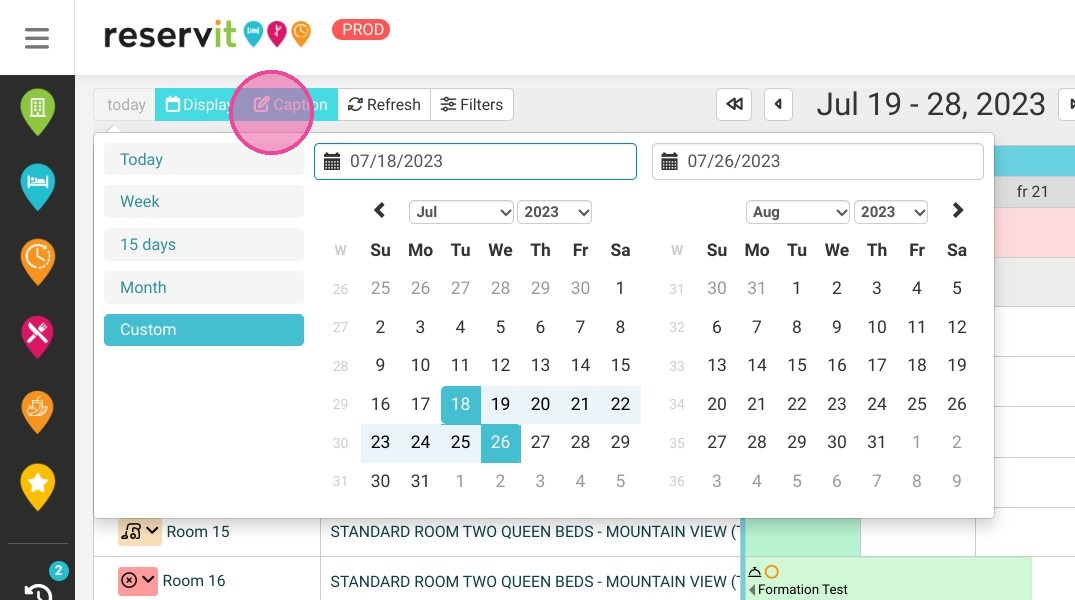
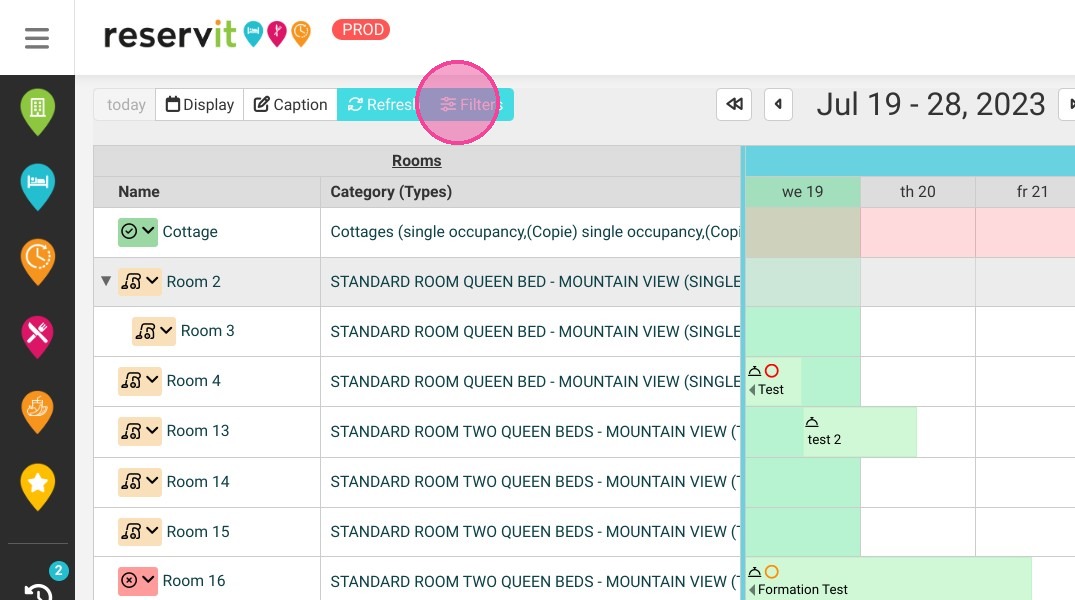
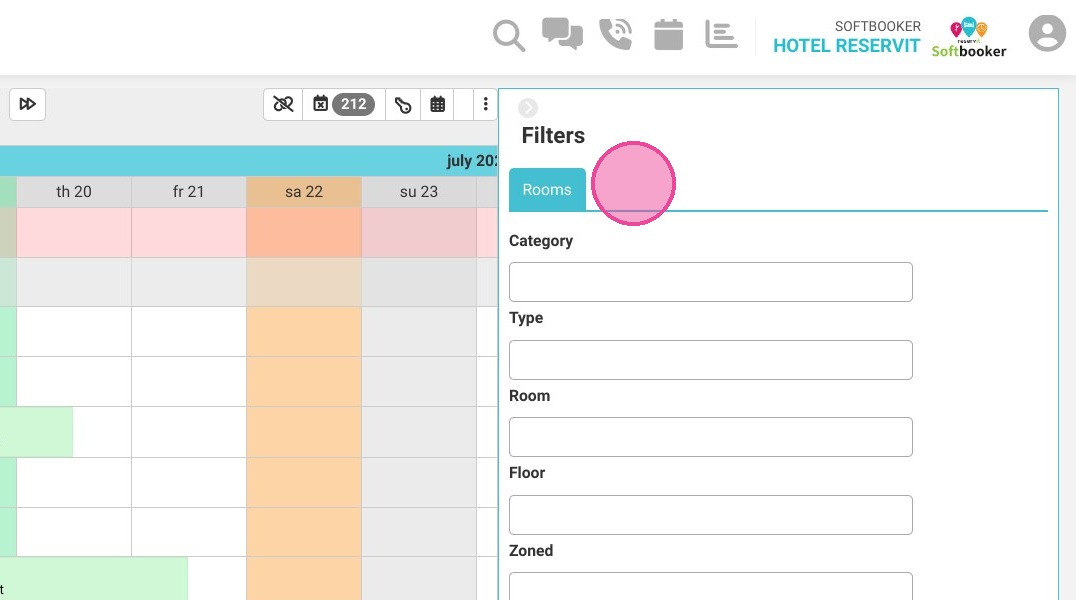
Decode Status Colors and Apply Filters: Open the "Caption" module to review the visual legend detailing the exact status of each colored reservation block. To avoid visual clutter, use the "Filters" tool to restrict your grid view to matching specifications, like designated floors or specific room layouts.
-
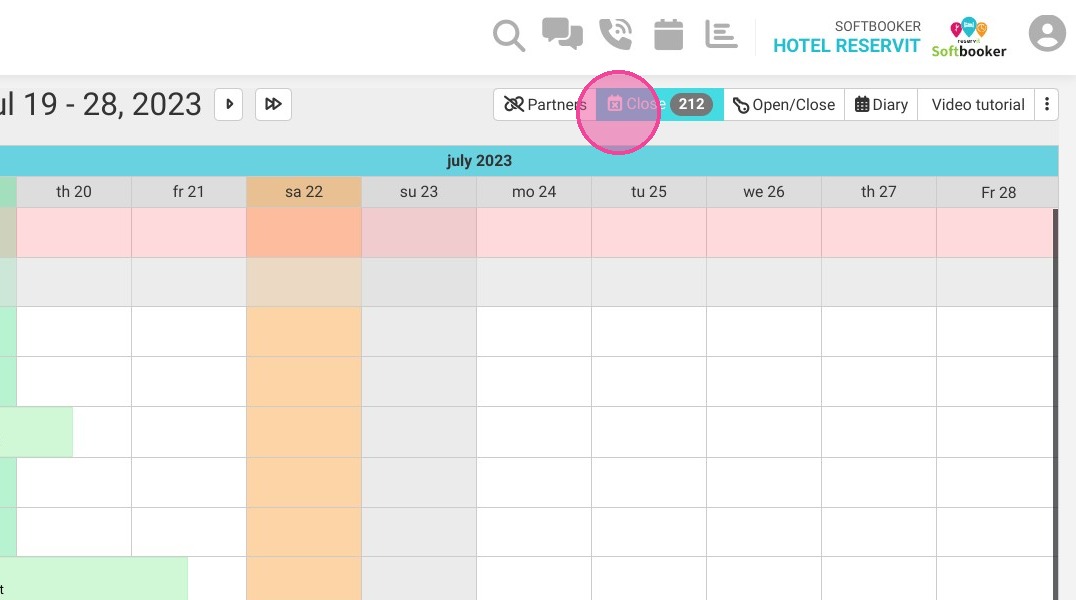
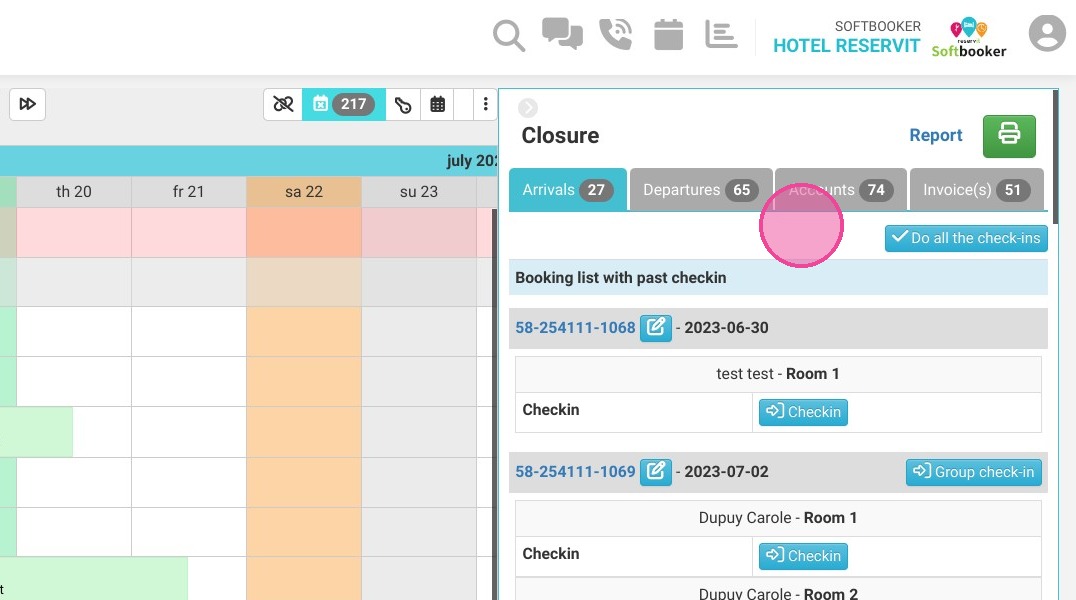
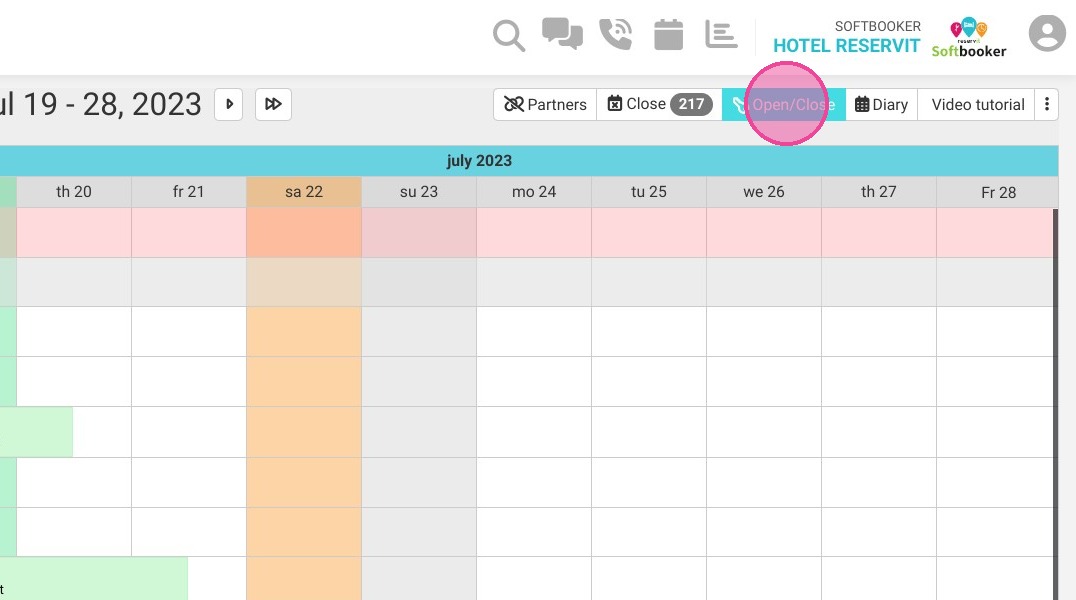
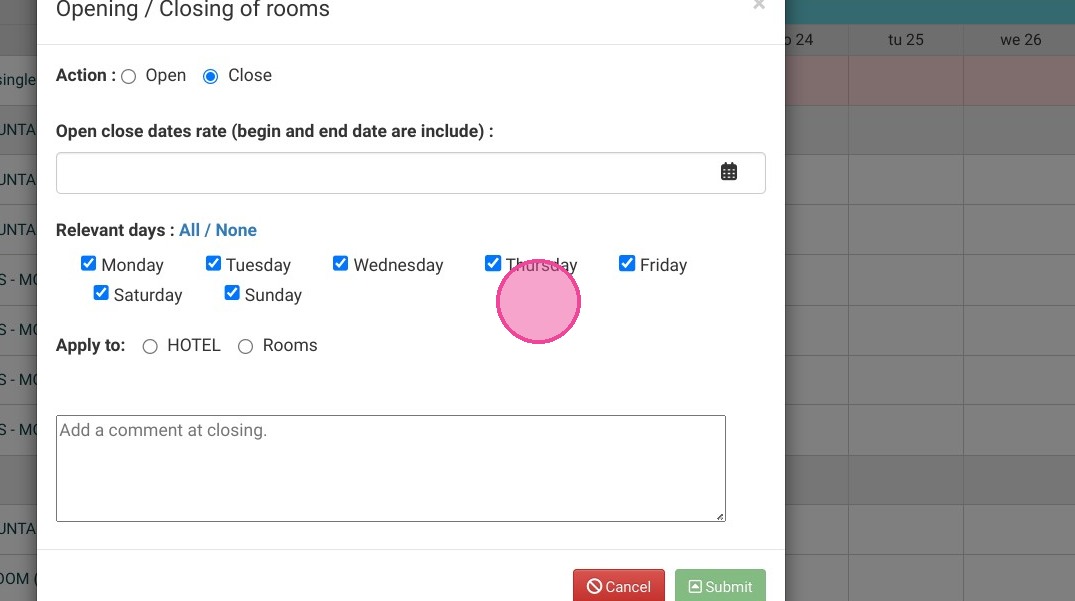
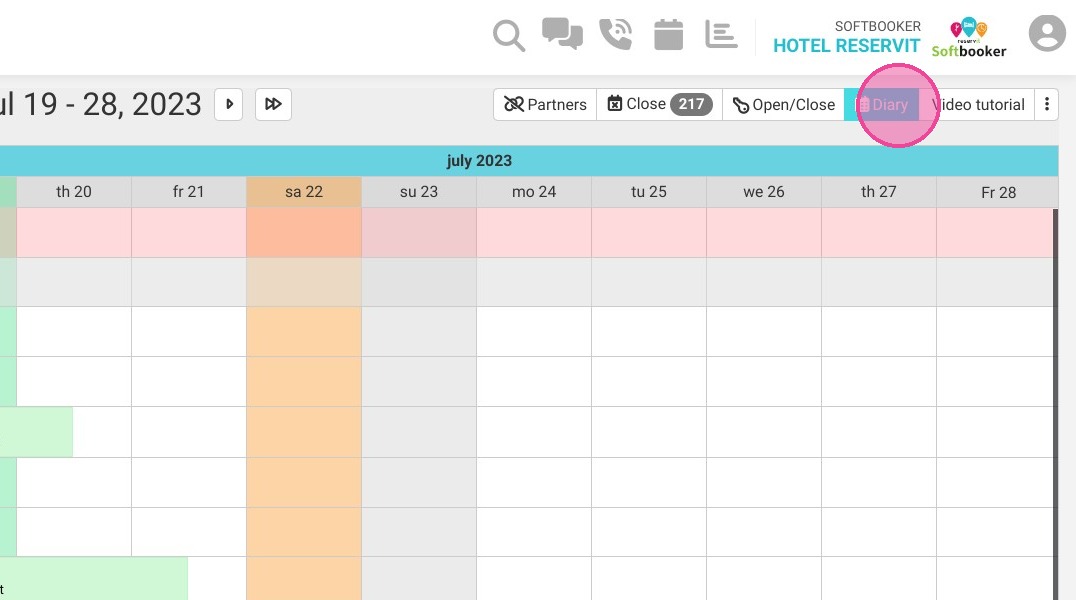
Manage Operations and Quick Actions: Open the "Close" menu to handle evening wrap-ups and guest check-outs, or use the "Open/Close" toggle to push physical rooms offline for maintenance. Click "Diary" to access a streamlined overview summarizing daily notes, incoming arrivals, and departures.
-
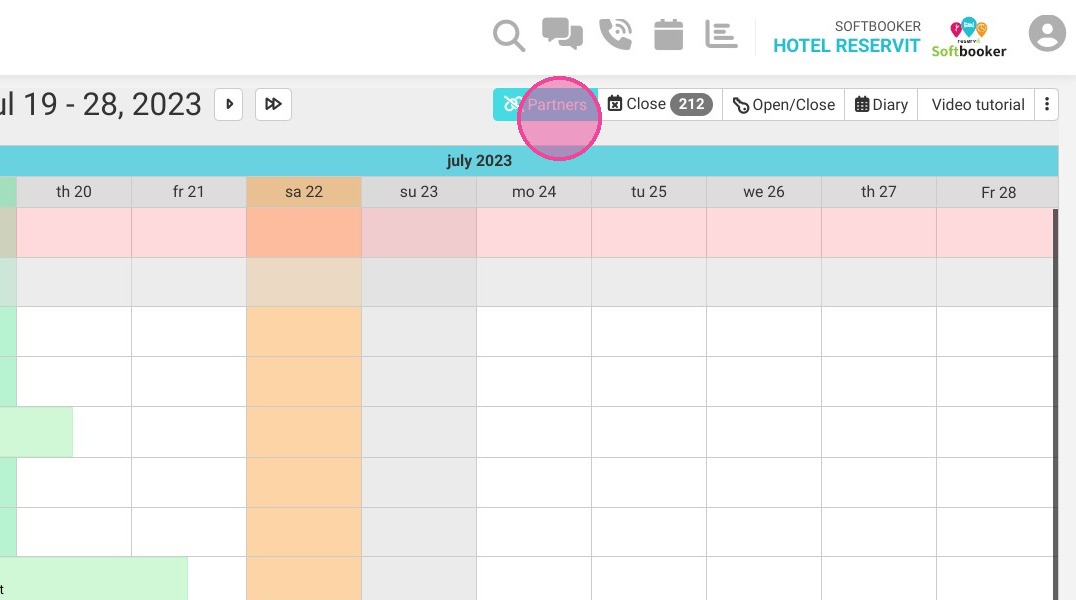
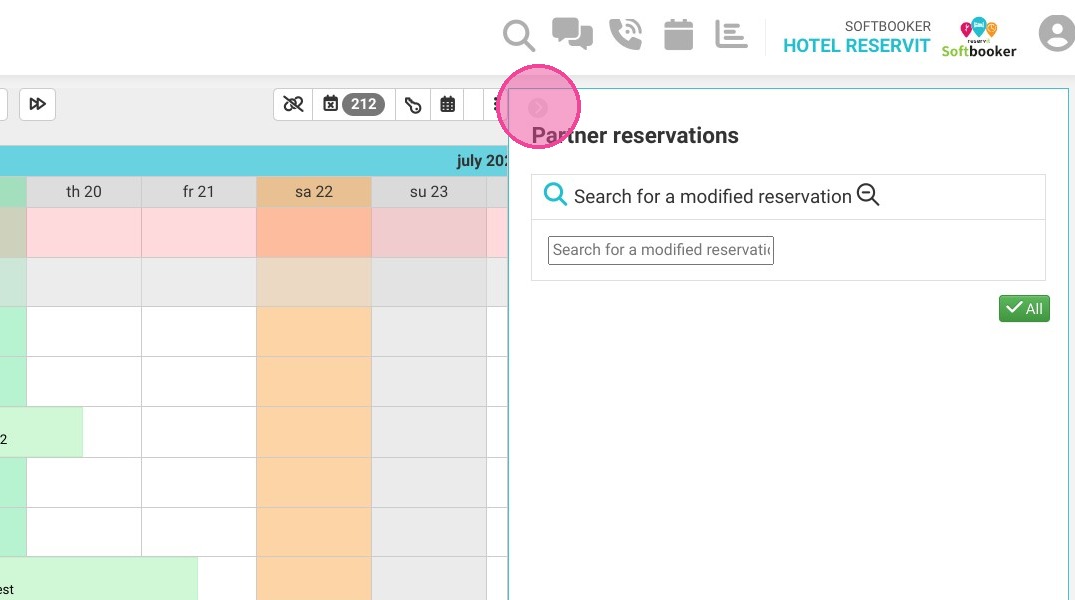
Audit Channels and Sidebar Room Lists: Click "Partners" for immediate visibility into connected third-party booking channels. Use the static left-hand sidebar to audit your structural room types and verify how your active guest cards correspond to your actual physical inventory grid.
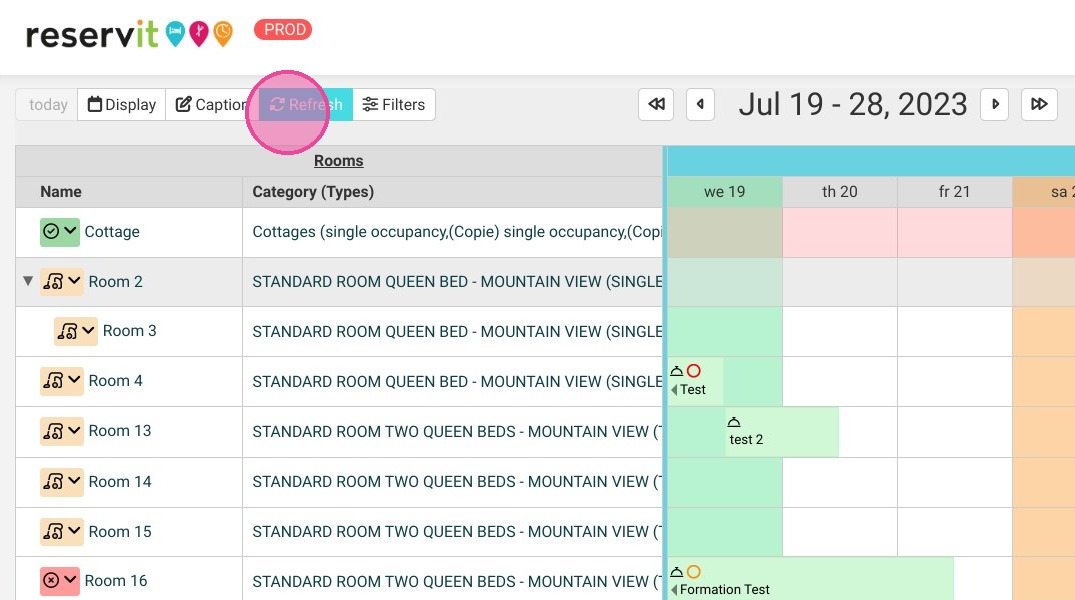
Tip (Real-Time Data Syncing): Make it a habit to use the "Refresh" button frequently during high-volume shift changes. Manually pulling a refresh ensures that last-minute online walk-ins or third-party channel modifications sync to your screen instantly, preventing room placement collisions.
Why Master the Planning Board?
Getting comfortable with this grid completely optimizes your front-desk operation by condensing your entire property's pulse into a single interactive matrix. Instead of forcing your team to dig through convoluted nested menus, Reservit PMS structures your room allocations, partner channels, task diaries, and closeout parameters into a highly scannable control panel—slashing guest wait times and streamlining your daily workflows.
1. By clicking on "Today" the schedule will automatically change to today's date
2. On "Display" you can choose the display periods
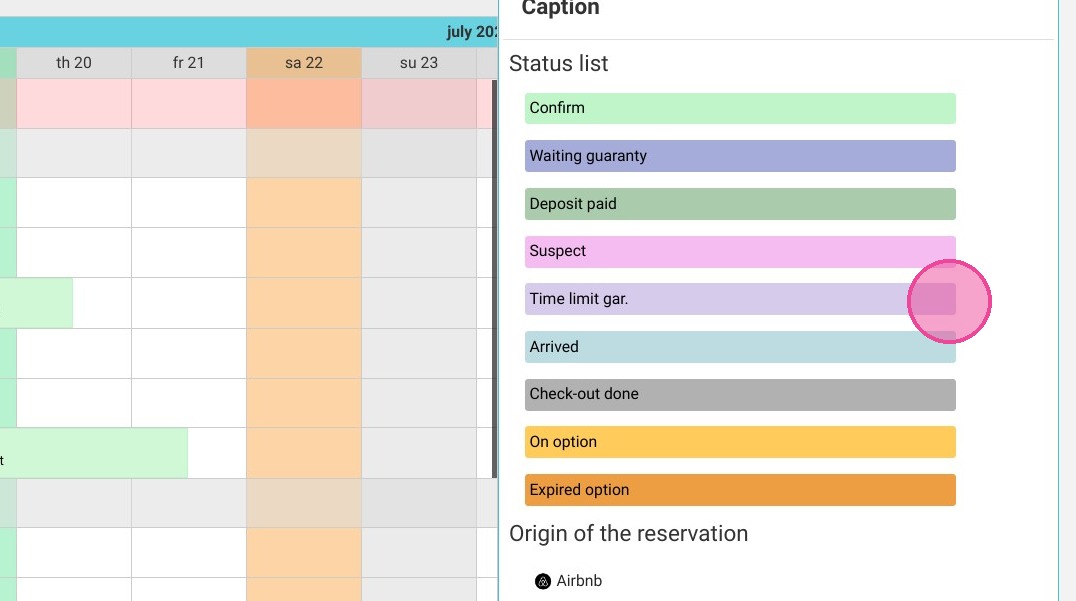
3. In "Caption" you will be able to see the color codes explaining the Reservation statuses.
4. You can "Refresh" the page
5. The "Filters" will allow you to limit the display according to certain criteria
6. Here, the dates you find the dates of the schedule displayed
7. In "Partners" you will have quick access to Partner Reservations
8. Click "Close ". Here you can come and do your closings such as check-outs, etc...
9. Click "Open/Close" and you can manage the opening and closing of your rooms
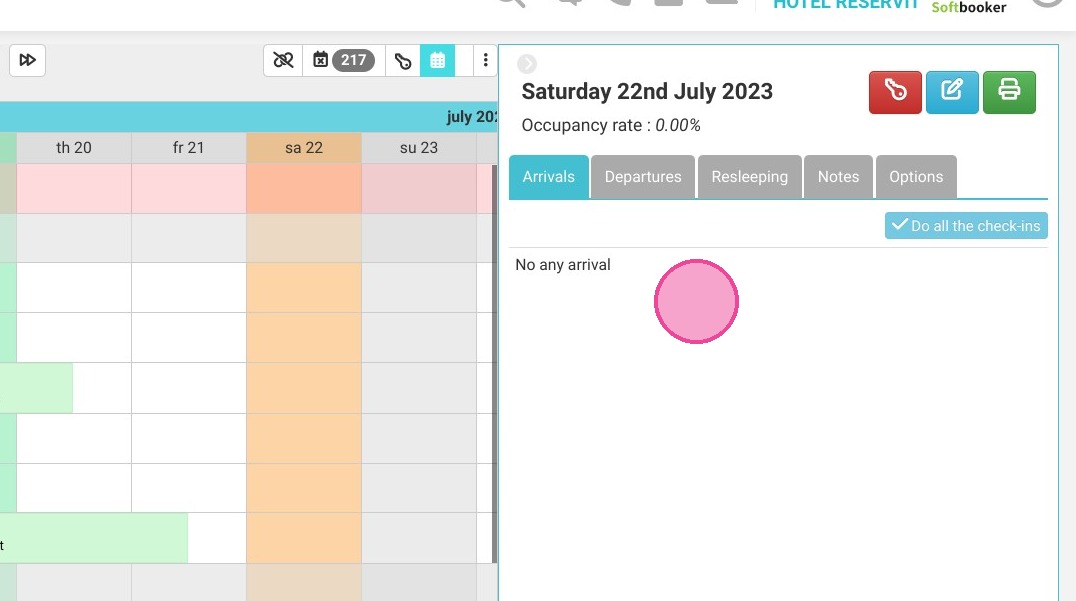
10. Click "Diary". The agenda comes to summarize the departures, arrivals, notes, etc...
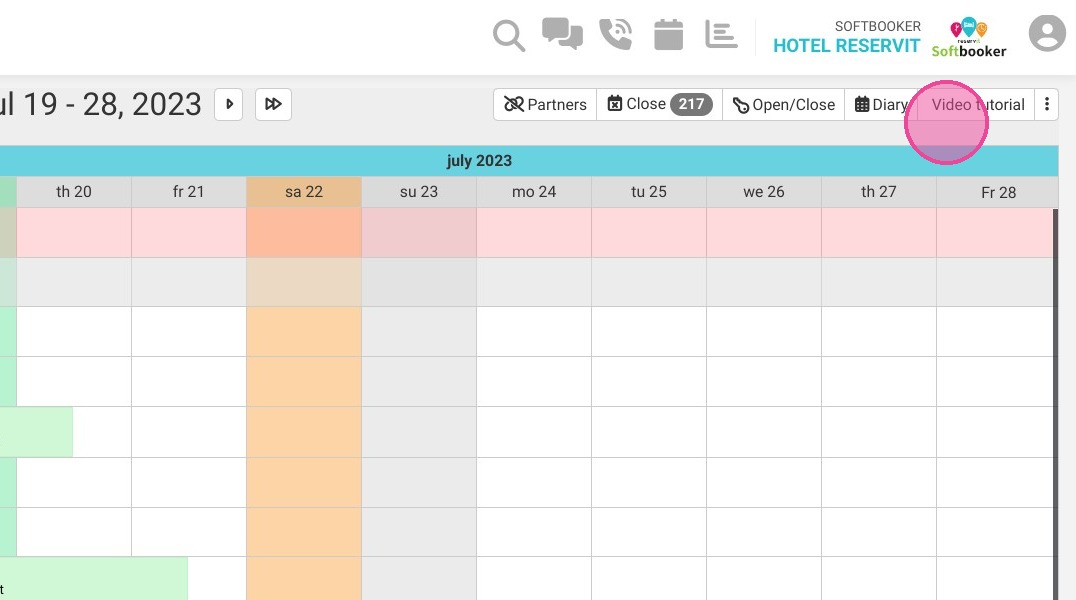
11. You also have a page that explains the video operation of the page.
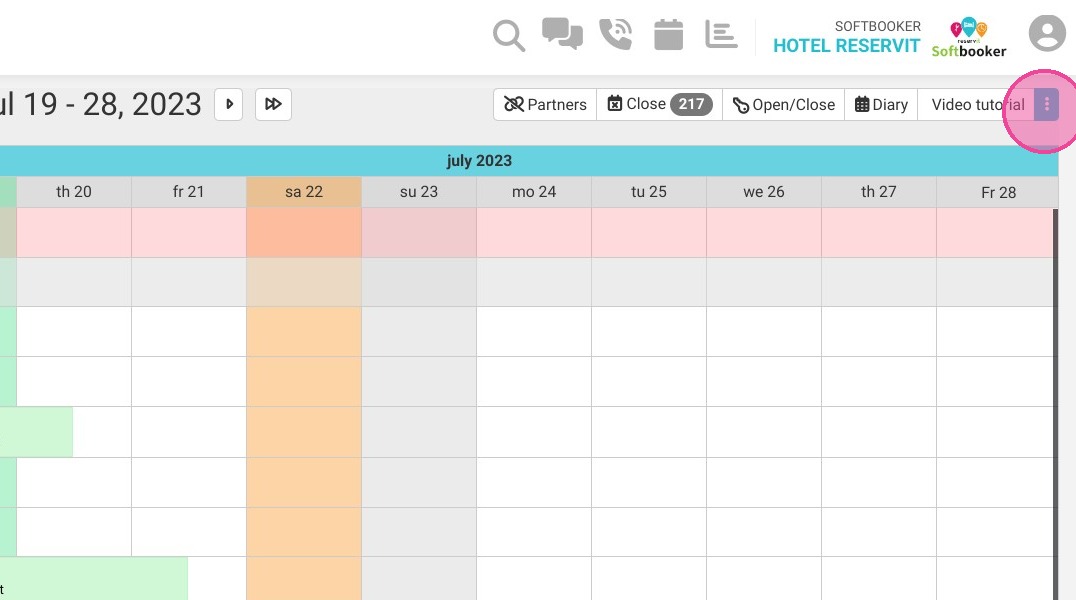
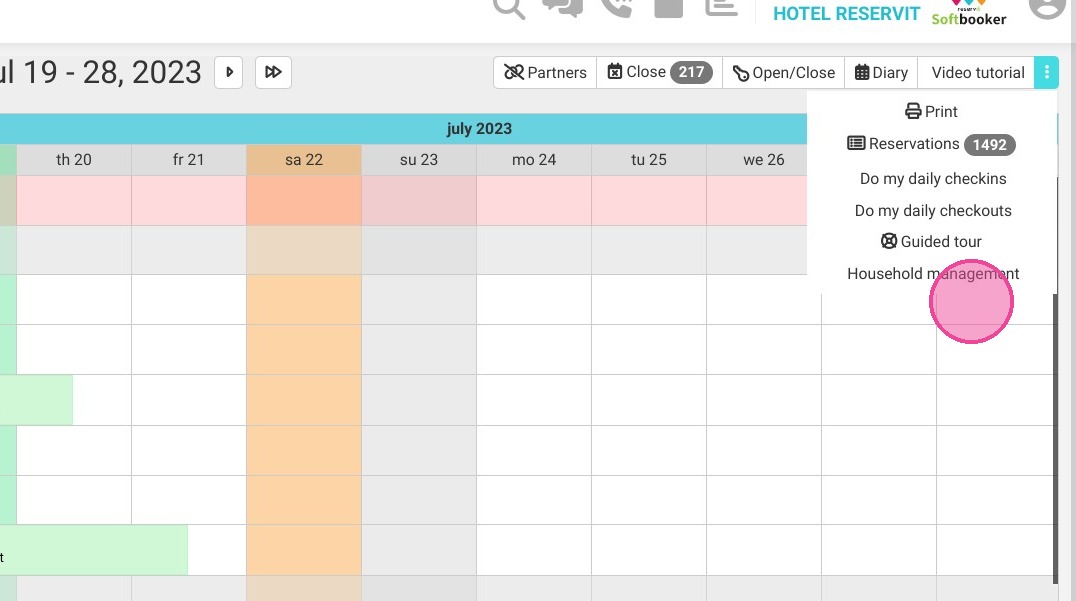
12. Here you have a shortcut button that brings you to all the other useful planning features
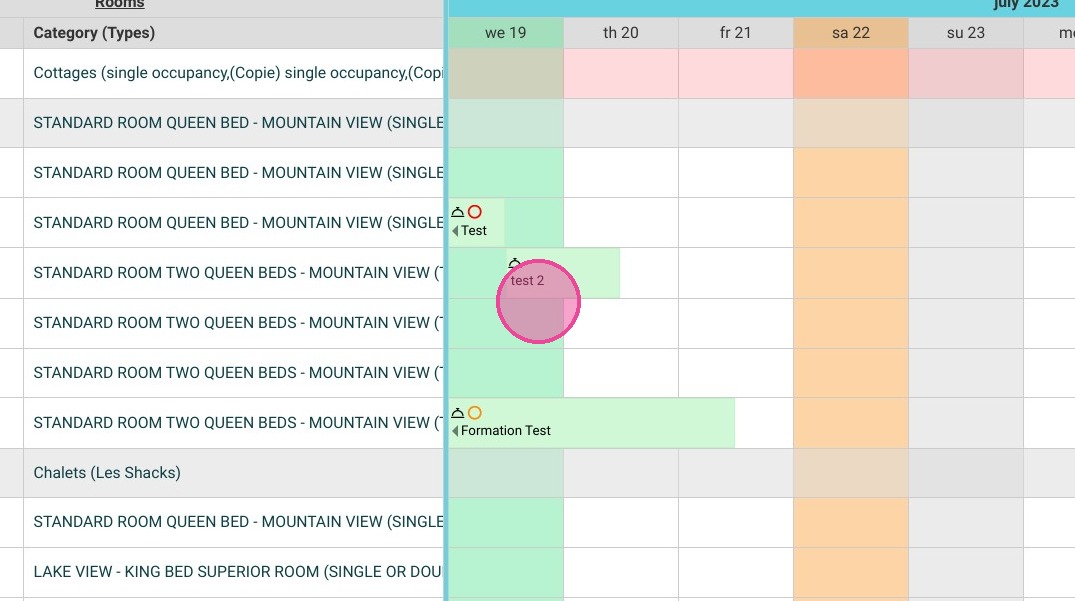
13. The list of rooms and the category to which it belongs
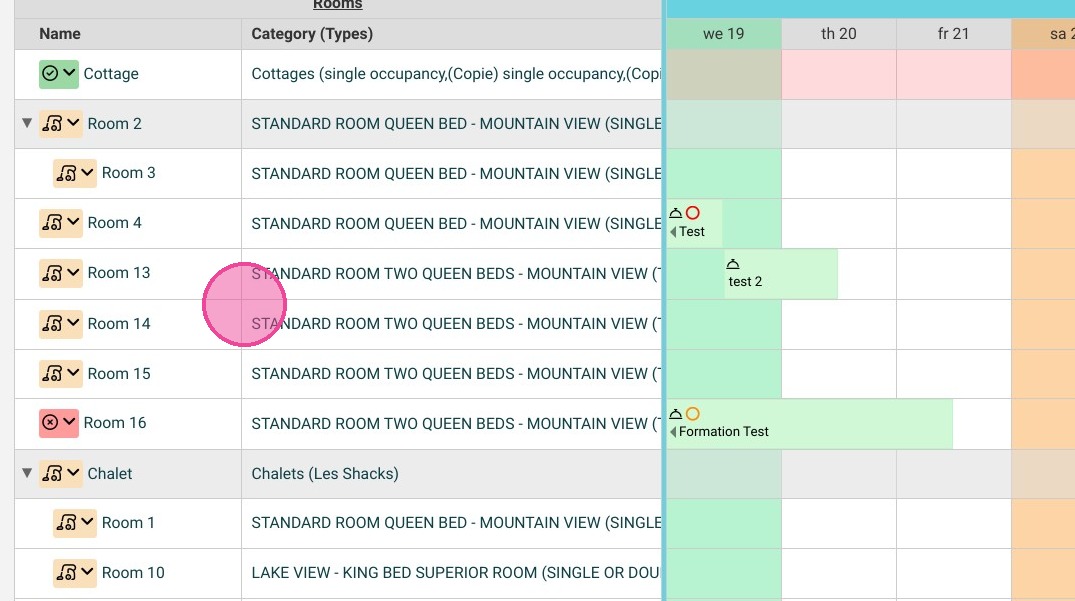
14. Here are placed the customer reservations in the planning table