Article Summary: This practical guide outlines how to efficiently manage, move, and unassign room placements directly from the interactive reservation calendar in Reservit PMS. You will learn how to swiftly execute drag-and-drop room moves, process room category upgrades, and temporarily park bookings using the "Unaffect" tool. Mastering these grid maneuvers gives your front desk maximum operational flexibility, ensures precise inventory placement, and streamlines guest room management.
The 4 key steps to manage room assignments on the calendar:
-
Execute a Drag-and-Drop Move: Locate the booking on the calendar grid, hold down the left mouse button, and drag the reservation block directly into the new desired room.
-
Confirm Pricing for Upgrades: Click "Confirm" to keep the original reservation price during a move, or choose "Edit Reservation" to apply manual rate adjustments if shifting between different room categories.
-
Unassign Bookings Securely: To remove a guest from a room without losing the booking, click the reservation, go to "Rooms," and select "Unaffect" to move it to the top "Overbooked" section while keeping the inventory locked.
-
Reallocate Parked Reservations: Reassign an unaffected booking either by using the "Rooms" drop-down list and clicking "Save," or by dragging it from the top tray back down to an open room on the calendar grid.
Why follow this guide? Following this tutorial empowers your front-desk team to handle last-minute room changes, unexpected maintenance blocks, and guest upgrades smoothly on the fly. It optimizes your calendar workflow, preventing accidental drops in inventory availability and ensuring your room assignments remain completely organized during hectic check-in windows.
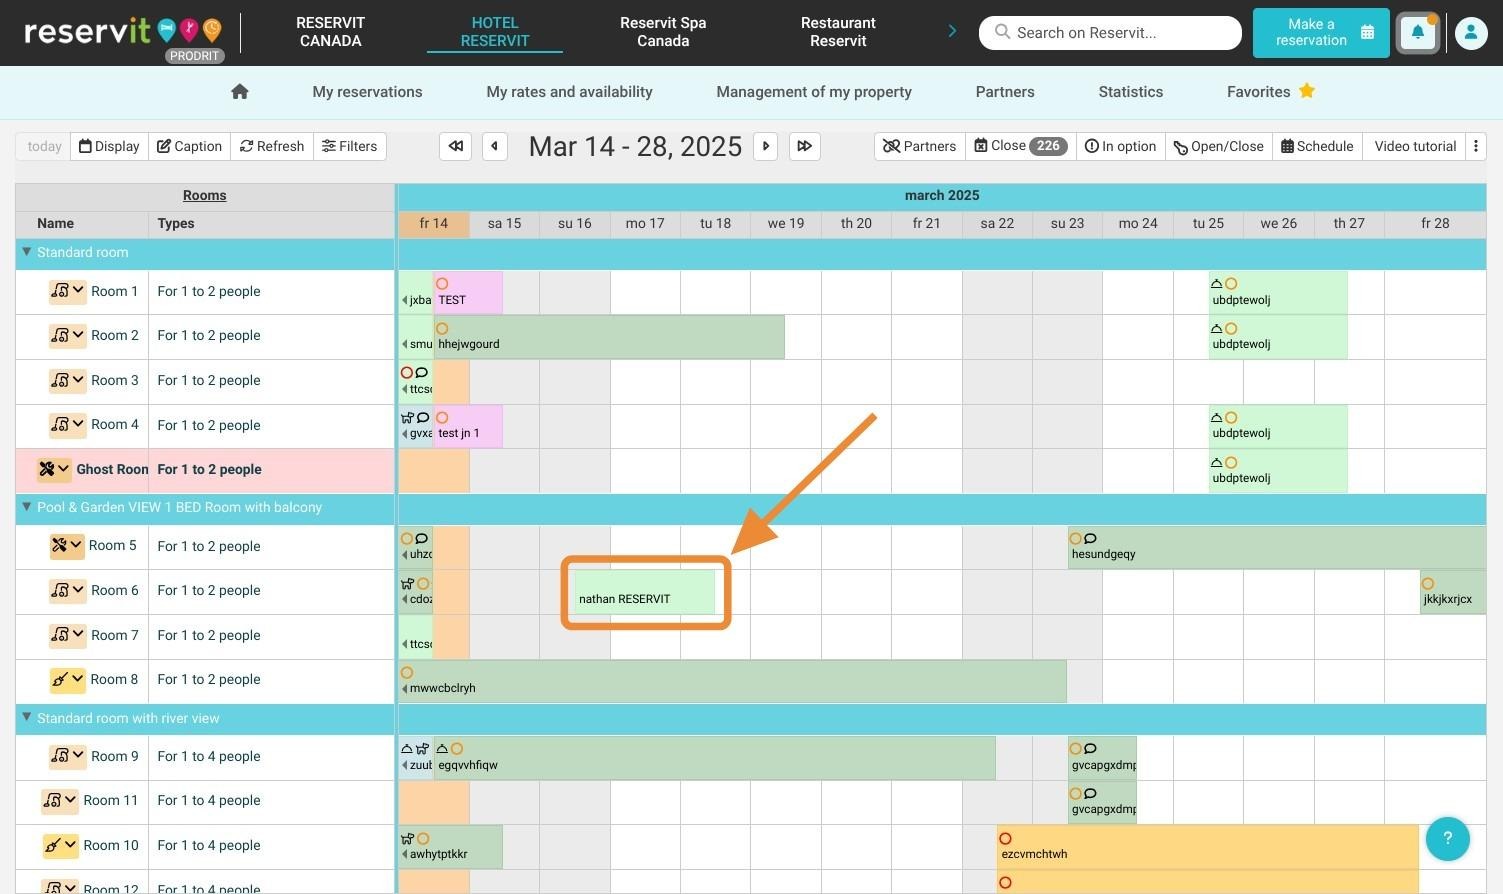
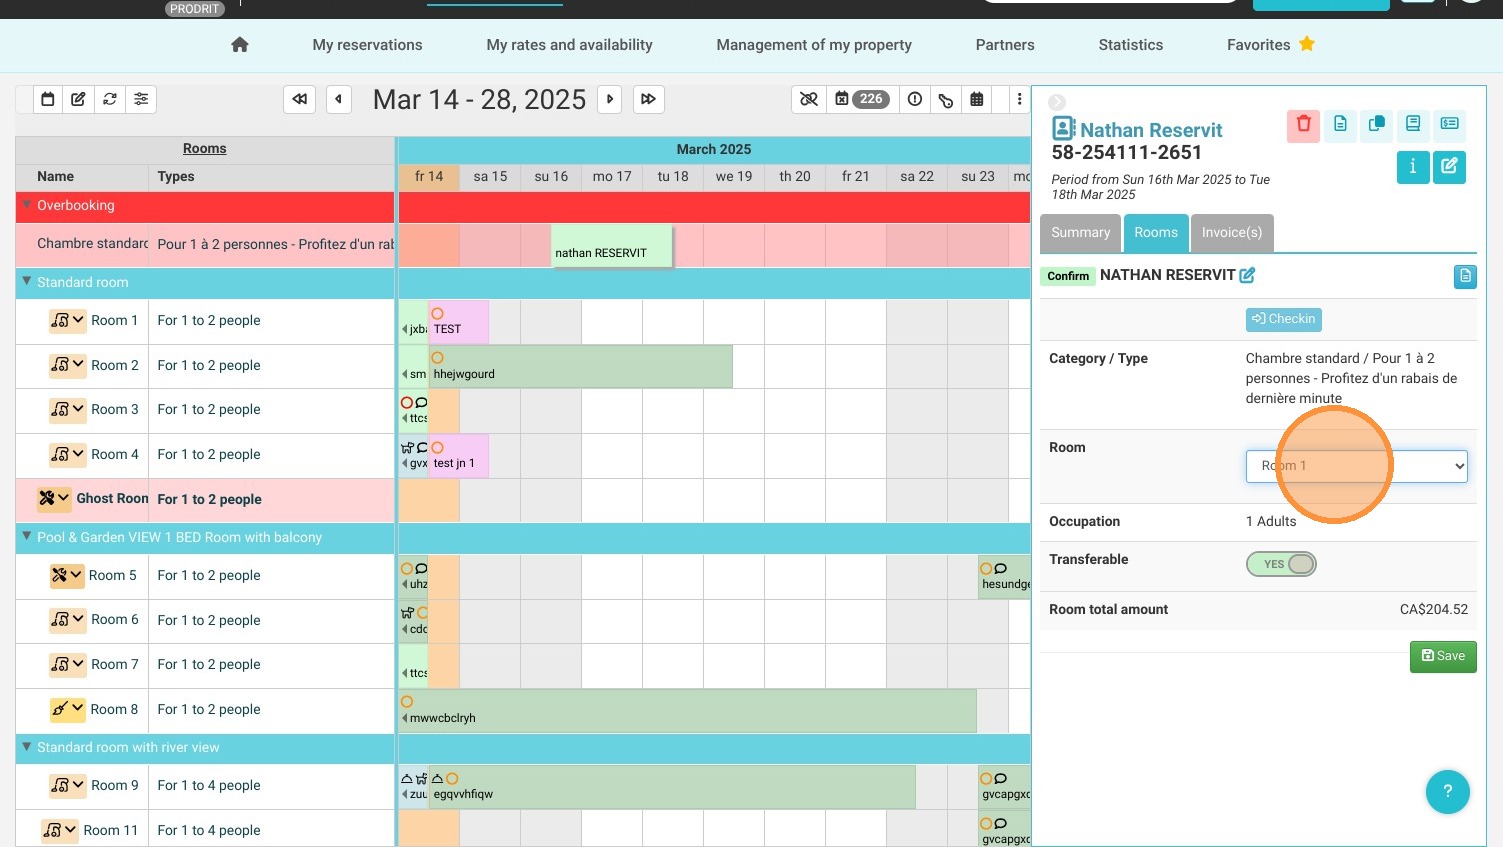
1. Access the reservation calendar or use the search bar to find the reservation you want to upgrade or change the category of.
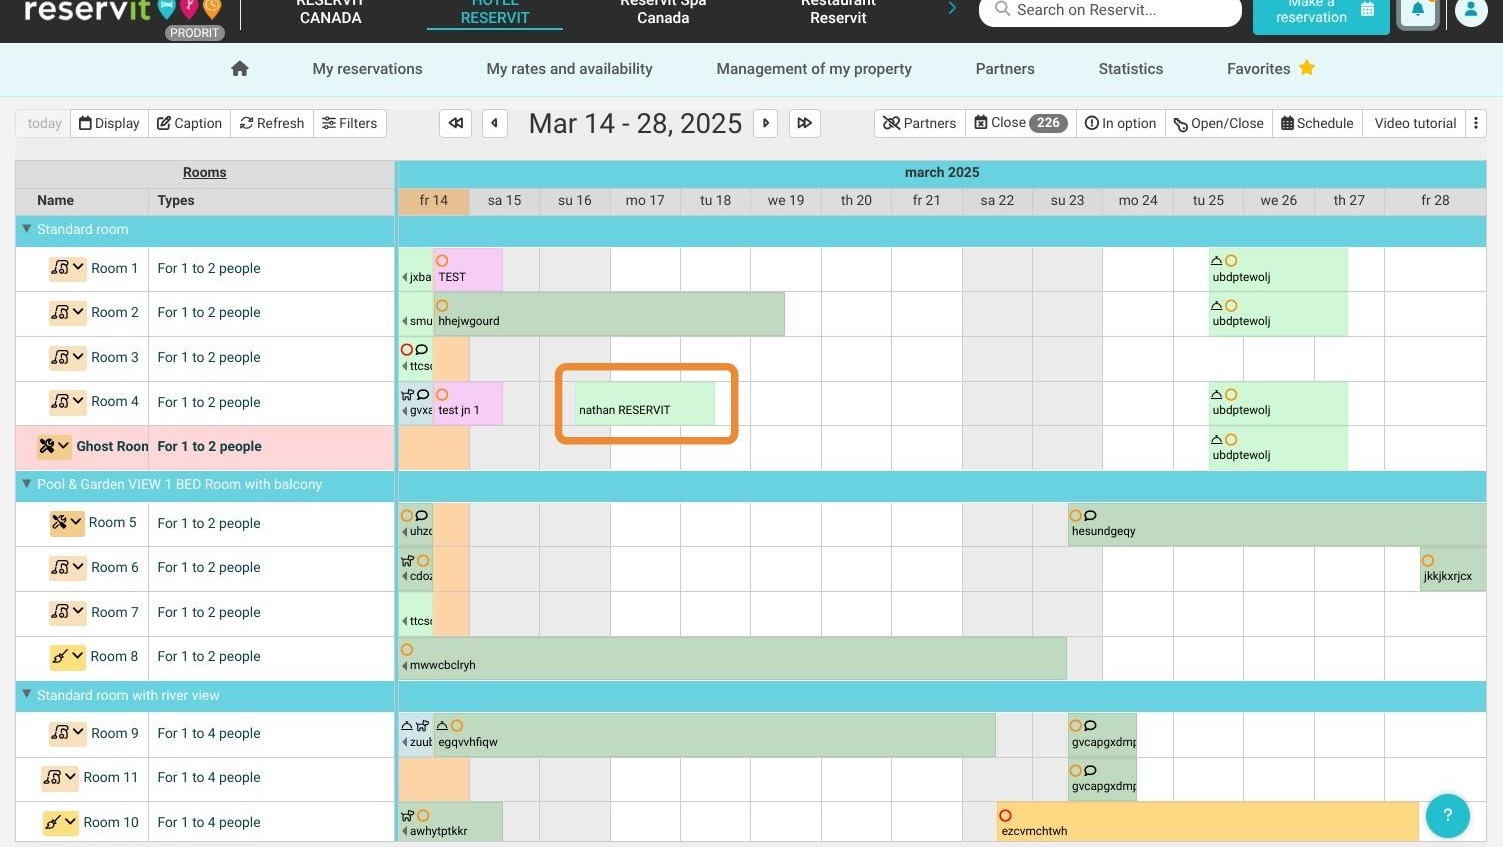
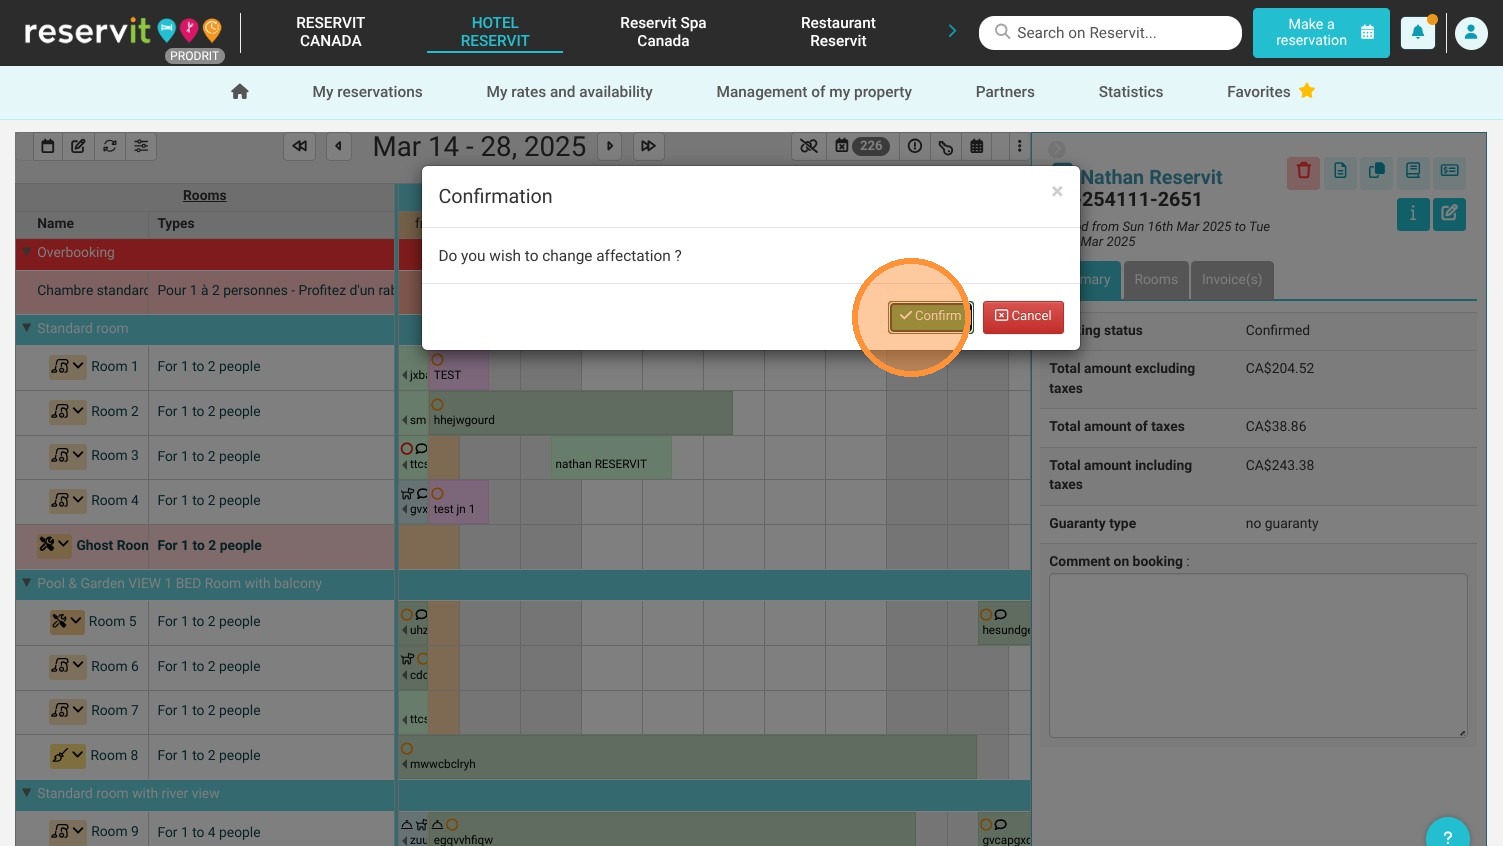
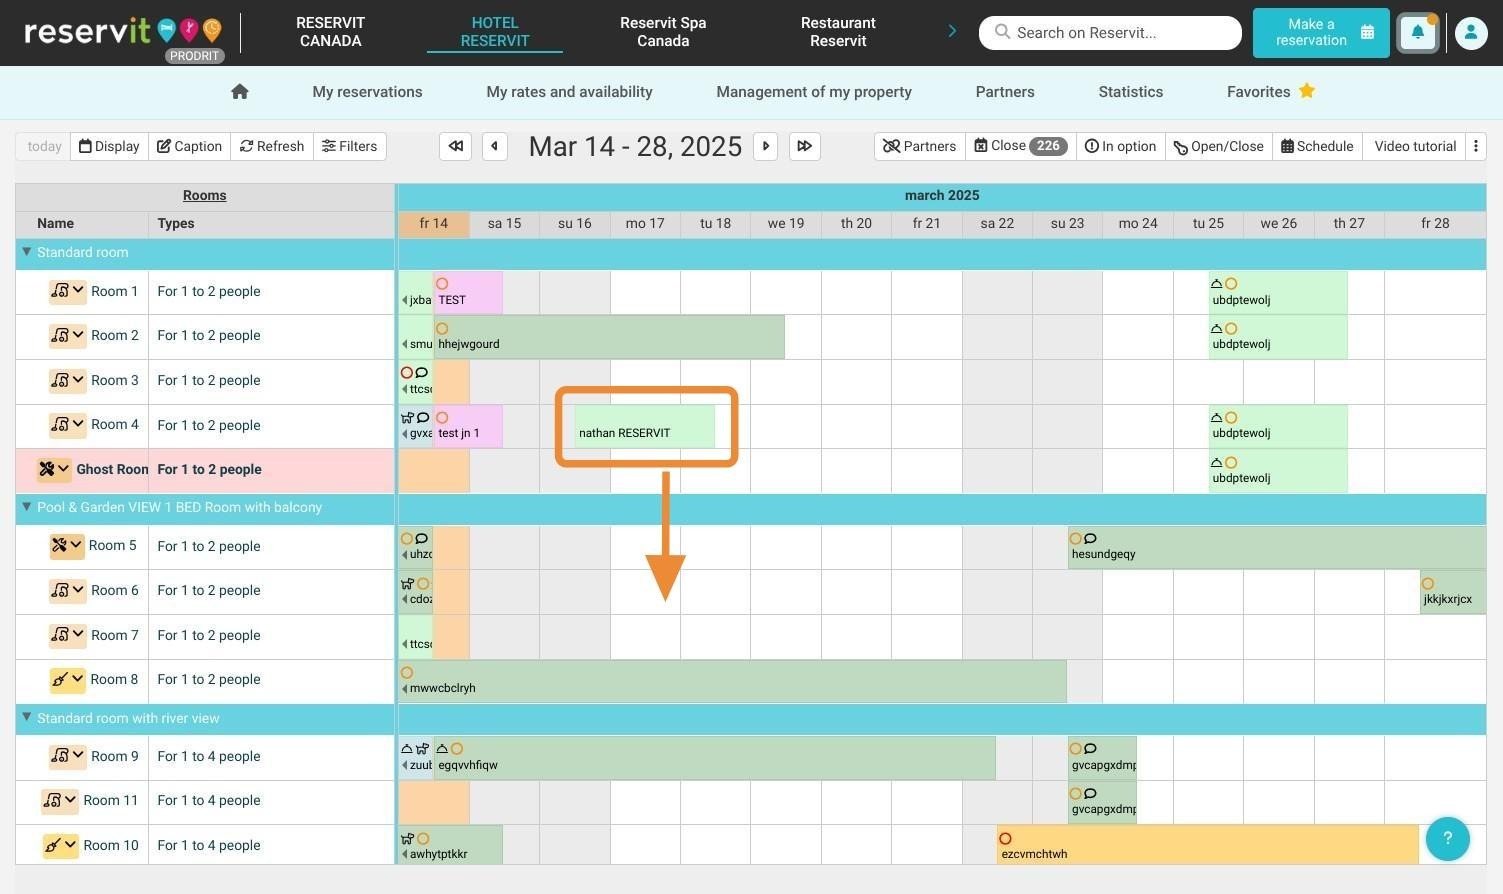
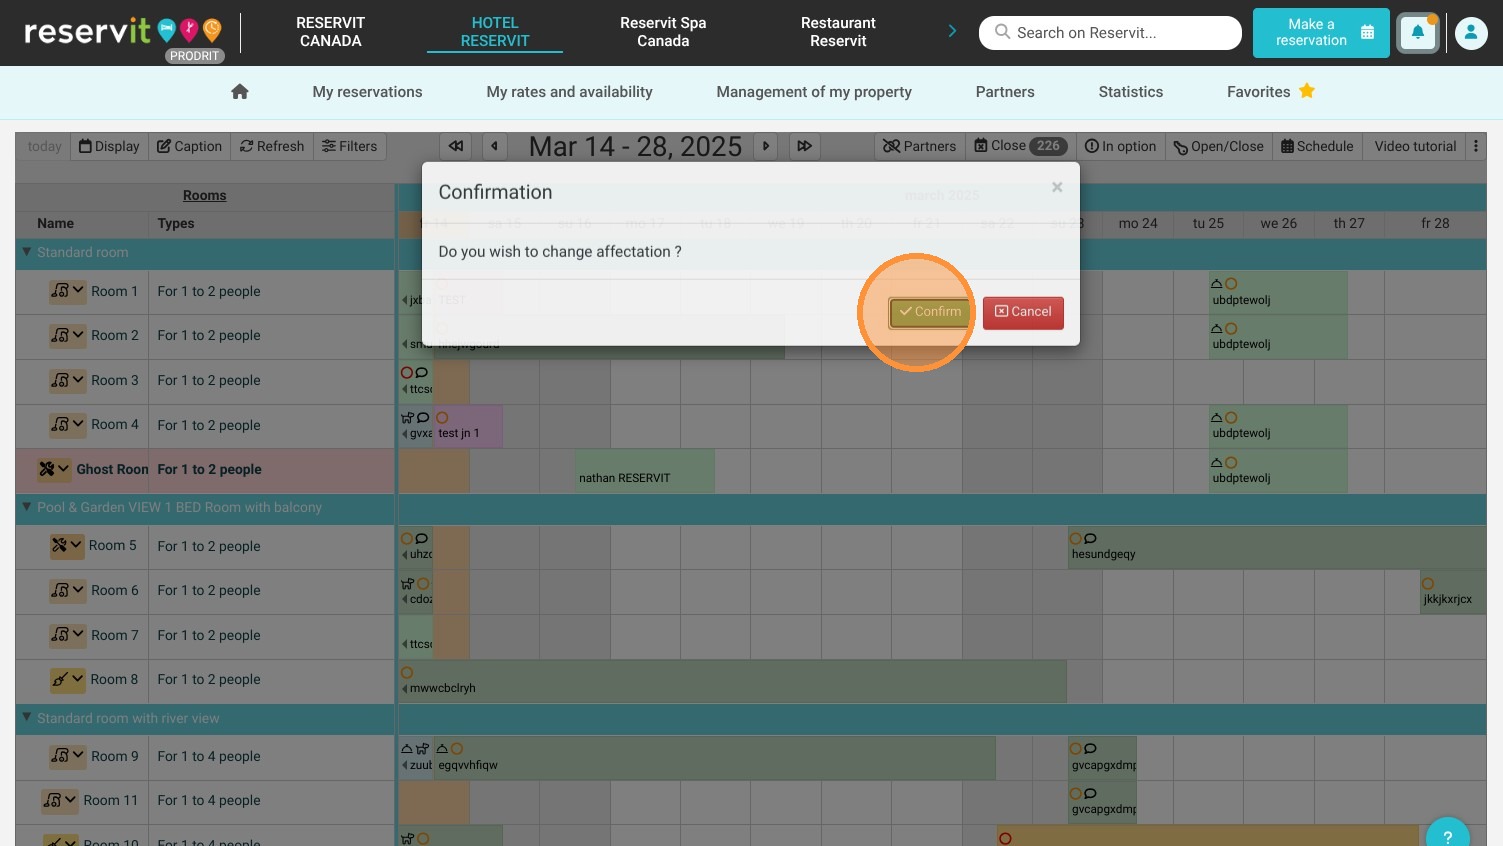
2. Click on the reservation you want to move. Hold down the left mouse button and drag the reservation to the desired room.
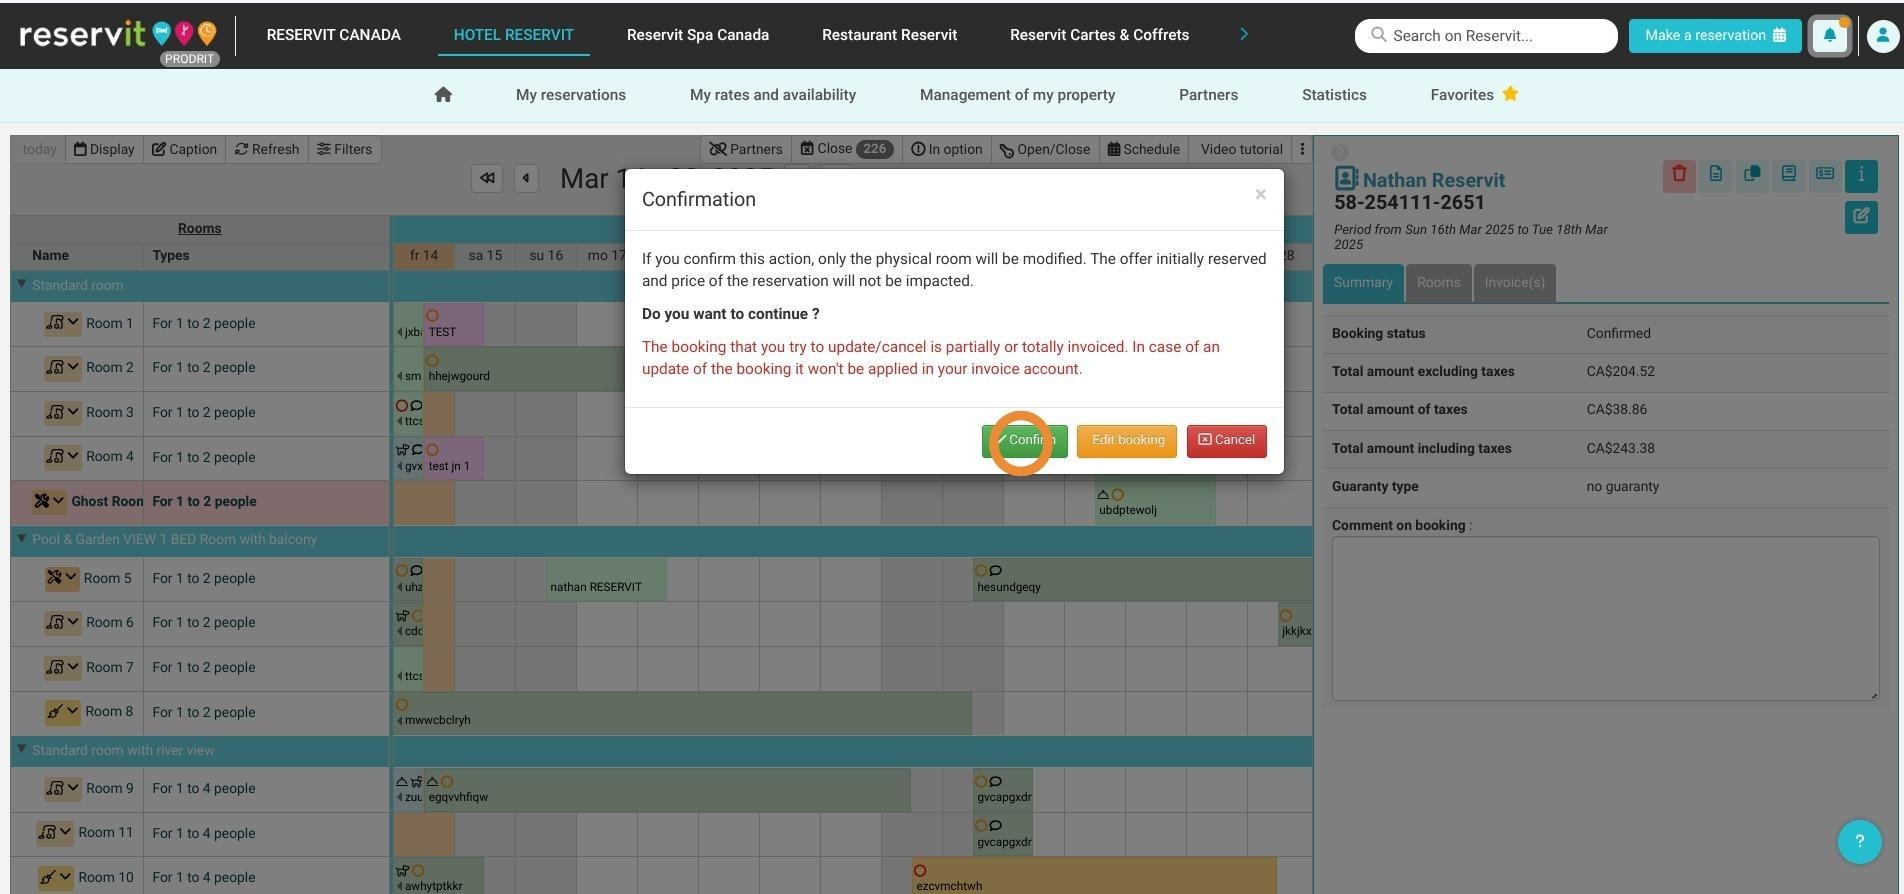
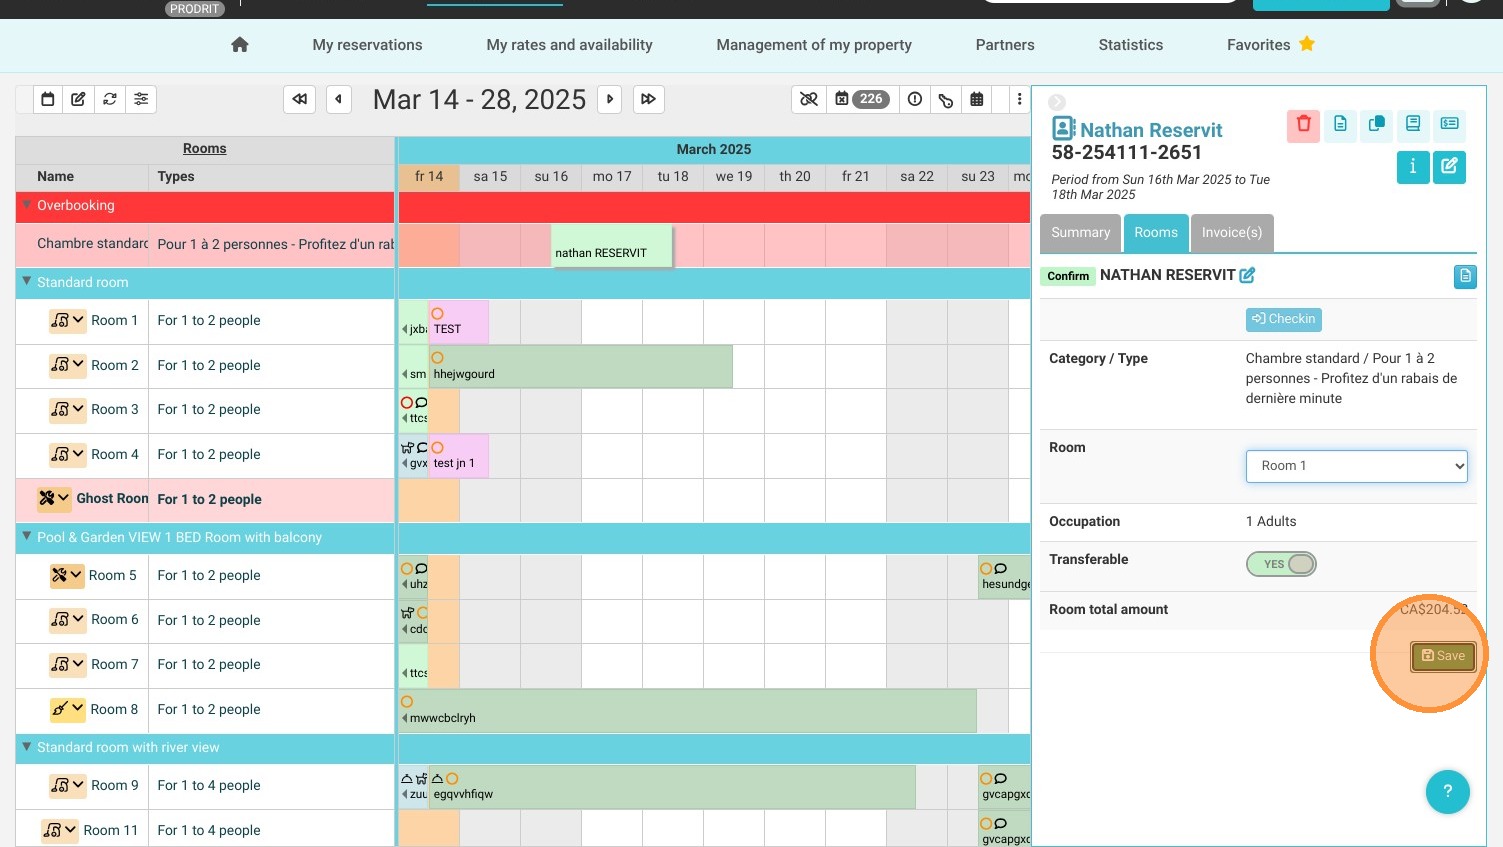
3. Click "Confirm" if you do not wish to change the reservation price.
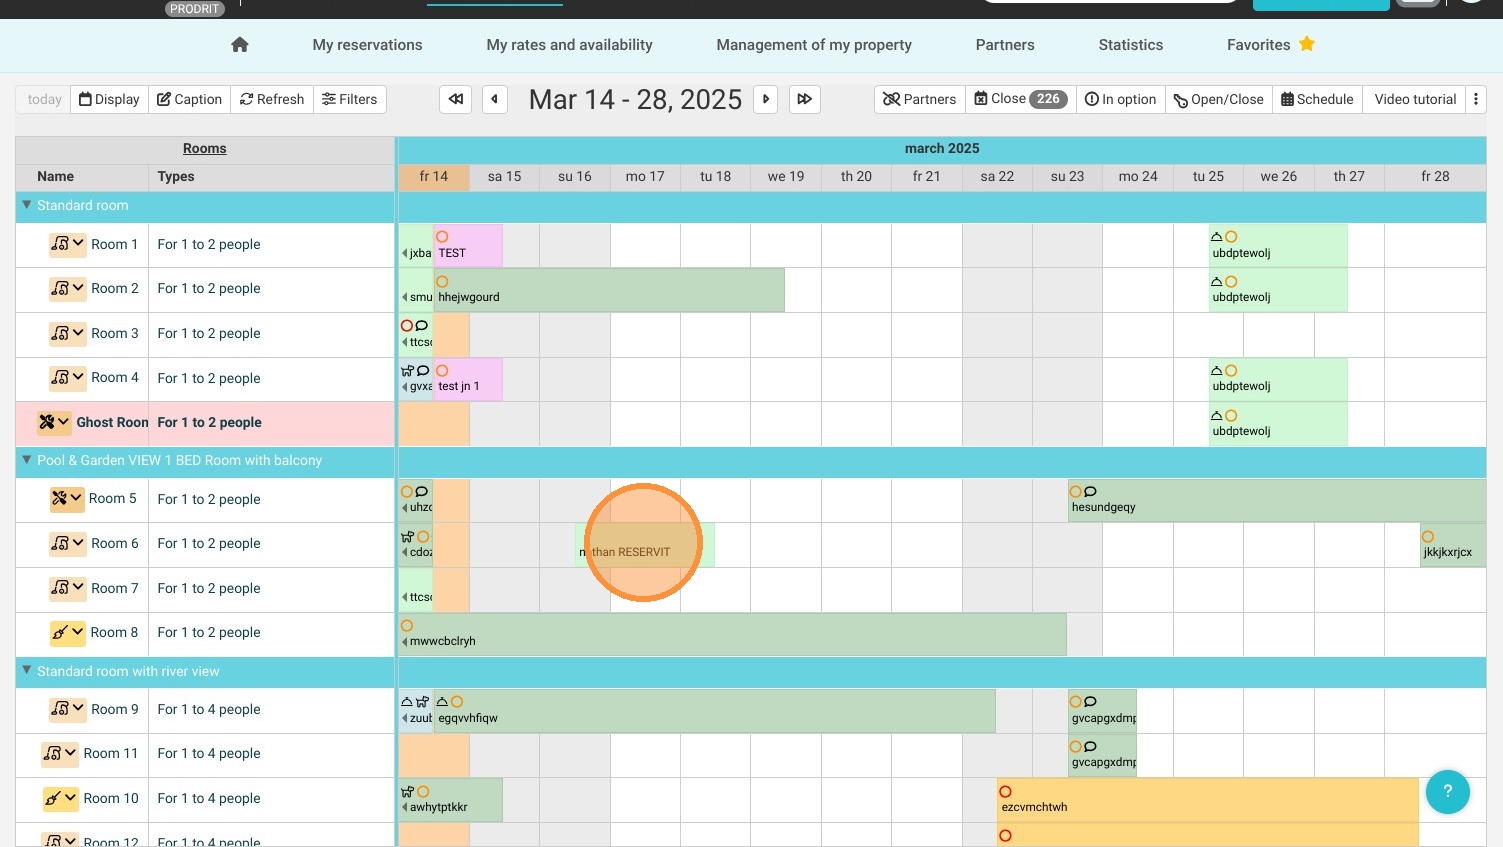
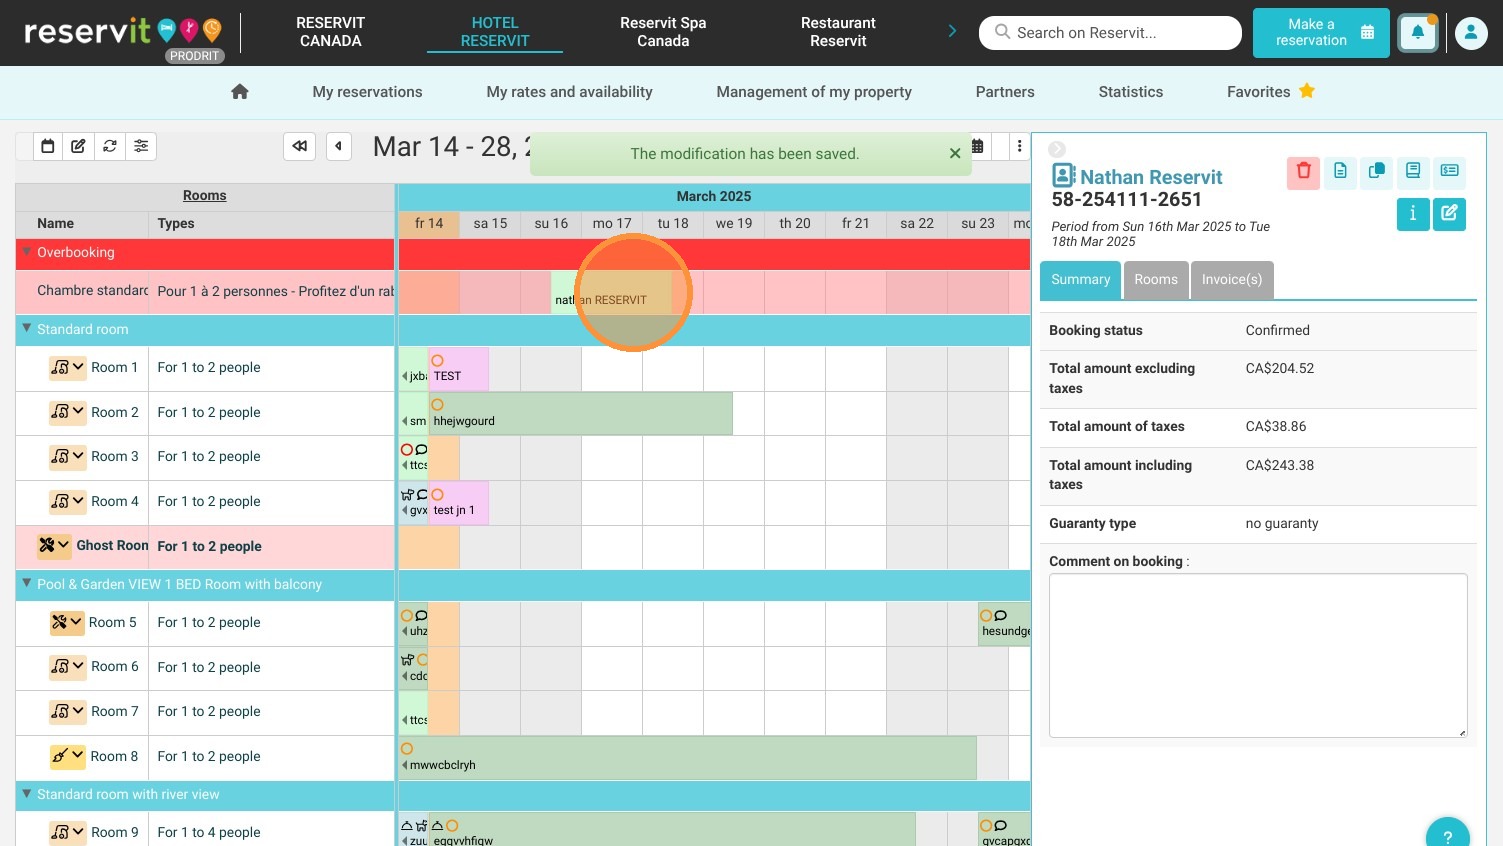
4. The reservation has been successfully moved to its new category.
5. You can do this within the same room category or move the reservation to a different room category. In this case, you will need to confirm the action, or you can choose to manually edit the reservation (by clicking the "Edit Reservation" button) to make additional modifications.
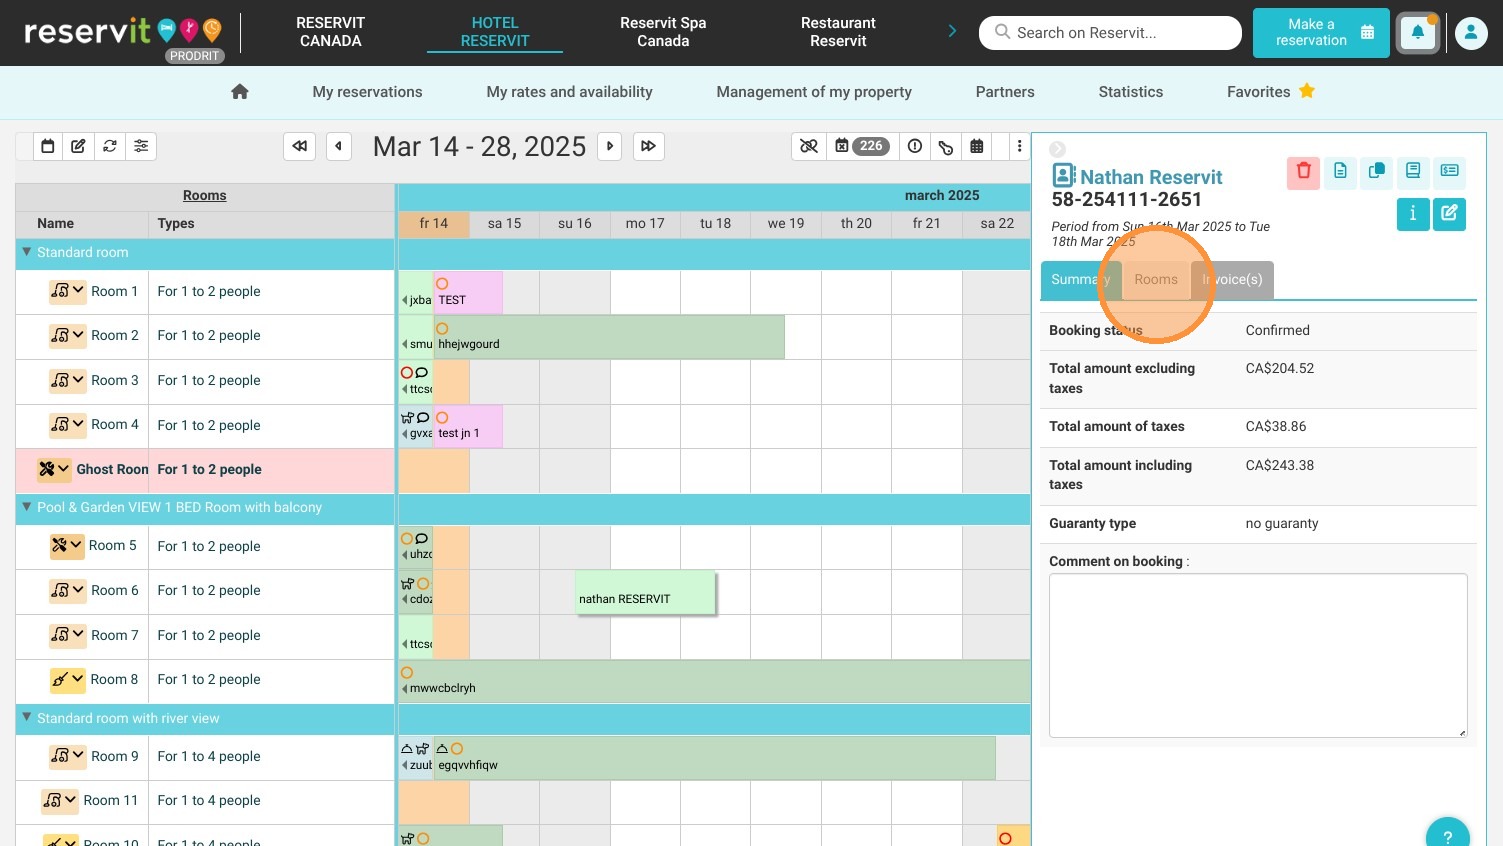
6. It is also possible to unassign a reservation from a room. To do this, click on the reservation.
7. Click "Rooms"
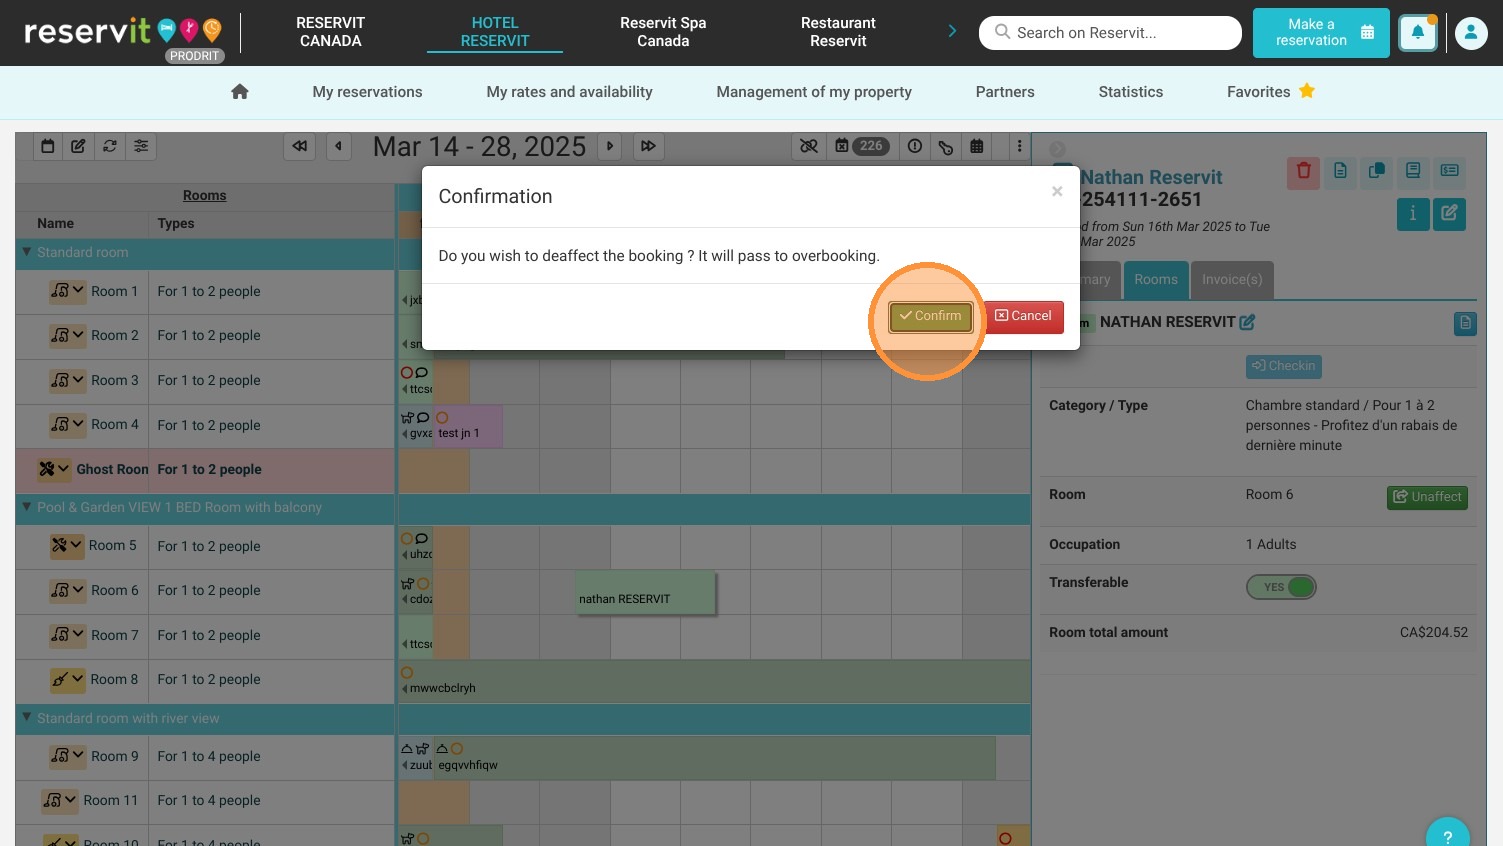
8. Click "Unaffect"
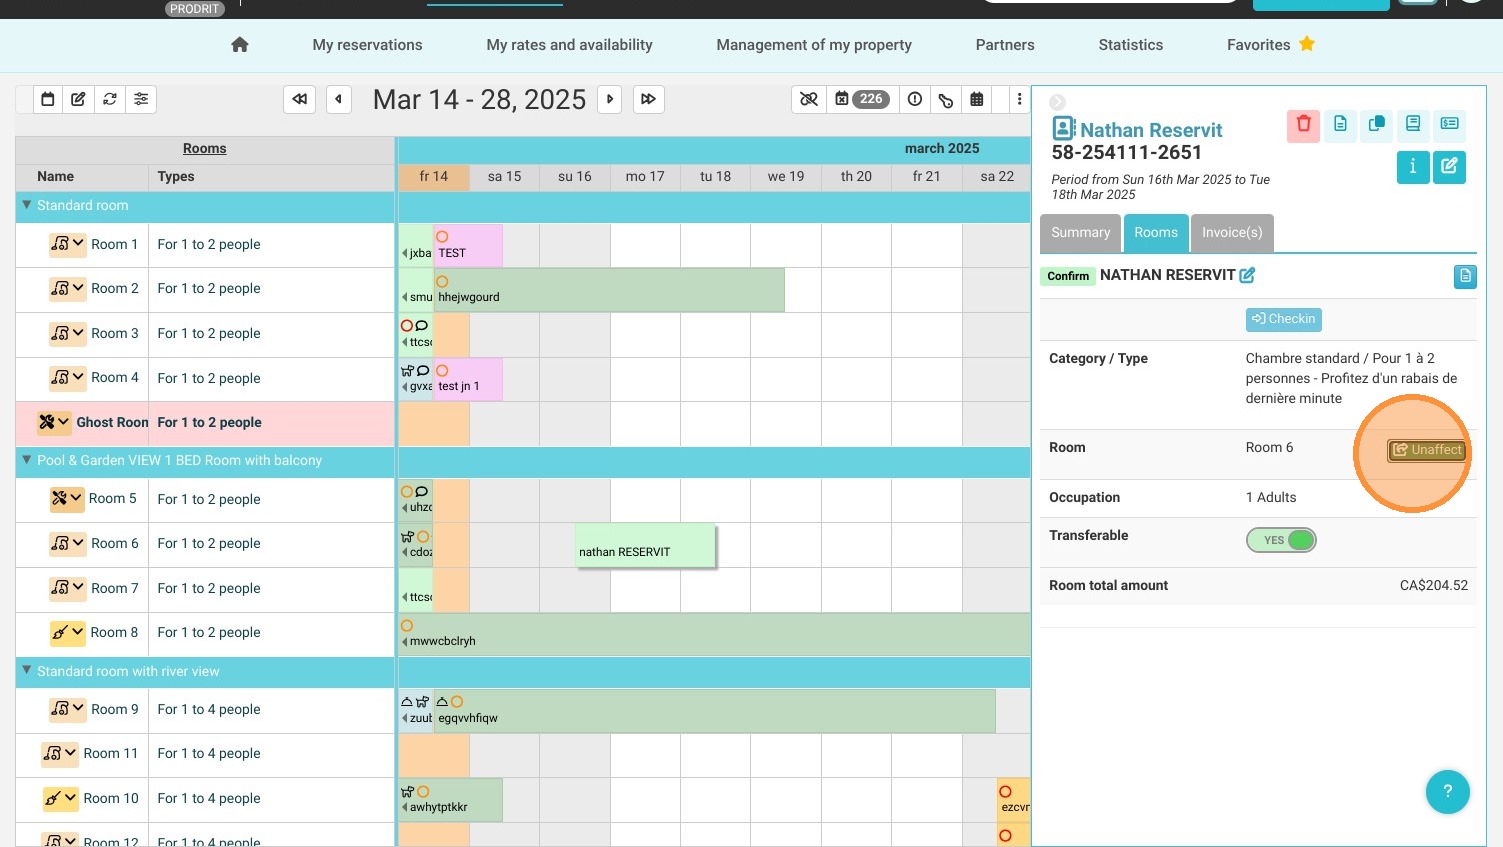
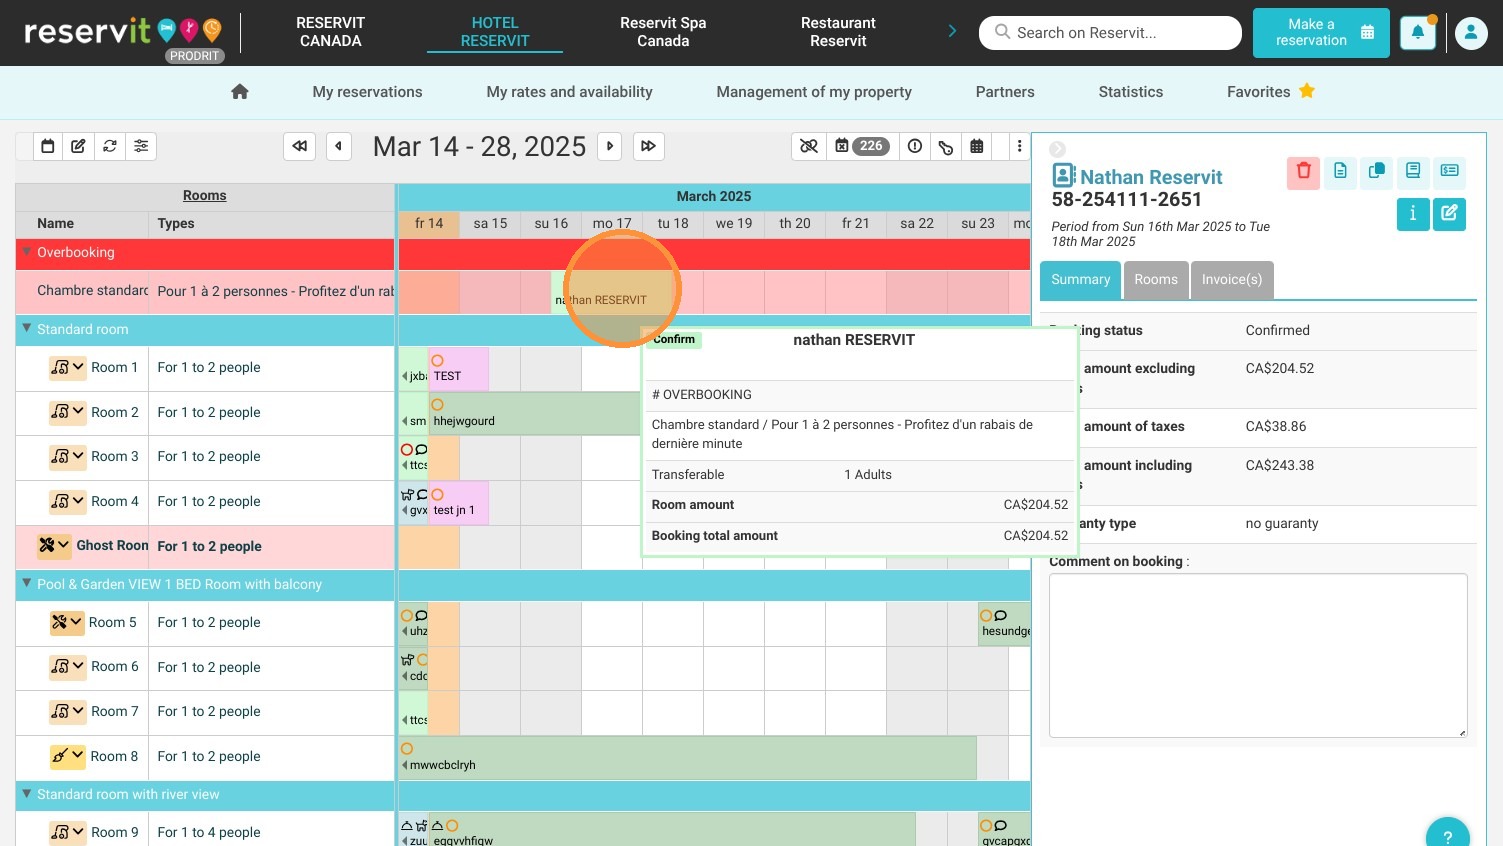
9. The system asks you to confirm the action. The reservation will be placed in a field named "Overbooked," but the associated inventory will NOT be released.
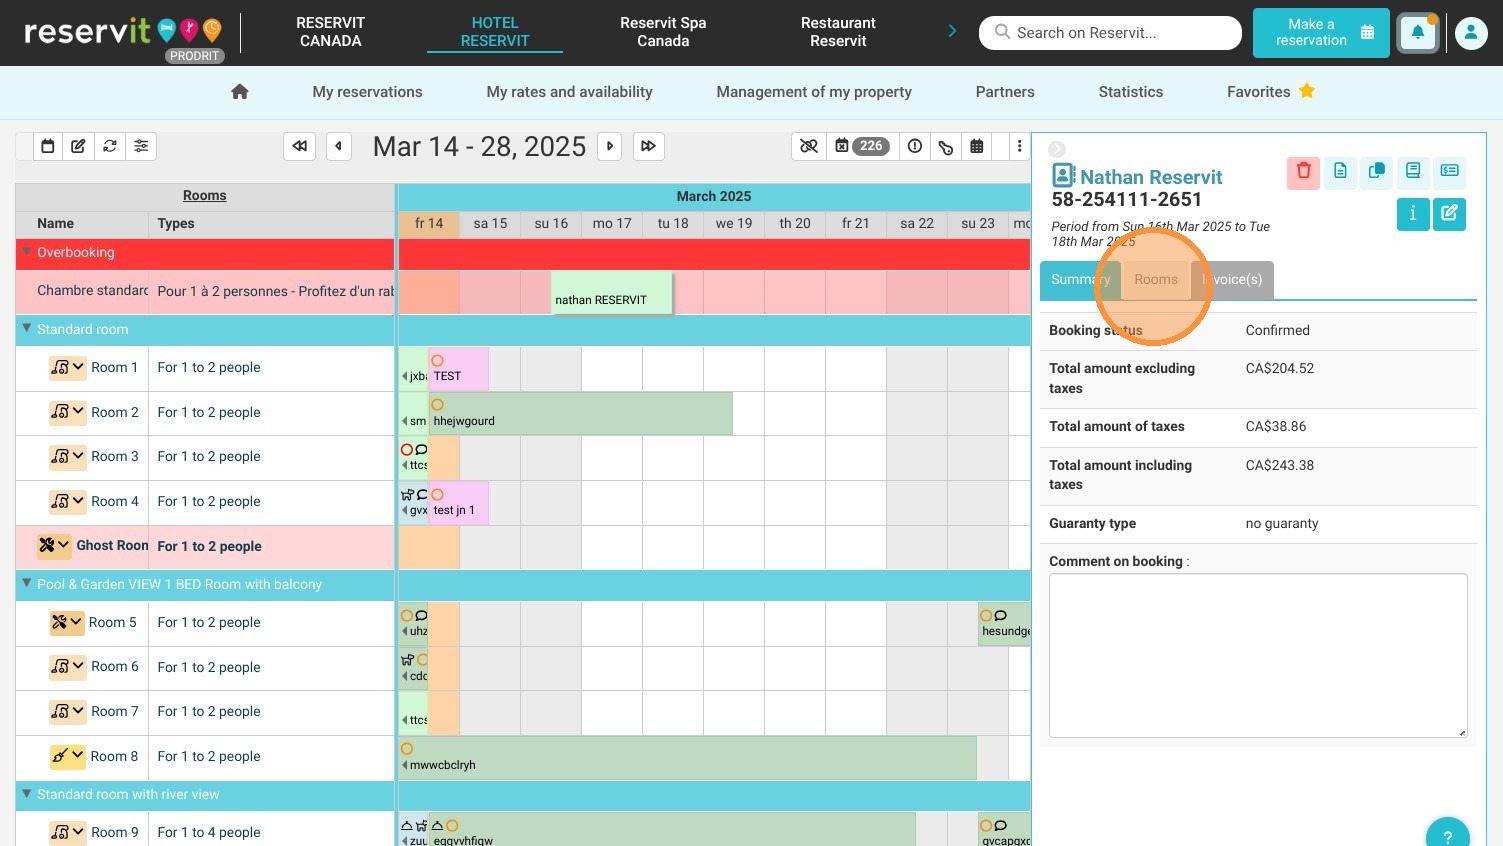
10. You will therefore find the reservation at the top of the screen.
11. Click "Rooms"
12. You will then be able to choose the room to be allocated from the drop-down list.
13. Click ''Save''.
14. Alternatively, click and hold the reservation and drag it to the desired room.
15. The system will ask you to confirm the action.